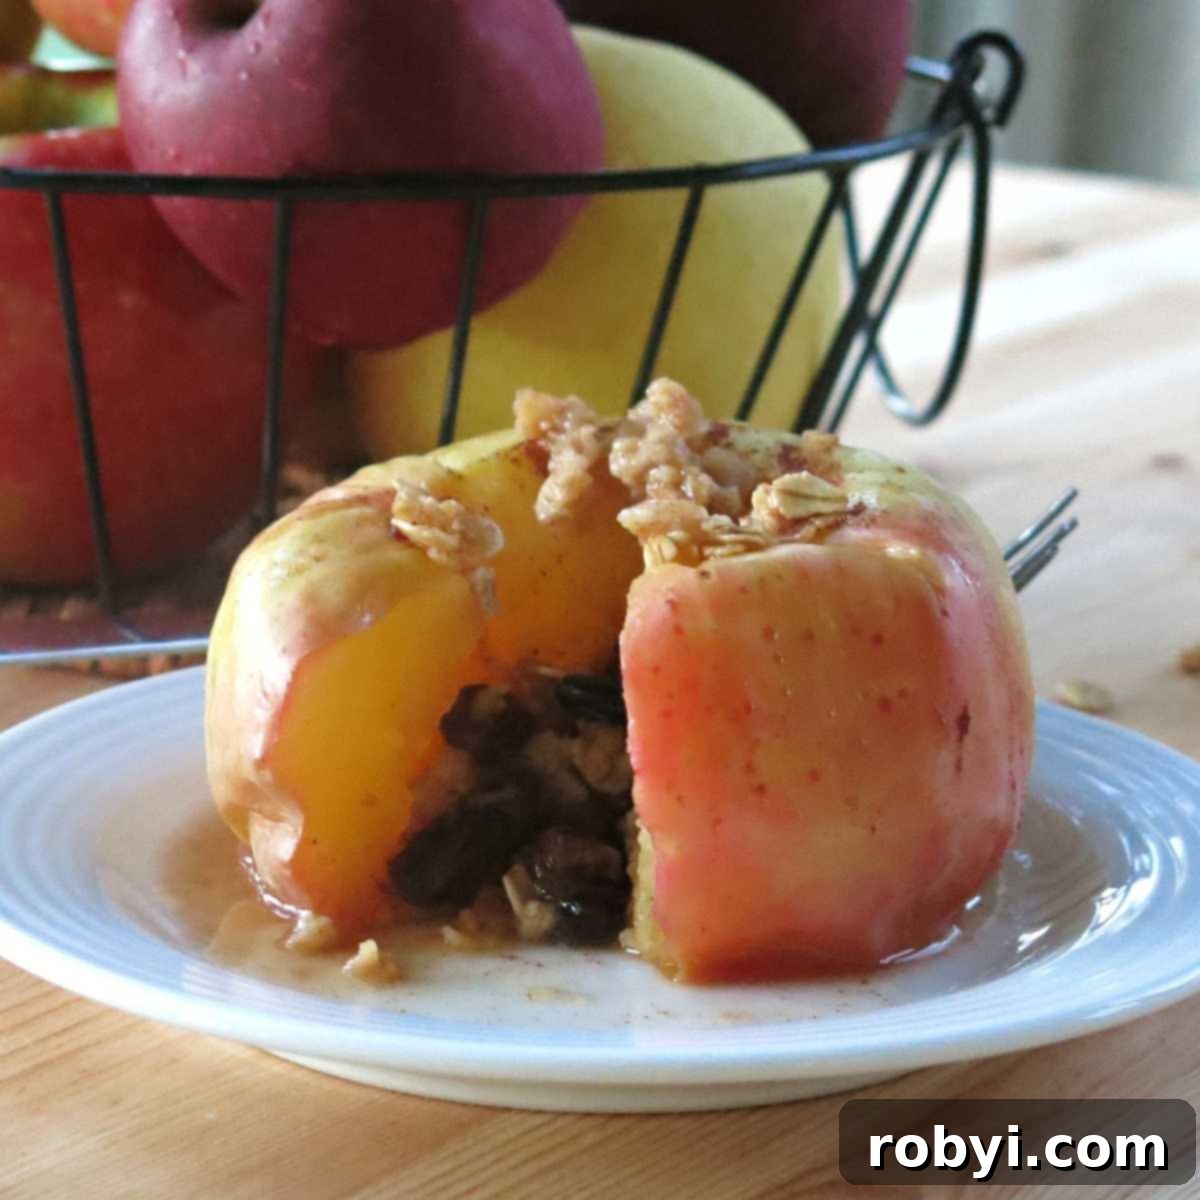
Microwave Baked Apples, lovingly stuffed with your favorite granola or oatmeal, offer an incredibly easy and healthy snack or dessert. Ready in mere minutes, these cozy delights taste just like a slice of comforting apple pie, but without the fuss of a crust!
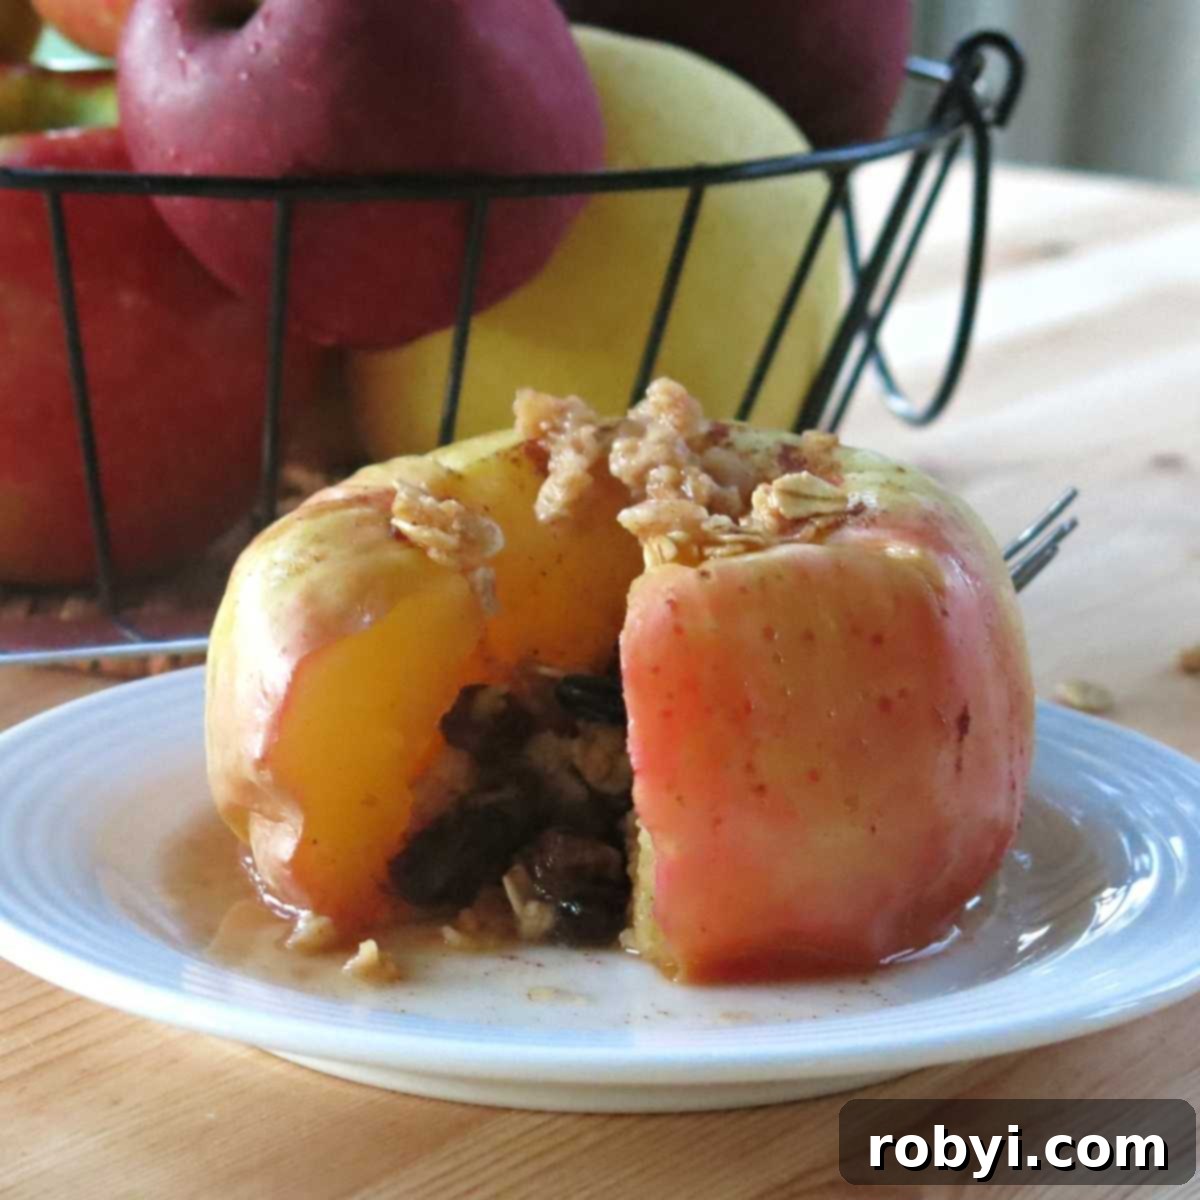
You might recognize this brilliant concept as a long-standing favorite within communities like Weight Watchers, celebrated for its simplicity and satisfying, pie-like taste. Imagine the comforting flavors of apple pie – warm, sweet, and spiced – but crafted in a fraction of the time and with far less effort. That’s precisely what you get with a microwave baked apple!
The process couldn’t be simpler: you core an apple, fill its center with delicious ingredients, and then microwave the entire apple. No need for peeling, slicing, or elaborate preparations. This method seals in the apple’s natural moisture and flavor, resulting in a tender, aromatic treat that feels wonderfully indulgent. I’ve personally enjoyed making these for years, finding them to be a perfect guilt-free splurge whenever a sweet craving hits.
One of the greatest advantages of microwave baked apples is their incredible versatility. Whether you’re aiming for a sugar-free, lower-carb, decadent, or vegan option, this recipe can be easily adapted to suit various dietary needs and taste preferences. Below, we’ll explore a wide array of variations, ensuring there’s a perfect baked apple recipe for everyone. Much like our healthy apple nachos, this is a delightful apple treat you’ll want to revisit again and again, especially as a comforting fall staple or a quick healthy snack any time of year.
Why Choose the Microwave for Baking Apples?
While traditional oven-baked apples are undeniably delicious, the microwave offers a distinct set of advantages that make it the superior choice for a quick, single-serving dessert or snack. Speed is paramount – you can go from raw apple to warm, tender baked delight in under 5 minutes. This makes it ideal for busy mornings, a post-workout treat, or a last-minute dessert when you’re short on time.
Beyond speed, microwave cooking is incredibly energy-efficient, especially when preparing just one or two apples, saving you from heating up a whole oven. It also simplifies cleanup, as you typically only need one microwave-safe bowl. The enclosed environment of the microwave helps to steam the apple, resulting in a wonderfully tender texture while retaining more of the apple’s natural moisture and nutrients. This method consistently delivers a perfectly cooked apple that’s soft on the inside, with a slightly firmer skin that holds its shape beautifully.
Choosing the Best Apples for Baking
The type of apple you select plays a significant role in the final texture and flavor of your microwave baked apple. For optimal results, we generally recommend crisp, sweet varieties that hold their shape well during cooking and offer a delightful balance of sweetness and a hint of tartness.
- Honeycrisp: A top contender, known for its exceptional sweetness, crisp texture, and juicy flesh. It softens beautifully without turning mushy.
- Royal Gala: Sweet and mild, with a fine-grained flesh that becomes tender and flavorful when cooked.
- Fuji: Offers a firm, crisp texture and a sweet, subtly tart flavor that holds up wonderfully to heat.
- Pink Lady®: Known for its distinctive sweet-tart flavor and firm flesh, making it an excellent choice for baking.
- Ambrosia: A naturally sweet, low-acid apple with a delicate aroma and crisp texture, perfect for a tender baked outcome.
If you have a preference for a more tart flavor, classic baking apples like Granny Smith can also be used. They will soften considerably, and their tartness provides a wonderful contrast to sweeter fillings. Feel free to experiment with your favorite apple varieties to discover your perfect baked apple experience!
Ingredients and Creative Variations for Your Stuffed Apples
The beauty of this recipe lies in its adaptability. Here’s a deeper look at the core ingredients and how you can personalize them to create your ultimate baked apple:
- Crisp, Sweet Apples: As mentioned, Honeycrisp, Royal Gala, Fuji, Pink Lady®, or Ambrosia are ideal. If you lean towards tartness, Granny Smith is a fantastic choice, especially when paired with sweet fillings.
- Warming Spices: A generous dash of cinnamon is classic, imparting that signature apple pie aroma and flavor. For more complexity, consider apple pie spice or pumpkin pie spice, which often include nutmeg, allspice, and ginger, adding layers of autumnal warmth. A pinch of ground cardamom can also be a delightful addition.
- Delicious Stuffings:
- Granola or Oatmeal: These are excellent for providing texture and a wholesome base. Choose your favorite granola for added crunch and flavor, or use rolled oats for a softer, chewier filling.
- Dried or Fresh Fruit: Get creative with additions like raisins, cranberries, chopped dates, blueberries, raspberries, or even small pieces of pear. These add natural sweetness and a burst of flavor.
- Finely Chopped Nuts: Almonds, walnuts, pecans, or pistachios add a satisfying crunch and healthy fats. Toast them lightly beforehand for enhanced flavor.
- Seeds: Chia seeds or flax seeds can boost nutrition and add a slight textural element.
- For a Decadent Treat: Fill the cavity with soft caramel candy cubes, a spoonful of nut butter (peanut, almond, or cashew), chocolate chips, or even a dollop of cream cheese mixed with a touch of sweetener.
- Sweeteners: To enhance the apple’s natural sweetness, choose from:
- Honey or Maple Syrup: Natural liquid sweeteners that add rich flavor.
- Agave Nectar: A vegan-friendly option with a neutral taste.
- Brown Sugar: Adds a classic caramel-like depth.
- Sugar-Free Alternatives: For a low-carb or sugar-free version, use Stevia, Allulose, or Monkfruit sweeteners.
- Optional Richness: Many enjoy adding a small pat of butter or a teaspoon of coconut oil to the center of their apples before microwaving. This creates a richer, more luxurious filling as it melts and mingles with the other ingredients.
Remember, this recipe is highly customizable. Adjust the quantities of any ingredient based on your preferences, the size of your apple, and any specific dietary requirements you may have. The possibilities are truly endless!
How to Make Baked Apples in the Microwave: A Simple Step-by-Step Guide
Crafting a single, perfect microwave baked apple is incredibly straightforward. Here’s how to do it, with helpful tips along the way. (Instructions for scaling the recipe for multiple apples are provided further down.)
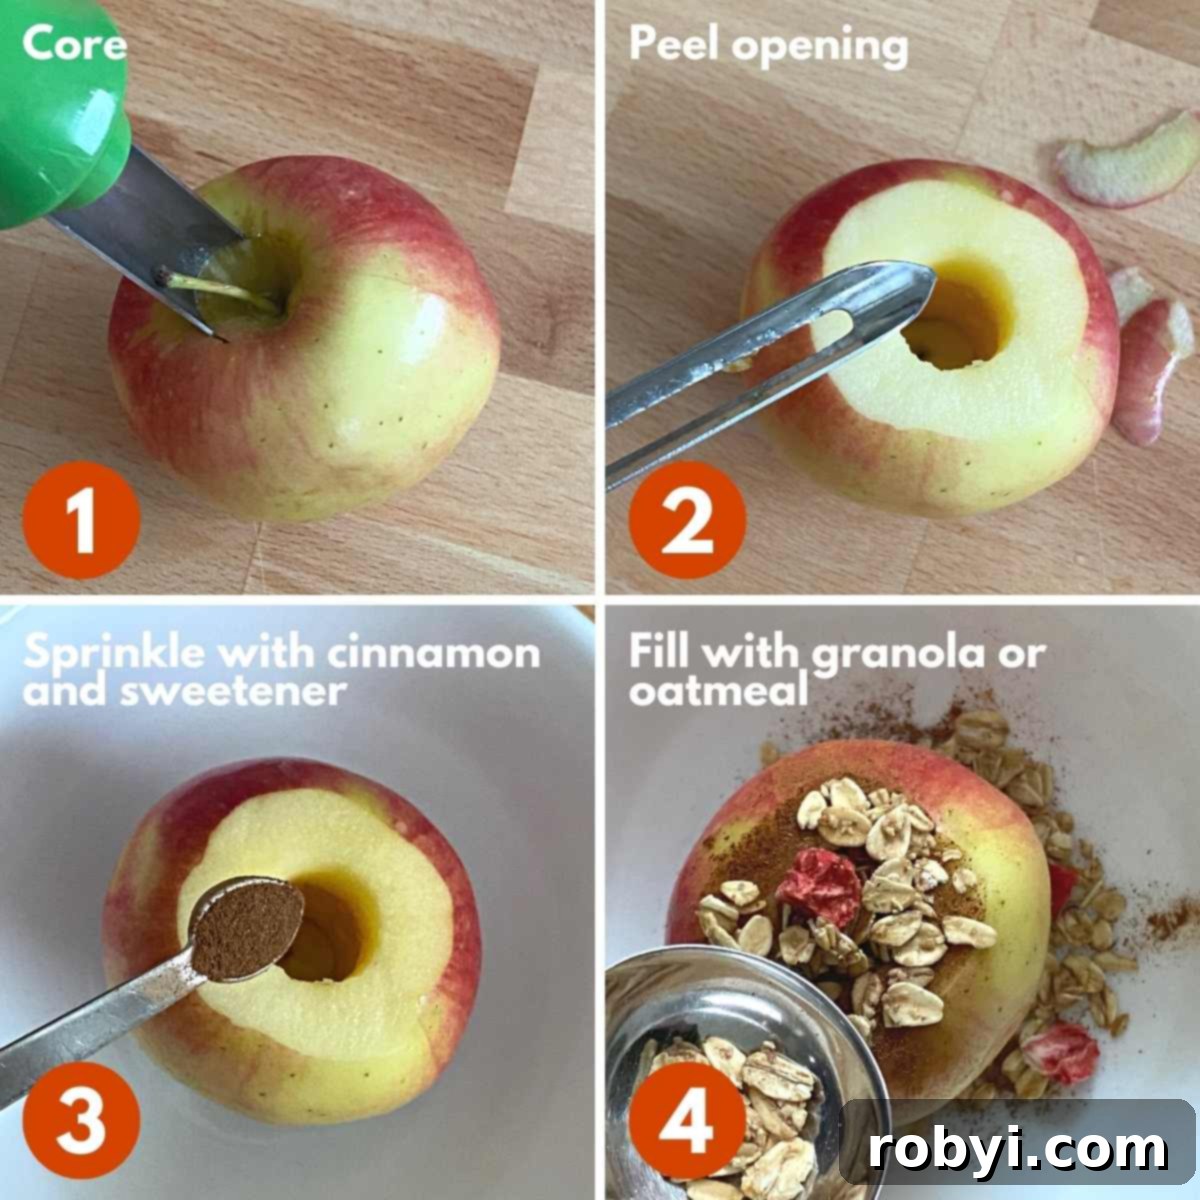
- Core the Apple: Carefully remove the core from the apple. Ideally, aim to leave the bottom of the apple intact. This creates a natural “cup” that prevents your delicious stuffing from oozing out during cooking. If you accidentally cut all the way through, don’t worry! Simply chop off the very bottom of the core and use it as a “plug” to seal the hole.
- Important Note: There is absolutely no need to peel the apple! The skin not only adds nutrients and fiber but also helps the apple maintain its shape and provides a lovely texture contrast.
- Helpful Tool: An apple corer is a game-changer for this recipe. It’s an inexpensive kitchen gadget that makes coring quick and clean, and it’s also handy for other apple-based recipes like crock-pot apple butter with no added sugar. If you don’t have one, a small paring knife can be used to carefully cut out the core, and a melon baller scoop can assist in removing any remaining seeds or tough core bits.
- Optional Tip: If you plan to load your apple with a generous amount of filling, you can carefully widen the cavity opening slightly using your paring knife.
- Score the Skin (Optional, but Recommended): This step helps prevent the skin from bursting during cooking and allows the apple to absorb flavors more evenly. Using a paring knife, make a shallow cut around the circumference of the apple, about halfway down. Alternatively, you can remove a small section of apple skin from around the cavity’s opening, as the original recipe suggests. This ensures the top portion of the apple cooks more evenly and allows the spices to penetrate deeper.
- Season the Cavity: Sprinkle the inside of the hollowed-out apple and the peeled/scored apple flesh with your chosen cinnamon (or other spices) and sweetener. This infuses the apple with flavor from the inside out.
- Fill with Goodies: Generously spoon your granola, oatmeal, or other desired ingredients into the apple cavity. Pack it gently but firmly.
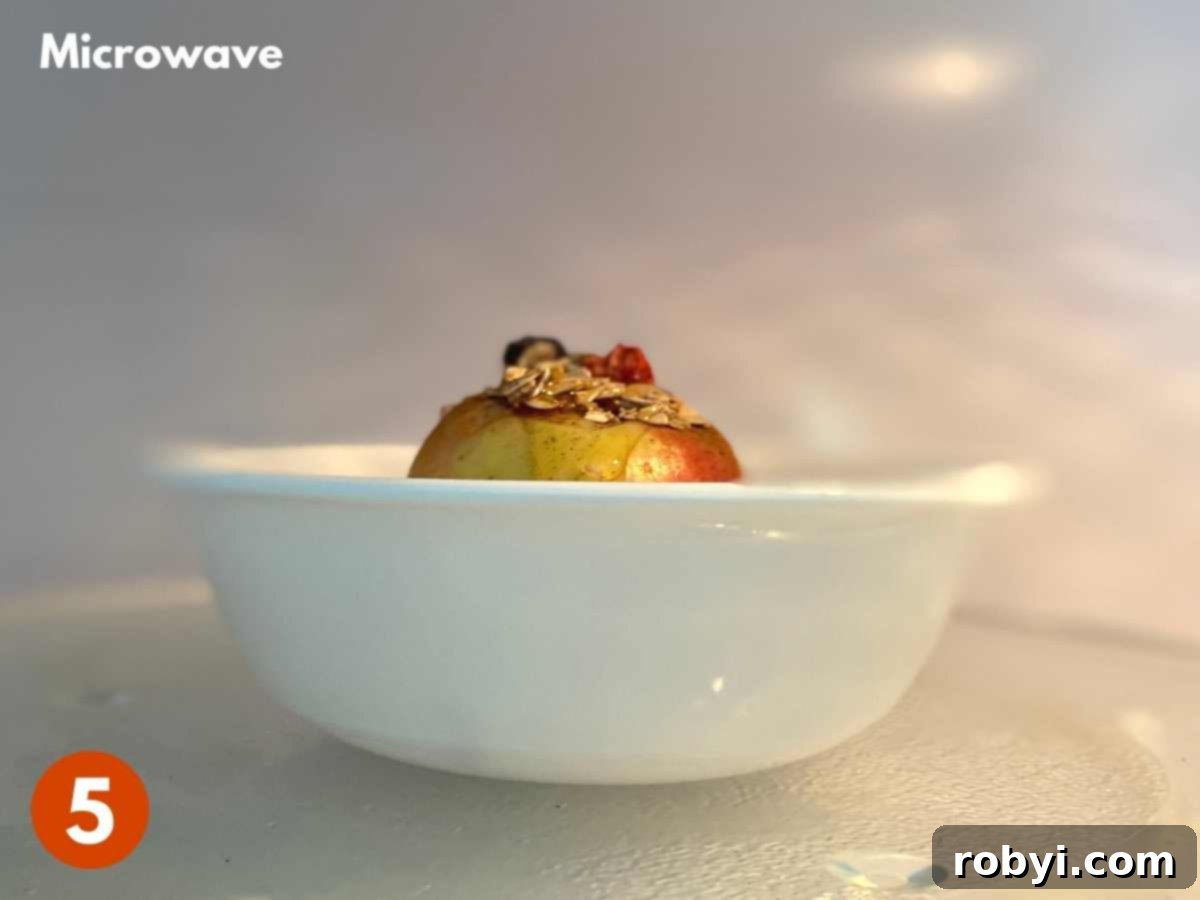
- Microwave with Care: Place the stuffed apple in a microwave-safe bowl.
- If your apple is filled predominantly with dry ingredients (like granola and nuts), you typically don’t need to cover it. Juices will naturally flow to the bottom of the bowl, creating a delicious syrupy base.
- However, if your filling includes juicy fruits (like blueberries) or melts easily (like caramel or chocolate chips), it’s best to cover the bowl loosely with a microwave-safe cover or a paper towel. This prevents potential splatters and ensures an easier cleanup.
- Crucial Warning: Do NOT cover the bowl with plastic wrap. Plastic wrap can melt and leech chemicals into your food when heated in the microwave. Always use a microwave-safe cover or a paper towel.
How to Tell When Your Microwave Baked Apple is Perfectly Done
The average cooking time for a medium-sized apple in the microwave is approximately 3 minutes. However, this can vary based on several factors:
- Apple Size: Larger apples will naturally require more cooking time.
- Microwave Wattage: Higher wattage microwaves cook faster. If you have a lower wattage microwave, you may need an extra minute or two.
- Apple Variety: Some apple varieties soften more quickly than others.
To ensure perfect doneness without overcooking, it’s best to start with the estimated time and then cook in short, one-minute bursts. Check frequently after the initial cooking period. Your microwave baked apple is done when you can easily insert a fork into its skin and flesh with little resistance. The center filling might also start to bubble, indicating it’s thoroughly heated through.
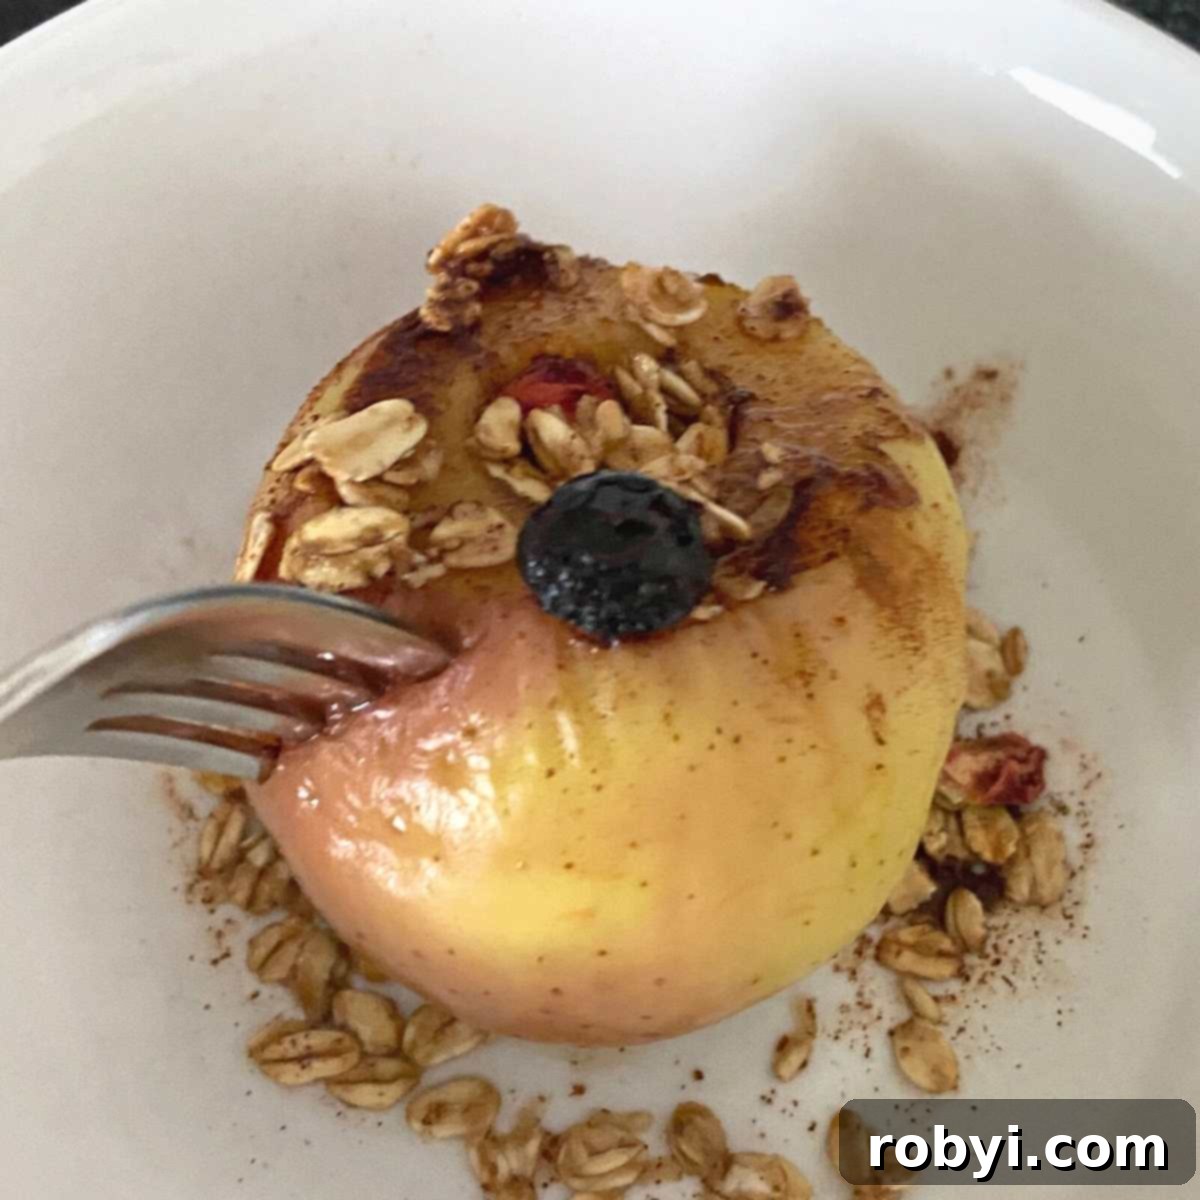
Once cooked, allow the apple to cool for several minutes before enjoying it. It will be extremely hot right out of the microwave!
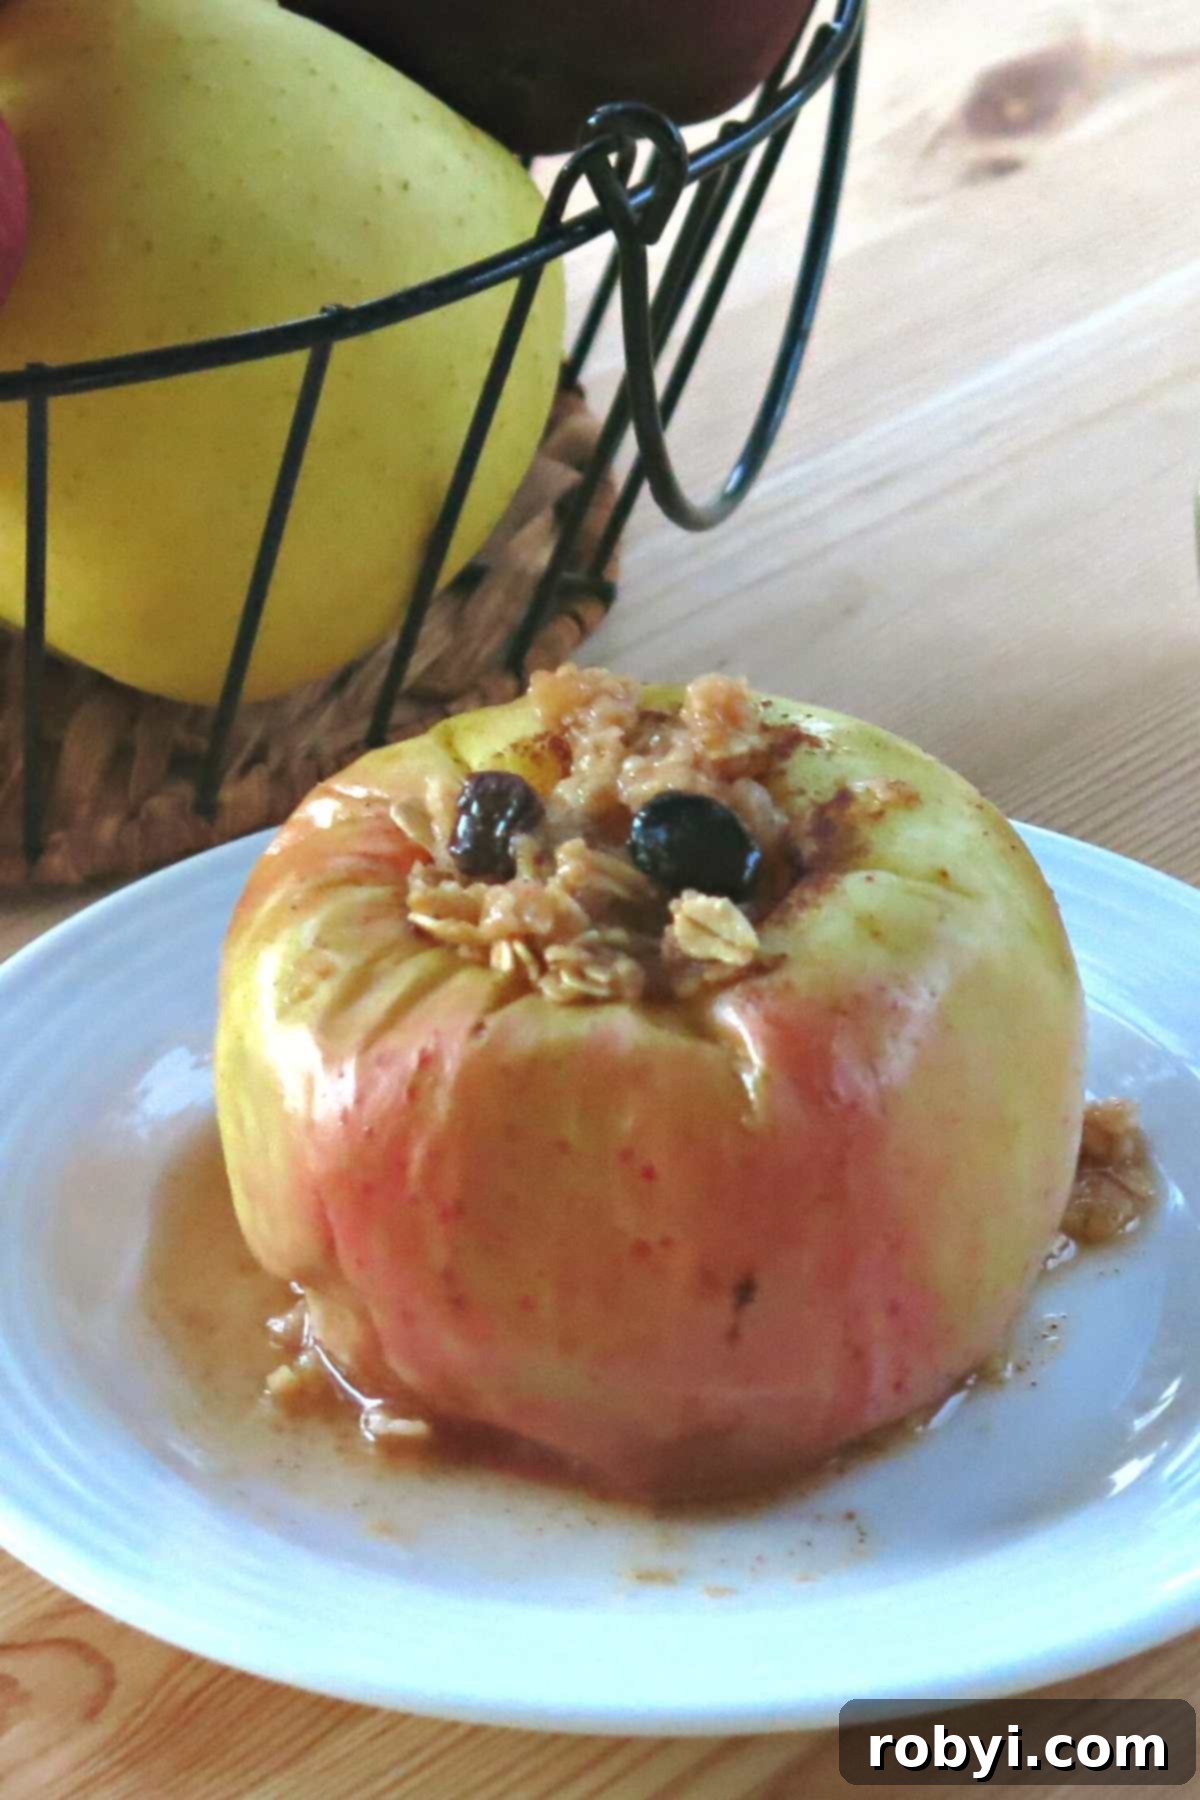
Scaling the Recipe: Cooking Multiple Microwave Baked Apples
Want to make a batch for the family or for meal prep? It’s simple to scale this recipe! Prepare each individual apple following the same steps as for a single serving. Once cored, seasoned, and stuffed, place all the apples in a large, microwave-safe casserole dish that can be covered.
For cooking multiple apples, add approximately one minute to the initial cooking time for each additional apple. For example, if cooking two apples, start with 4-5 minutes. After this initial period, continue cooking in short, 1-minute bursts, checking the apples frequently for doneness. They are ready when the skin is fork-tender and the filling in the center begins to bubble gently. This method ensures even cooking and prevents any single apple from becoming overcooked.
Serving Suggestions: Elevate Your Baked Apple Experience
While a microwave baked apple is delightful on its own, a few simple additions can transform it into an elegant dessert or a more substantial snack.
- Classic Toppings: Top with a generous swirl of whipped cream (dairy or coconut-based for vegan options) or a dollop of vanilla ice cream. The cold, creamy contrast against the warm apple is simply divine.
- Healthy Boost: Serve alongside a scoop of plain or vanilla Greek yogurt for added protein and a refreshing tang.
- Indulgent Drizzles: A drizzle of warm caramel sauce, chocolate syrup, or even a swirl of maple syrup can take your dessert to the next level.
- Extra Texture: Don’t forget to save some of your filling ingredients – a sprinkle of extra granola, chopped nuts, or dried fruit over the top adds visual appeal and a satisfying crunch.
- Unique Additions: Consider a pinch of sea salt to enhance the sweetness, a dollop of mascarpone cheese for a richer taste, or a drizzle of your favorite nut butter for healthy fats and protein.
Tips for Success and Troubleshooting
- Prevent Browning: If you’re concerned about the apple browning while you prep other ingredients, you can rub a little lemon juice inside the cavity and over any exposed flesh.
- Adjusting Sweetness: Taste your apple variety before adding sweetener. Naturally sweet apples might need less, while tarter ones might benefit from a bit more.
- Don’t Overcook: Overcooking can lead to a mushy apple. It’s better to undercook slightly and add short bursts until it reaches your desired tenderness.
- Cooling is Key: Always let the apple rest for a few minutes. Not only is it scorching hot, but residual heat will continue to cook it slightly, perfecting the texture.
Frequently Asked Questions
Q: Can I use any type of apple?
A: While many apples work, crisp and firm varieties like Honeycrisp, Fuji, or Pink Lady are best as they hold their shape and texture well. Softer apples might become too mushy.
Q: How do I store leftover baked apples?
A: Place cooled baked apples in an airtight container and refrigerate for up to 3-4 days. They are delicious cold or gently reheated.
Q: How do I reheat a microwave baked apple?
A: Reheat in the microwave for 30-60 seconds, or until warmed through. Be careful not to overheat.
Q: Can I prepare these ahead of time?
A: You can core and stuff apples a few hours in advance, then refrigerate until ready to microwave. For best results, microwave just before serving.
More Easy Apple Snacks to Enjoy
If you love the simplicity and deliciousness of these microwave baked apples, you’ll certainly enjoy these other easy apple-inspired treats:
- Healthy Apple Nachos Recipe
- Easy Oven-Dried Apple Chips Recipe
- Apple Berry Salsa with Cinnamon Chips {Low-Sugar}
Looking for more easy, healthy, and carb-conscious recipes?
📋 Recipe: Microwave Baked Apples Stuffed with Granola

Microwave Baked Apples Stuffed with Granola
Microwave Baked Apples stuffed with granola are an easy, healthy snack or dessert that’s ready in minutes. It’s like no-crust apple pie!
Prep Time: 5 minutes
Cook Time: 5 minutes
Total Time: 10 minutes
Servings: 1 Serving
Author: Marjory Pilley
Ingredients
- 1 apple (sweet and crisp, such as Honeycrisp, Pink Lady®, Royal Gala, Fuji, or Ambrosia)
- ⅛ teaspoon cinnamon
- 2 Tablespoons granola or oatmeal
- ¼ teaspoon honey (maple syrup, agave nectar, or another sweetener)
Instructions
- Remove the core from the apple using an apple corer or paring knife, ideally leaving the bottom of the apple intact. If you cut all the way through, chop off the bottom of the core and replug the hole. Note: You do not need to peel the apple.
- Using a paring knife or vegetable peeler, remove a small section of apple skin from around the opening of the cavity.
- Sprinkle cinnamon and sweetener inside the hollowed-out and peeled areas of the apple.
- Spoon granola or oatmeal and any other desired ingredients into the apple’s cavity.
- Place the stuffed apple in a microwave-safe bowl. If the filling is mostly dry, you don’t need to cover it. If using juicy fillings like berries or caramel, cover the bowl loosely with a microwave-safe cover or a paper towel (avoid plastic wrap).
- Cook on high for 3 minutes or until the apple is fork-tender. Cooking time may vary based on apple size and microwave wattage.
- Allow the apple to rest for about 2-3 minutes before enjoying it. It will be hot!
Notes
You’ll find more expert tips and step-by-step pictures above!
Grab 5 Low-Carb Sauces and get more easy, healthy recipes! JOIN HERE
Nutrition
Calories: 194kcal | Carbohydrates: 40g | Protein: 3g | Fat: 4g | Saturated Fat: 0.5g | Polyunsaturated Fat: 1g | Monounsaturated Fat: 1g | Sodium: 9mg | Potassium: 274mg | Fiber: 6g | Sugar: 24g | Vitamin A: 99IU | Vitamin C: 8mg | Calcium: 31mg | Iron: 1mg
Nutritional and Food Safety Disclaimer
This recipe was originally published on 8/19/15 and has been updated and expanded to improve the reader experience and provide more comprehensive information.
