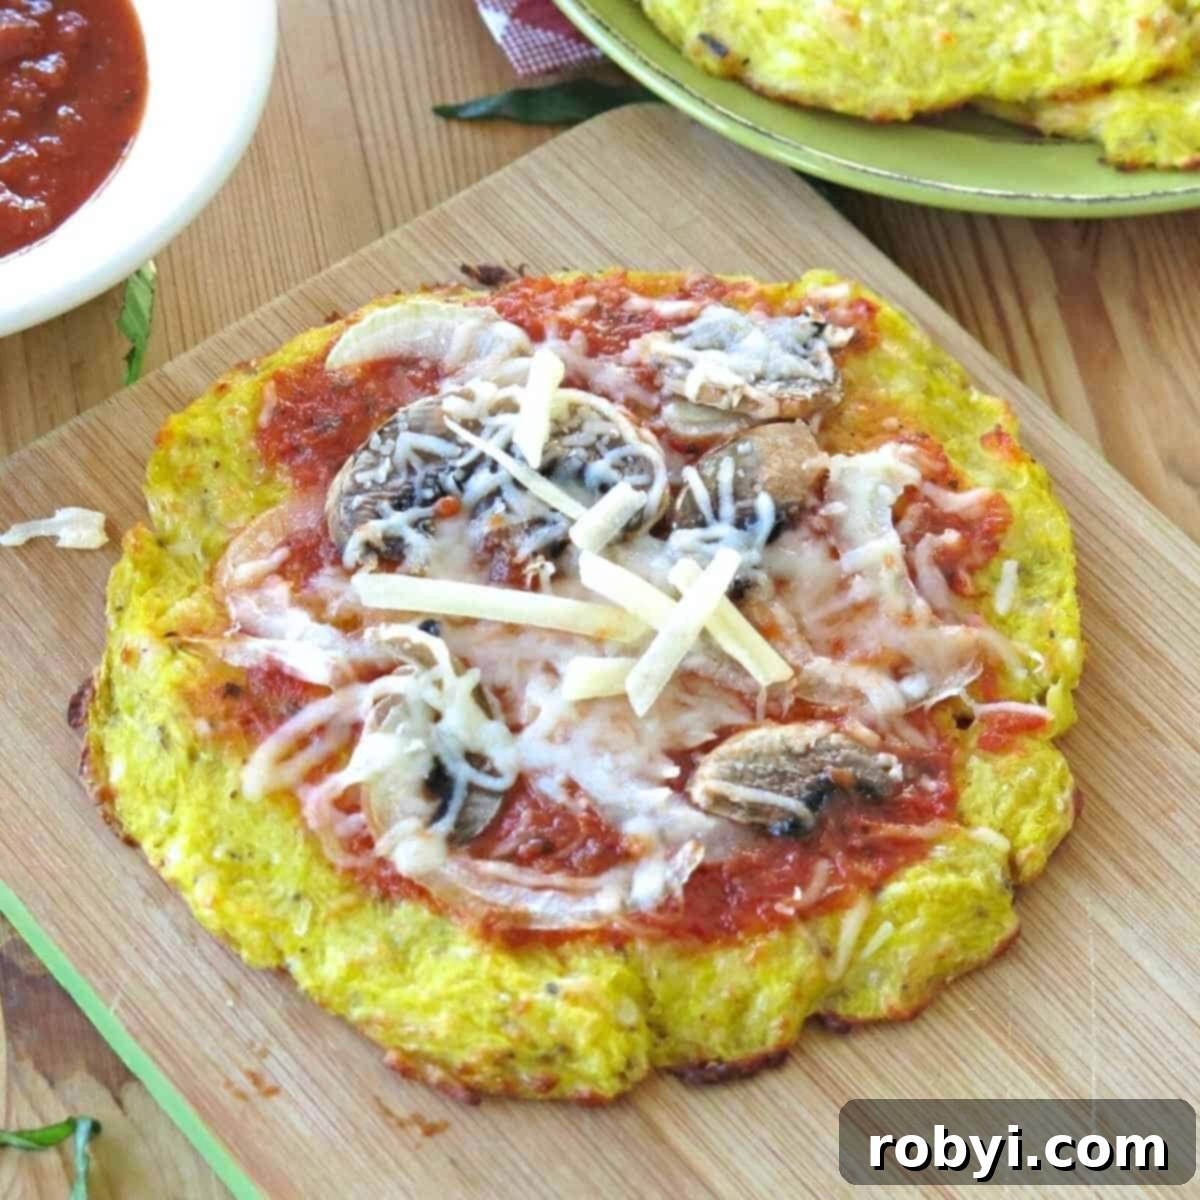
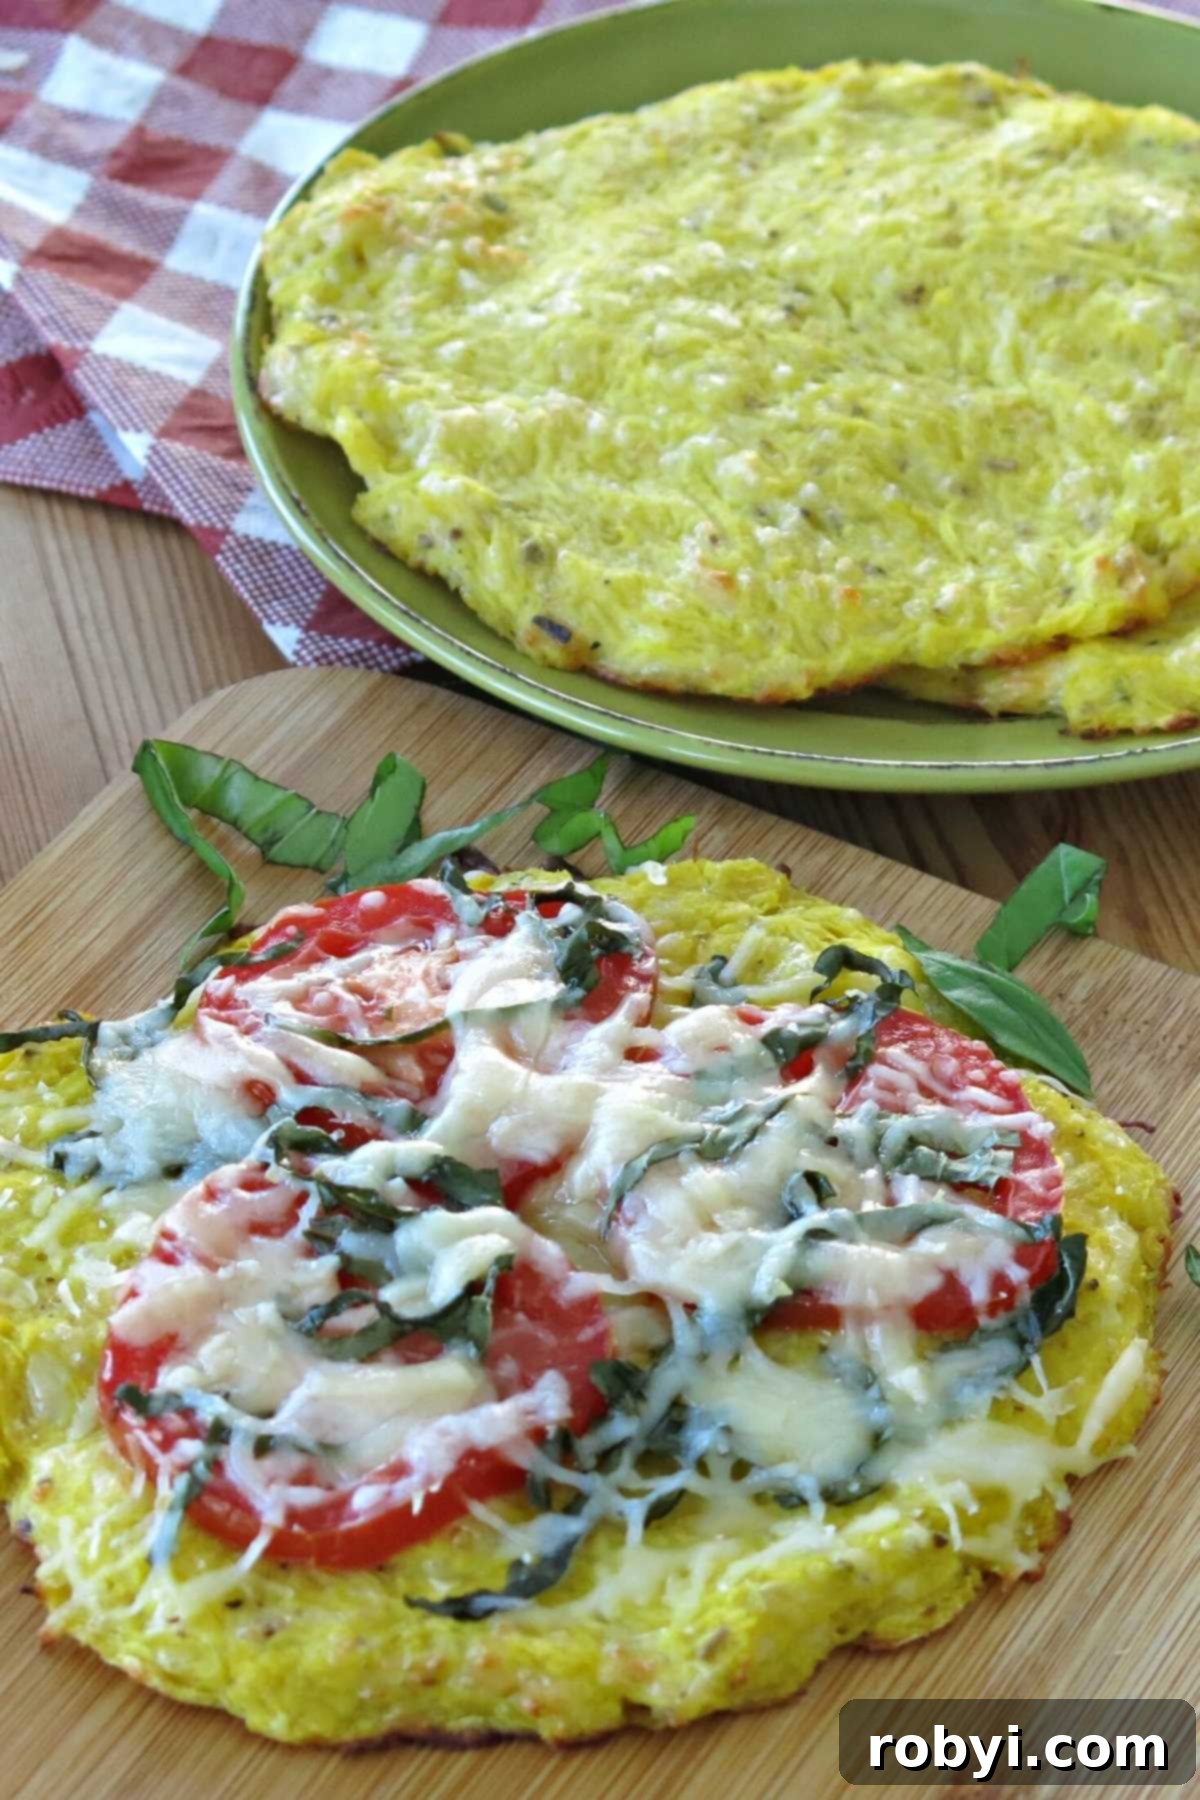
Spaghetti squash pizza crust offers a delightful and healthy alternative for pizza lovers! It’s an exceptionally versatile, low-carb, and gluten-free base that promises to tantalize your taste buds from the very first bite. Imagine a crisp, golden crust that not only supports your favorite toppings but also contributes a subtly sweet and buttery flavor to your meal. This isn’t just a healthy substitute; it’s a delicious foundation that stands proudly on its own.
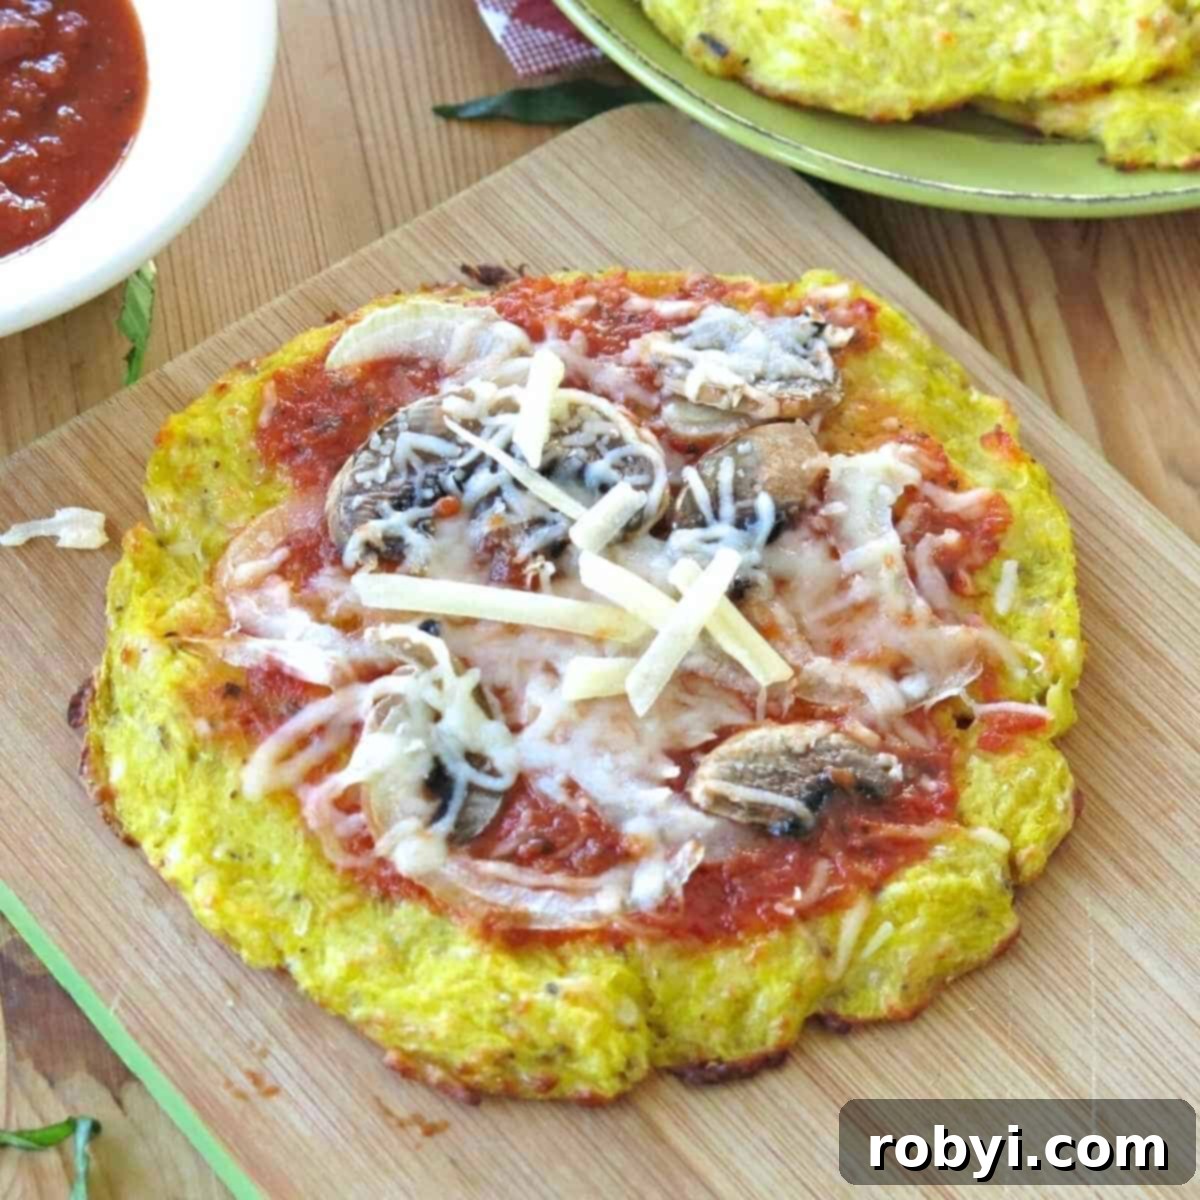
Are you exploring the world of grain-free, vegetable-based crusts that masterfully mimic traditional pizza? You’re in for a treat! When prepared correctly, these innovative pizza crust alternatives aren’t just a healthier choice; they are incredibly flavorful. Forget soggy, bland vegetable crusts; the spaghetti squash version provides a satisfying texture and taste that will surprise and impress.
Among the various grain-free options available, the pizza crust made from spaghetti squash is a true champion. It quickly won over my entire family, a testament to its irresistible appeal. Its flavor is remarkably buttery and more delicate than other popular alternatives like cauliflower pizza bites, making it a crowd-pleaser for even the pickiest eaters. This unique flavor profile allows your chosen toppings to shine while providing a rich, savory backdrop.
The beautifully crispy crust achieved with spaghetti squash is perfectly suited for an endless array of topping combinations. Whether you dream of a classic Margherita, a robust meat-lover’s feast, a vibrant vegetarian delight, or an exotic gourmet creation, this crust provides the ideal canvas. Its ability to hold up to various ingredients ensures a perfect slice every time, making your homemade pizza experience truly exceptional.
Essential Ingredients for Your Spaghetti Squash Pizza Crust
Crafting a delicious and sturdy spaghetti squash pizza crust requires only a handful of simple ingredients. Each component plays a crucial role in achieving the desired texture, flavor, and binding properties. Here’s what you’ll need to transform this humble winter squash into a magnificent pizza base:
- Spaghetti squash: This is, of course, the star of our show. It must be cooked and its signature spaghetti-like strands carefully removed. The proper preparation of spaghetti squash is key to the success of this crust. We’ll dive into easy methods for cutting and cooking this squash in the section below, ensuring you get perfectly tender strands ready for the next steps.
- Mozzarella cheese: Opt for shredded mozzarella cheese, which is celebrated for its mild flavor and excellent melting properties. It contributes to the crust’s structure, adding a slight chewiness and a rich, subtle taste that won’t overpower the delicate squash flavor. While other shredded cheeses like Monterey Jack or Colby Jack can be used for variation, be aware that they will introduce a different flavor profile to your crust.
- Egg: A single egg serves as the primary binder for our crust. It helps to hold the spaghetti squash strands and cheese together, ensuring a cohesive and firm crust that won’t crumble when sliced. Don’t underestimate the power of this simple ingredient in providing structural integrity.
- Oregano and garlic powder: These aromatic spices are essential for infusing the crust with classic Italian-inspired flavors. Oregano adds an earthy, slightly peppery note, while garlic powder provides a warm, savory depth. Together, they create a wonderfully seasoned base that complements any pizza topping you choose. Feel free to adjust the quantities to your taste or add a pinch of red pepper flakes for a subtle kick.
Typically, a medium-sized 3-pound spaghetti squash will yield approximately 4-5 cups of cooked strands. For this specific recipe, we begin with about 4 cups of cooked spaghetti squash. However, it’s vital to note that once the liquid is meticulously removed – a critical step for a crispy crust – you will be left with approximately 1 ½ cups of concentrated spaghetti squash goodness! This reduction in volume highlights the importance of moisture removal for optimal texture.
If you find yourself with extra cooked spaghetti squash strands, don’t let them go to waste! Spaghetti squash is incredibly versatile. Consider whipping up a creamy spaghetti squash Alfredo, a comforting spaghetti squash soup, or a hearty spaghetti squash au gratin. These recipes are excellent ways to enjoy the remaining squash and add variety to your meal rotation.
For the precise measurements of each ingredient and detailed, step-by-step instructions, please consult the comprehensive recipe card located further down this page.
Mastering the Art of Cooking Spaghetti Squash
Many home cooks find the task of cutting spaghetti squash in half to be the biggest hurdle when preparing this versatile vegetable. While it might seem daunting at first, it certainly shouldn’t be a barrier! We’ve got you covered with a couple of straightforward and highly effective methods that make cooking spaghetti squash a breeze, regardless of your comfort level in the kitchen. The goal is to get those tender, ready-to-scrape strands with minimal effort and maximum safety.
Effortless Whole Baking: Oven or Slow Cooker Method
For those who prefer to avoid wrestling with a raw, tough squash, cooking it whole is by far the easiest and safest method. This approach softens the entire gourd, making it simple to cut and scoop once cooked. You can achieve this with either your oven or a slow cooker, offering flexibility based on your schedule and preference. Here’s a brief overview of how to cook spaghetti squash whole:
- Prepare the Squash: Begin by carefully poking 8-10 holes into the outer surface of the spaghetti squash using a sharp knife or fork. This crucial step allows steam to escape during cooking, preventing pressure buildup and ensuring even cooking.
- Choose Your Appliance:
- Slow Cooker Method: Place the prepared squash directly into your slow cooker. This method is incredibly hands-off, perfect for when you want to set it and forget it.
- Oven Method: If using the oven, place the squash on a sturdy baking sheet. Preheat your oven to a moderate 425°F (220°C).
- Cook Until Tender: Cook the squash until its outer surface is visibly soft to the touch. A good test is to easily insert a knife into the squash with very little resistance.
- Slow Cooker Timing: Allow 3-4 hours if cooking on high, or extend to 5-6 hours if cooking on a low setting. Cooking times may vary slightly based on the size of your squash.
- Oven Timing: Bake for approximately 30 minutes, remembering to roll the squash over halfway through the cooking time to ensure even roasting.
- Cool and Handle: Once cooked, remove the spaghetti squash and let it cool for about 10 minutes. Use oven mitts or a clean towel to handle it carefully, as it will still be quite hot. At this point, the squash will be much softer and should easily break apart or be simple to cut.
- Final Preparation: With the squash now soft and manageable, cut it in half lengthwise and use a spoon to scoop out and discard the seeds and stringy pulp. Your cooked spaghetti squash strands are now ready to be scraped out and used for your pizza crust!
The Flavorful Route: Cutting and Roasting Halves
For those who appreciate a deeper, more caramelized flavor in their spaghetti squash, cutting it in half before roasting is an excellent option. Exposing the flesh to direct heat during roasting enhances its natural sweetness and adds a beautiful golden hue. To make the initial cutting process much safer and easier, we recommend a quick pre-softening step in the microwave.
- Pre-soften the Squash (Crucial Step):
- To soften the squash and make it easier to cut, start by poking 8-10 holes around its outer surface with a knife. This allows steam to vent, preventing it from bursting.
- Place the entire squash on a microwave-safe plate and microwave on high for about 2 minutes. Rotate the squash, and microwave for up to 2 additional minutes. The goal is to slightly soften the skin, not fully cook it.
- Carefully remove the partially softened squash from the microwave. It should now be much easier to slice in half lengthwise. Once cut, scoop out and discard all the seeds and fibrous strands from the center.
- Season and Prepare for Roasting: Lightly brush the exposed flesh of each spaghetti squash half with a good quality olive oil. Season generously with salt and freshly ground black pepper to taste. You can also add a sprinkle of garlic powder or your favorite herbs here for extra flavor.
- Roast to Perfection: Place the seasoned squash halves, cut-side down, on a sheet pan that has been lined with parchment paper. Parchment paper is highly recommended for easy cleanup and to prevent sticking. Bake in a preheated oven at 375°F (190°C) for approximately 40 minutes, or until the flesh is tender and can be easily scraped with a fork.
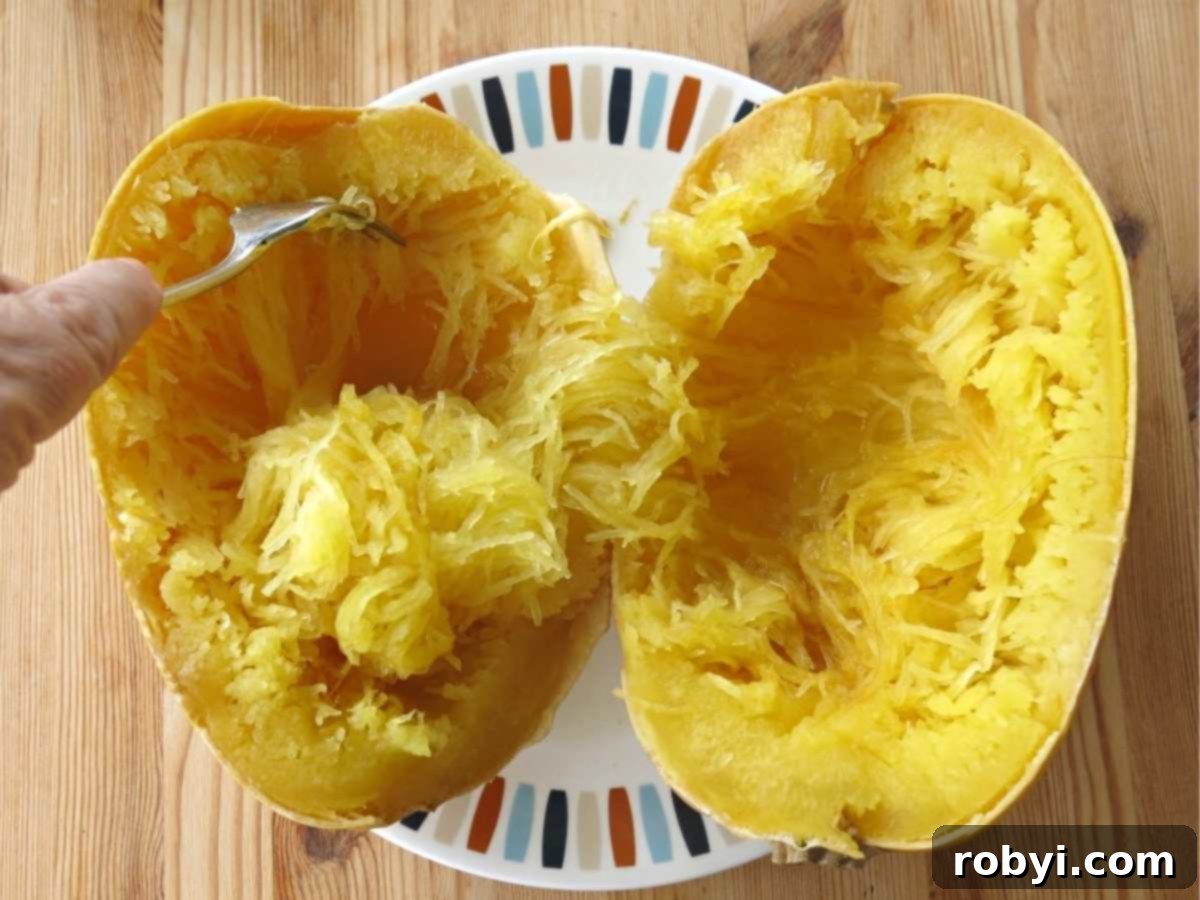
While cooking spaghetti squash does require some time, it’s largely hands-off preparation, freeing you up to attend to other tasks or relax. Furthermore, you can significantly streamline your pizza-making process by cooking the squash 1-2 days in advance. Cooked spaghetti squash strands can be stored in an airtight container in the refrigerator, ready to be incorporated into your pizza crust whenever you’re ready to bake. This make-ahead tip is a game-changer for weeknight meals!
Crafting Your Perfect Spaghetti Squash Pizza Crust: A Step-by-Step Guide
Once your spaghetti squash is cooked and cooled, transforming it into a delicious pizza crust is a straightforward process. Follow these detailed step-by-step instructions, complete with visual aids, to achieve a firm, crispy, and flavorful crust that will become your new go-to for healthy pizza nights.
Step 1: Scrape and Measure the Squash Strands
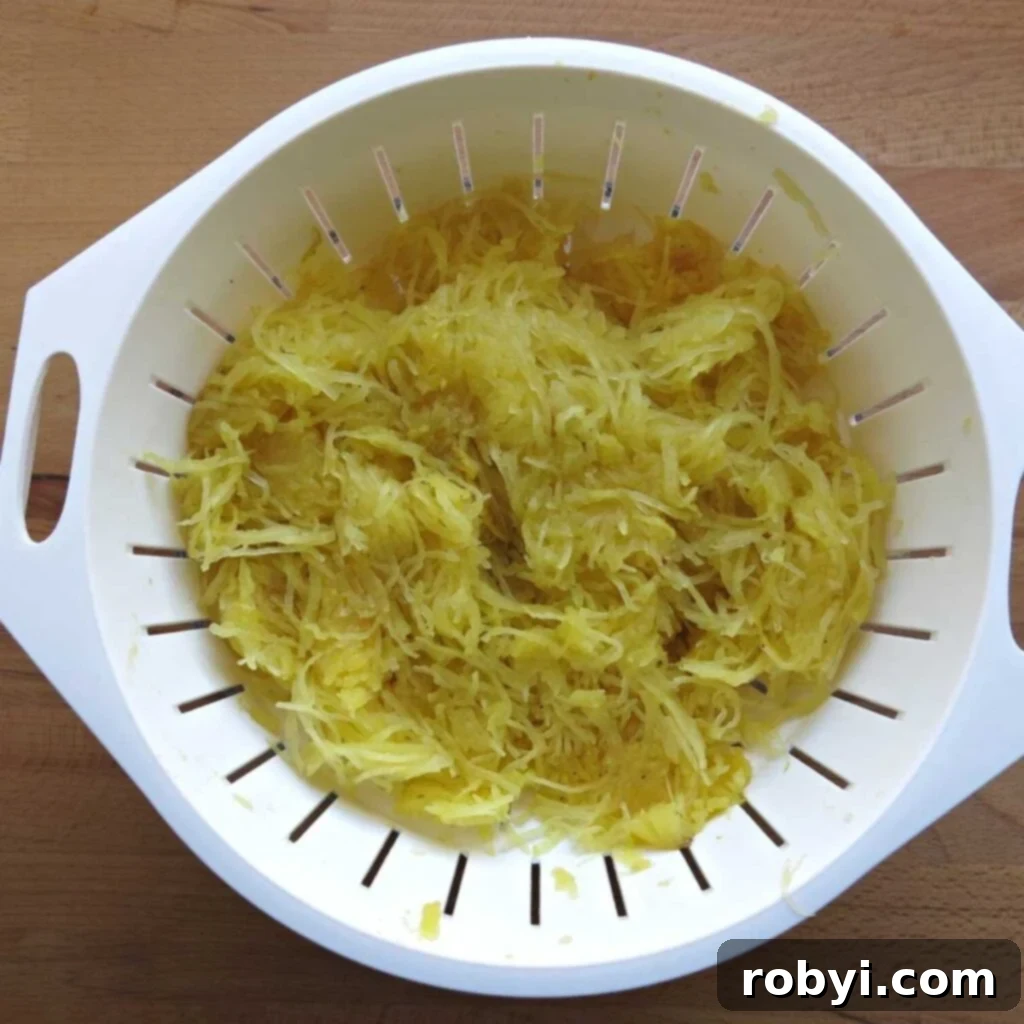
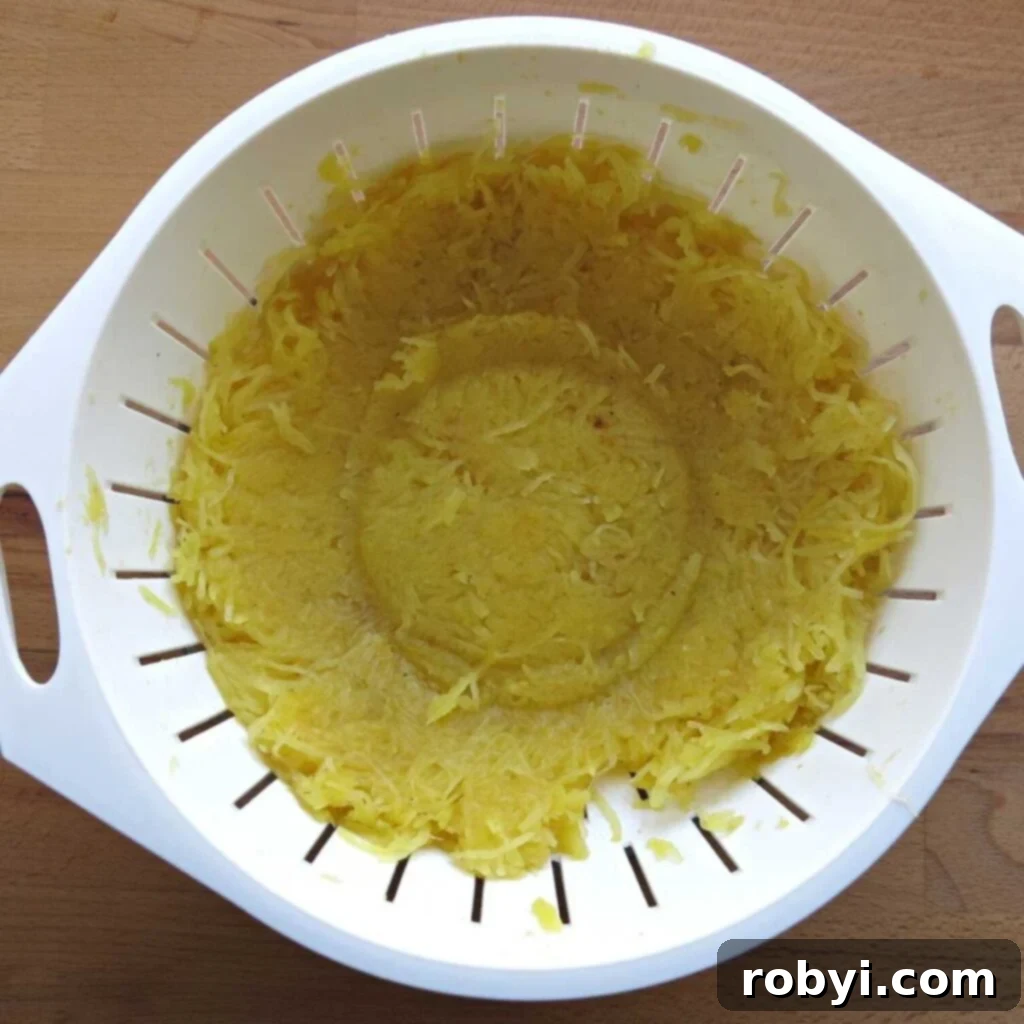
After your spaghetti squash has been cooked and is cool enough to handle, use a fork to carefully scrape the tender, noodle-like strands away from the skin of the gourd. Aim to measure out approximately 4 cups of these cooked spaghetti squash strands. Place all the measured strands into a fine-mesh strainer set over a bowl. This initial collection and straining setup is essential for the next critical step: liquid removal.
Step 2: Press Out Initial Liquid
This is arguably the most crucial step for achieving a truly crispy crust, so don’t skip it! Place a clean, sturdy bowl directly on top of the spaghetti squash strands in the strainer. Apply firm, steady pressure to press down on the squash, forcing out a significant amount of excess liquid. You’ll be surprised how much water comes out! As the liquid drains, periodically gather the strands towards the center of the strainer and repeat the pressing process. Continue until a good amount of liquid has been released. This quick initial press removes a substantial portion of the moisture and is an important prelude to the next step.
Step 3: Squeeze Out Remaining Moisture for Ultimate Crispiness
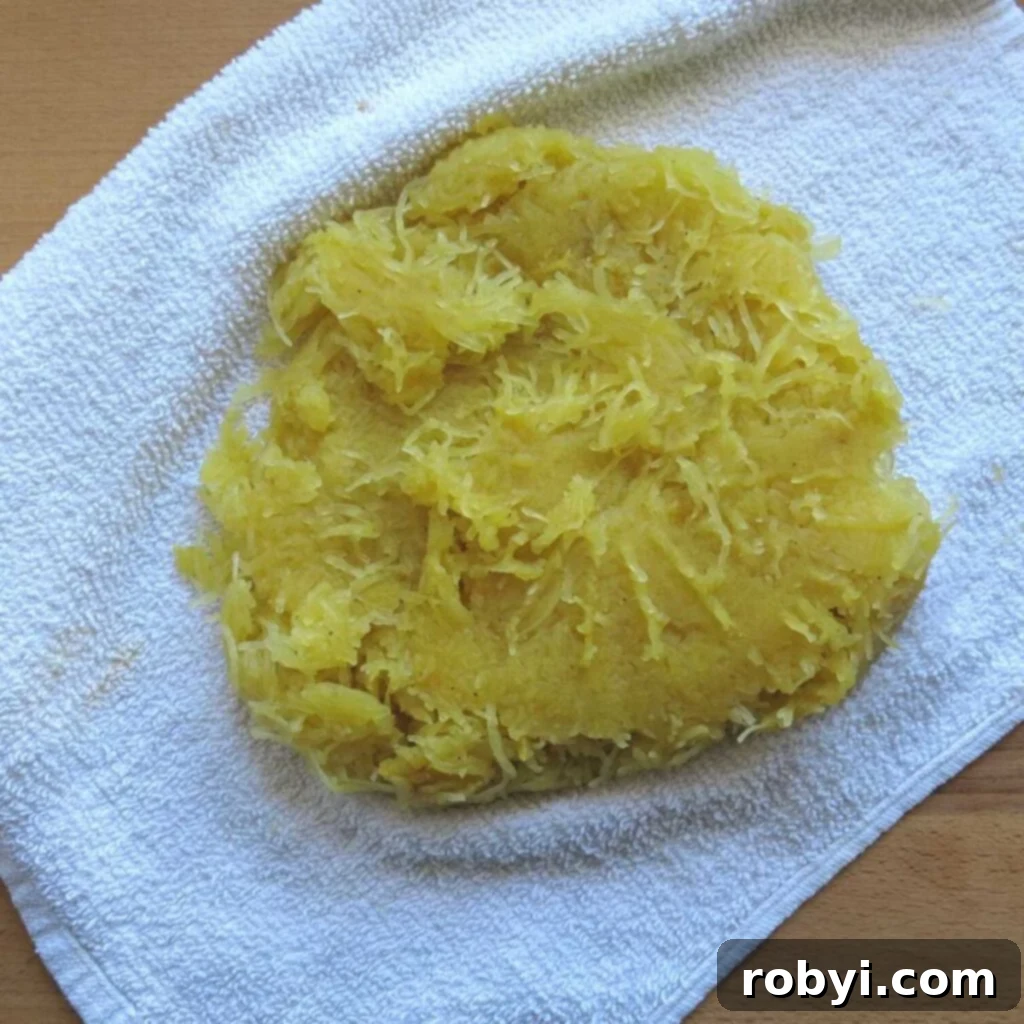
For the crispiest possible crust, you need to extract every last drop of liquid. Transfer the partially drained spaghetti squash strands from the strainer onto the center of a clean, lint-free dishcloth or a few layers of strong paper towels. Gather the corners of the cloth or paper towels, twisting them tightly to form a ball, and then squeeze with all your might over a sink or bowl. Continue squeezing until no more liquid drips out. This rigorous squeezing is paramount; if you skip this step, your crust will likely be soggy instead of delightfully crisp. After this process, your 4 cups of cooked spaghetti squash will have reduced significantly, resulting in about 1 ½ cups of perfectly dry, concentrated strands, ideal for forming a firm crust.
Step 4: Combine Ingredients to Form the “Dough”
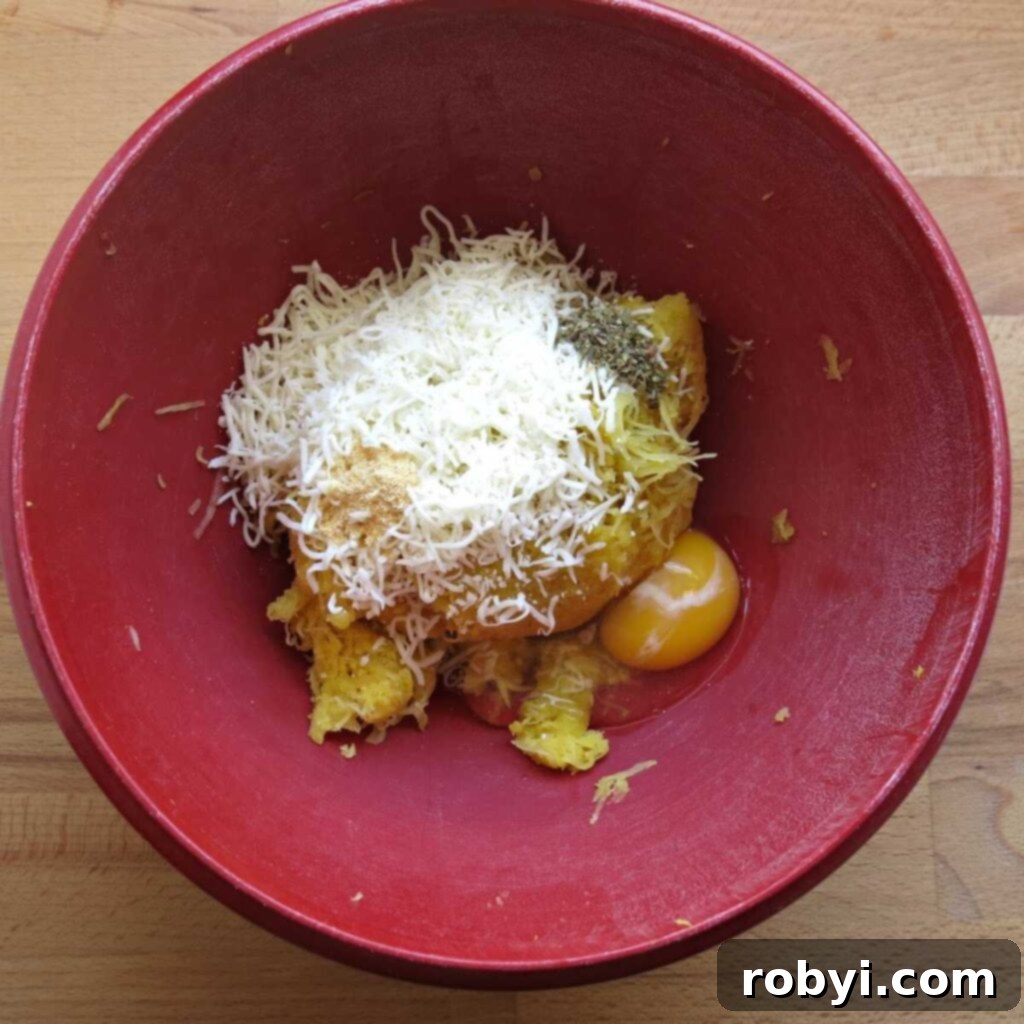
Once the spaghetti squash strands are thoroughly dry and compressed, use a fork to gently break them apart, ensuring they are separated enough to mix evenly. Transfer these broken-up strands into a large mixing bowl. To this, add your binding and flavoring ingredients: the beaten egg, shredded mozzarella cheese, a generous pinch of dried oregano, and a dash of garlic powder. Mix all these components together thoroughly until well combined. The mixture should be cohesive and sticky enough to hold its shape, resembling a loose “dough.” Use your hands if necessary to ensure everything is evenly incorporated.
Step 5: Shape and Prepare for Baking
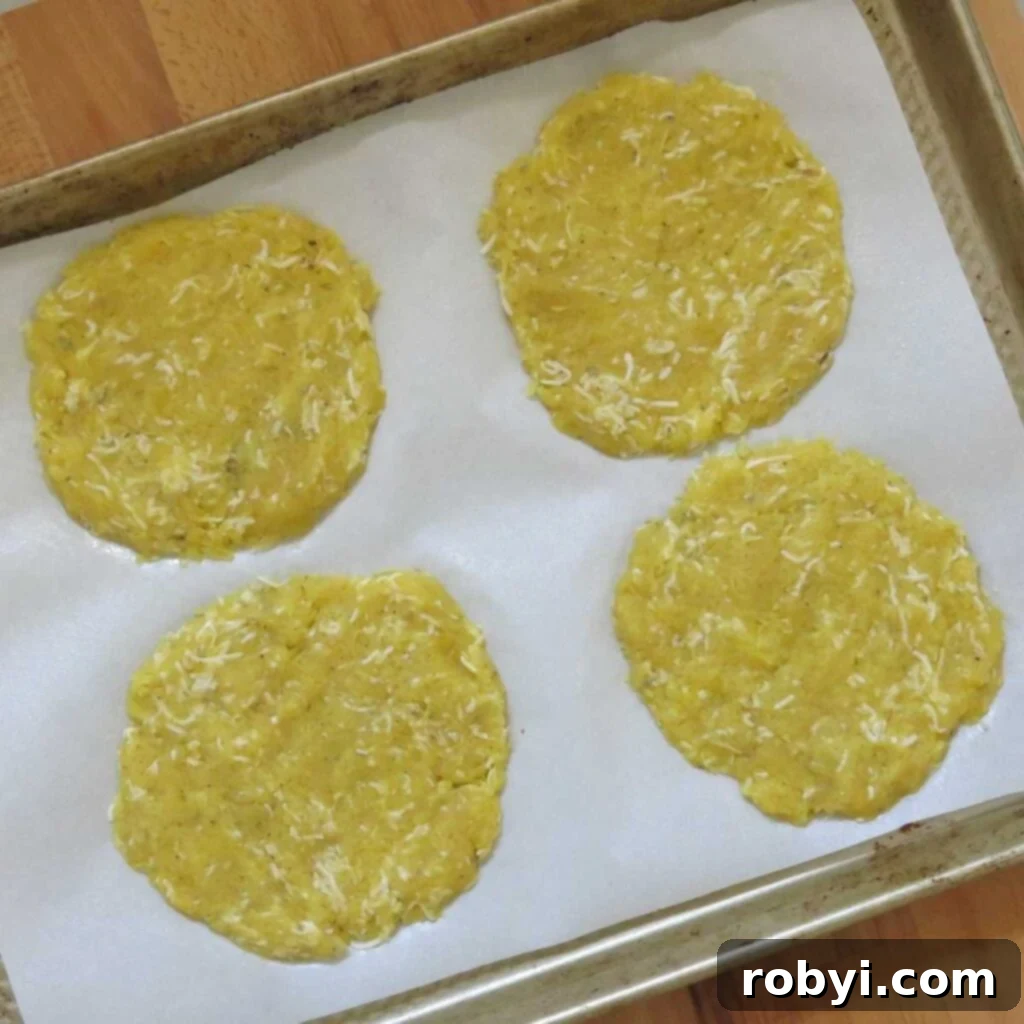
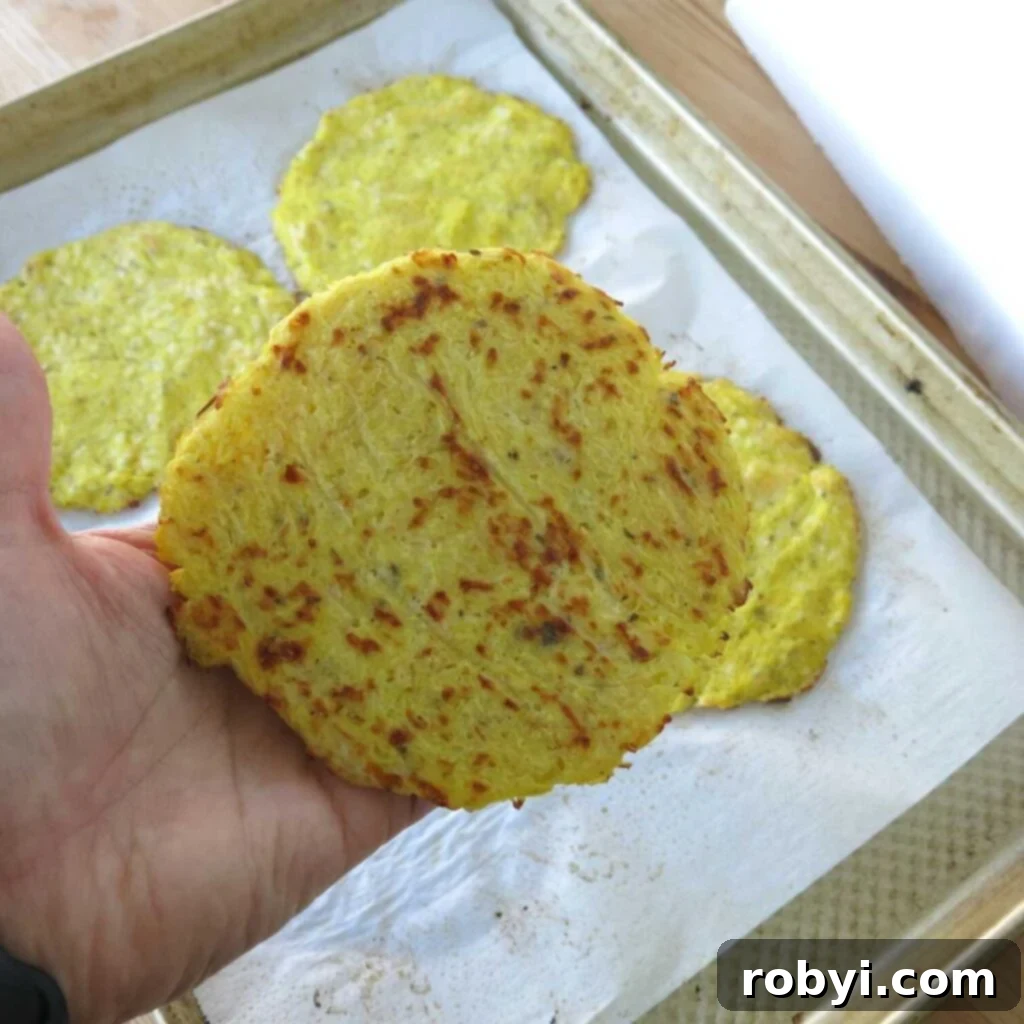
Now it’s time to form your pizza crusts! Scoop portions of the spaghetti squash mixture onto a baking sheet that has been lined with parchment paper. Lightly spray the parchment paper with cooking spray to prevent any sticking and to aid in crisping. Using your hands or the back of a spoon, shape the mixture into individual pizza crusts. You can opt for smaller, personal-sized rounds, which are often easier to handle and achieve crispiness, or form a larger, round, or free-form crust. The key is to flatten the “dough” evenly to about ¼ inch thick. A thinner crust will result in a crispier texture, so don’t be afraid to press firmly to achieve your desired thickness.
Step 6: Pre-Bake the Crust for Firmness
Preheat your oven to 400°F (200°C). Once hot, carefully place the baking sheet with your shaped crusts into the oven. Bake for approximately 15 minutes. During this pre-bake, the crust will firm up, and the edges will begin to turn golden brown and crisp. This step is essential for establishing the structural integrity of the crust before you add any toppings, ensuring it doesn’t become soggy under the weight of sauces and other ingredients. Keep an eye on them to prevent over-browning, as oven temperatures can vary.
Step 7: Add Toppings and Finish Baking
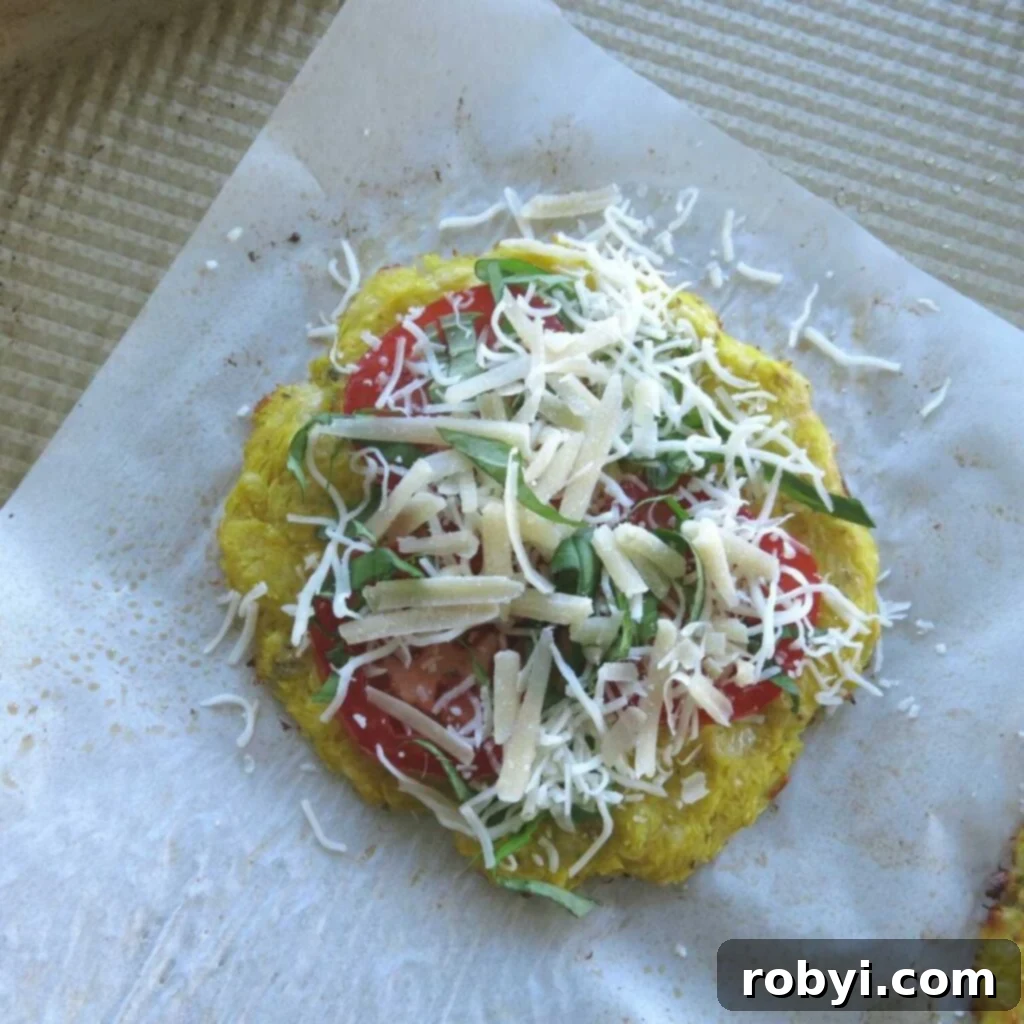
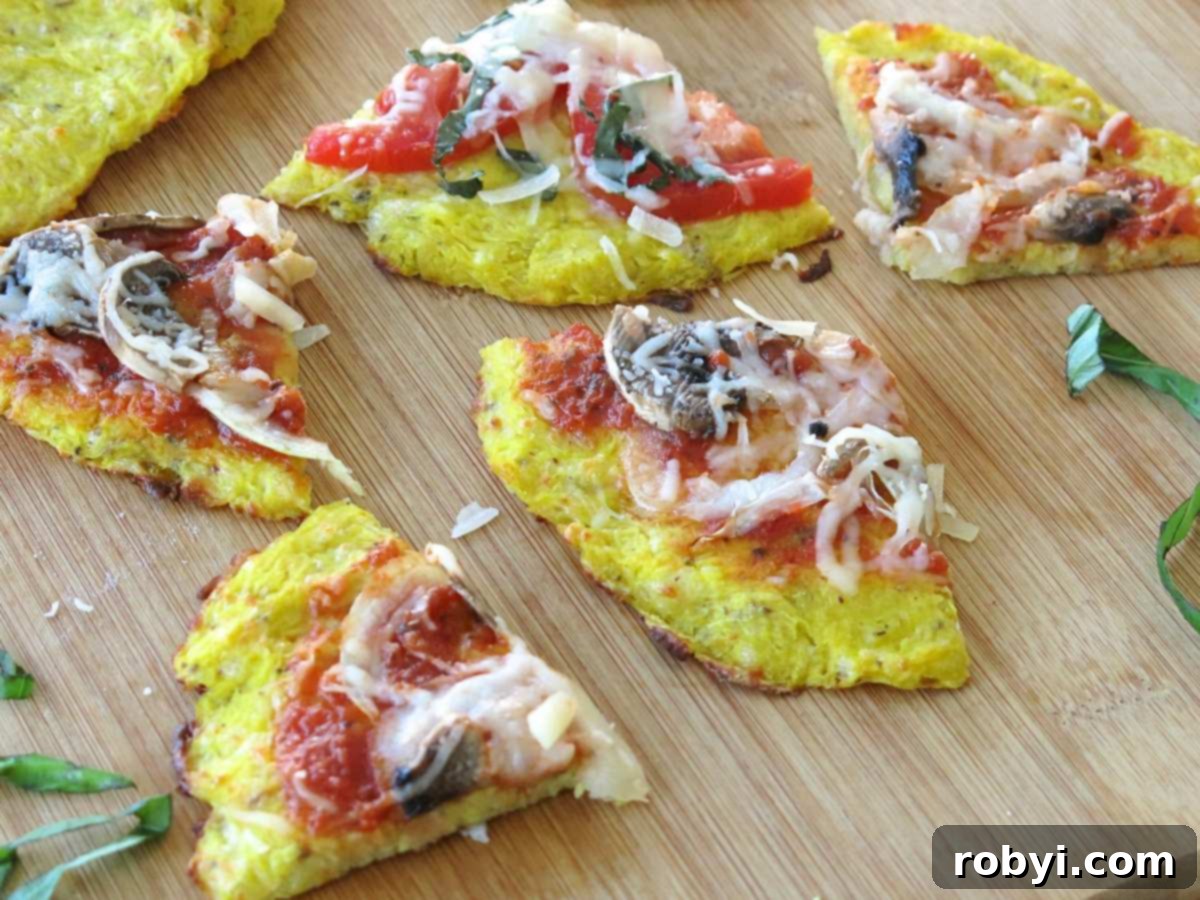
Once the crusts are pre-baked to a firm and slightly crispy state, remove them from the oven. Now comes the fun part: adding your favorite pizza sauce and toppings! Spread a thin layer of your chosen sauce, then generously arrange your desired toppings. Return the topped pizzas to the oven for an additional 5-7 minutes. The goal here is to heat the toppings through, allow the cheese to melt into a bubbly, golden perfection, and further crisp the crust. Monitor closely to prevent burning. Once ready, carefully remove from the oven, slice, and serve immediately for the best experience!
Expert Tips for the Best Spaghetti Squash Pizza Crust
Achieving a perfectly crispy and flavorful spaghetti squash pizza crust is all about paying attention to a few key details. These expert tips will help you master the process and avoid common pitfalls, ensuring your homemade pizza is a resounding success every time:
- Maximize Liquid Removal: This tip cannot be overstated – it is absolutely vital to remove as much liquid as humanly possible from the cooked spaghetti squash strands. Excess moisture is the primary enemy of a firm, crisp crust, leading to a soggy and unappealing texture. Use both the strainer-and-press method followed by squeezing in a clean dishcloth. Squeeze harder than you think you need to! The drier your squash, the crisper your crust will be.
- Aim for a Thin Crust: When shaping your pizza base, strive for an even thickness of about ¼ inch. Generally, the thinner you can make the crust, the crispier and more enjoyable it will be. A thinner crust also cooks more uniformly and quickly, reducing the chances of any parts remaining soft. If you prefer a slightly softer, chewier crust, you can make it a bit thicker, but remember this will impact the overall crispiness.
- Consider Personal-Sized Pizzas: While it’s certainly possible to create one large spaghetti squash pizza, we’ve found that preparing smaller, personal-sized pizzas is often much easier to manage. Smaller crusts are simpler to form, transfer, and achieve optimal crispiness. They also make for convenient individual servings and allow for a variety of topping choices for different preferences. However, if you’re set on a large pie, the same principles of pressing, shaping, and baking apply. You can easily form a large round or even a free-form, rustic-style pizza on a single baking sheet.
- Don’t Overload Toppings: While tempting, piling too many heavy or watery toppings onto your spaghetti squash crust can undermine its crispness. Keep your toppings relatively light and avoid excessively wet ingredients. If using watery vegetables like tomatoes or mushrooms, consider pre-sautéing them slightly to remove some moisture before adding them to the pizza. This helps prevent the crust from becoming soggy.
- Preheat Your Baking Sheet (Optional but Recommended): For an extra-crispy bottom crust, especially if making a larger pizza, try preheating your baking sheet or pizza stone in the oven before carefully placing the shaped crust onto it. The immediate high heat contact will help create a crispier base, similar to what happens with traditional pizza dough.
Storage & Make Ahead: Enjoying Your Crust Later
One of the fantastic advantages of this spaghetti squash pizza crust recipe is its suitability for meal prep and future enjoyment. You can absolutely prepare and cook these crusts in advance, making weeknight pizza a breeze!
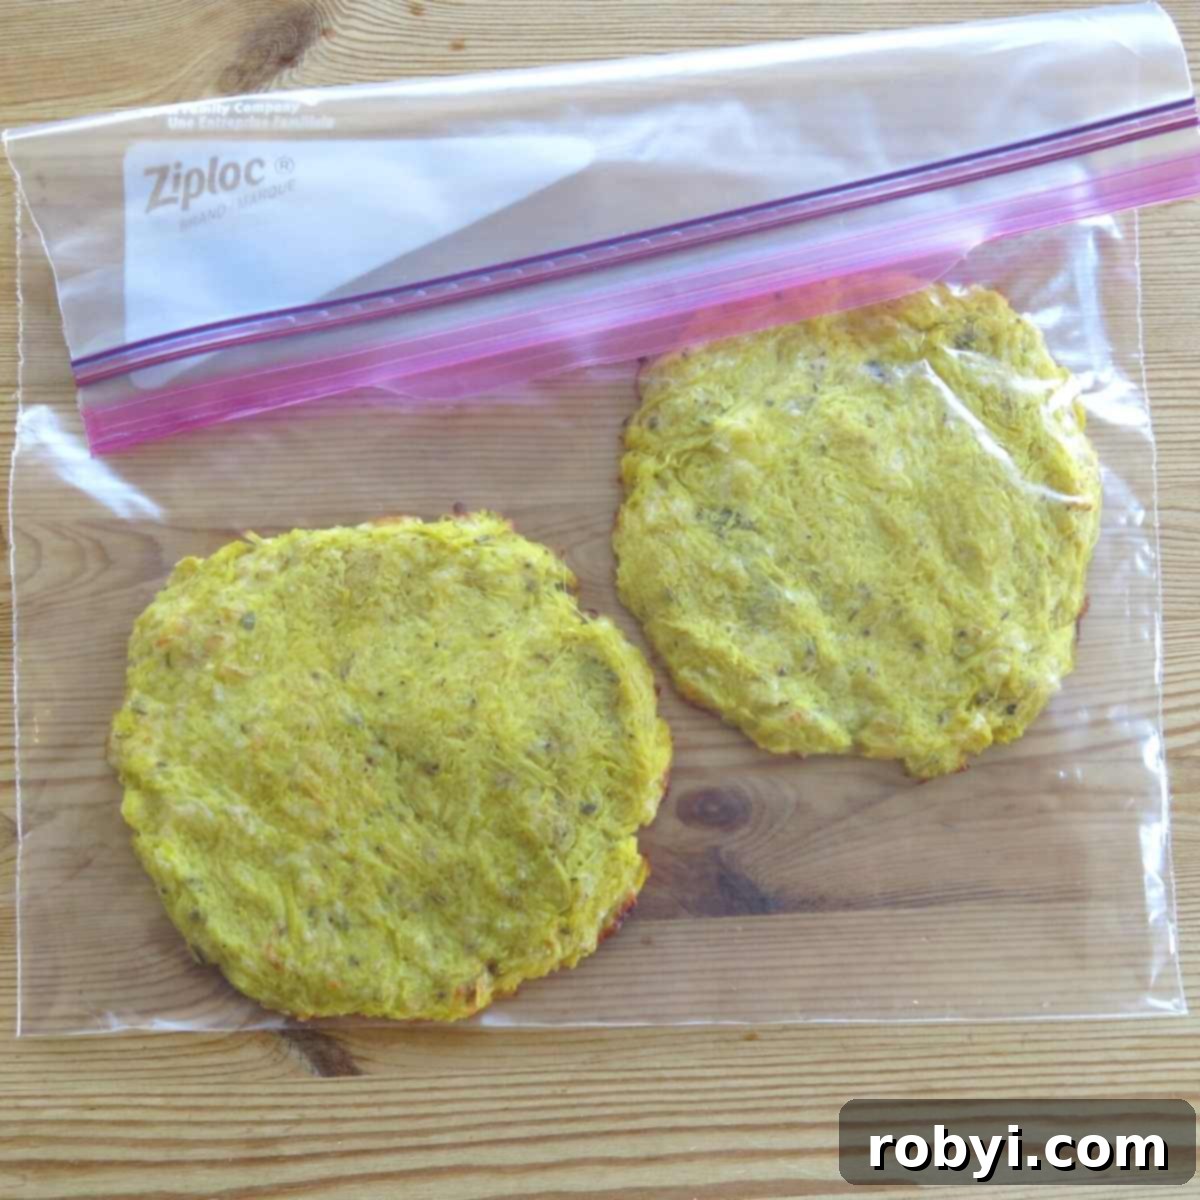
Prepared and pre-baked spaghetti squash crusts can be successfully frozen, allowing you to have a healthy pizza base on hand whenever a craving strikes. To freeze them, ensure the crusts are completely cooled after baking. Then, carefully stack them with a piece of parchment paper between each crust to prevent sticking. Place the stacked crusts into a freezer-safe ziplock bag or an airtight container, making sure to remove as much excess air as possible to prevent freezer burn. Store them in the freezer for up to 2 months without any loss of quality.
When you’re ready to transform your frozen crusts into a delicious meal, simply remove the desired number of crusts from the freezer and transfer them to the refrigerator to defrost overnight. This gradual thawing process helps maintain their texture. The following day, once fully defrosted, you can proceed with adding your favorite pizza toppings and baking them in the oven as you normally would. It’s important to note that we do not recommend microwaving the defrosted crusts, as this method tends to make them soggy and detracts from the desired crisp texture.
Inspiring Topping Ideas for Your Spaghetti Squash Pizza
The beauty of spaghetti squash pizza is its versatility, making it a fantastic canvas for virtually any topping you would enjoy on a classic pizza. The subtle, buttery flavor of the crust complements a wide range of ingredients, allowing your creativity to flourish. Here are some mouthwatering topping combinations, including those we savored, to inspire your next pizza creation:
- Fresh Margherita Style: A simple yet elegant choice featuring thinly sliced ripe tomatoes, fragrant fresh basil leaves, and a generous layer of shredded mozzarella cheese. A drizzle of olive oil after baking enhances the fresh flavors. This combination highlights the natural taste of the crust beautifully.
- Savory Mushroom & Onion: Start with a rich spaghetti sauce base, then top with thinly sliced fresh onions and earthy mushrooms. You can sauté the mushrooms and onions slightly beforehand to intensify their flavor and reduce moisture. For an even more indulgent twist, consider adding some slow cooker caramelized onions – their sweet, deep flavor is an absolutely mouthwatering topping on this pizza, taking it from good to gourmet.
- Classic Pepperoni & Cheese: You can never go wrong with a traditional combination. Layer your favorite pizza sauce, plenty of mozzarella cheese, and slices of savory pepperoni. Add a sprinkle of Italian seasoning for an extra kick.
- Vegetable Garden Pizza: Load up your crust with a colorful array of vegetables. Think bell peppers (red, yellow, green), zucchini, spinach, olives, cherry tomatoes, and artichoke hearts. A light tomato sauce and a blend of mozzarella and provolone cheese work wonderfully here.
- Mediterranean Inspired: For a burst of Mediterranean flavors, use a thin layer of pesto or olive oil as a base. Top with crumbled feta cheese, Kalamata olives, sun-dried tomatoes, and a sprinkle of dried oregano. Grilled chicken can be added for protein.
- Spicy Sausage & Peppers: For meat lovers, browned Italian sausage (sweet or spicy), roasted bell peppers, and onions over a marinara sauce base create a hearty and satisfying pizza.
- Breakfast Pizza: Get creative with a brunch-inspired pizza! Top with scrambled eggs, cooked bacon or sausage crumbles, and cheddar cheese. A light white sauce or even no sauce works well for this unique option.
Experiment with different sauces, cheeses, meats, and vegetables to discover your ultimate spaghetti squash pizza combination. The possibilities are truly endless!
Seeking more effortlessly healthy, carb-conscious recipes to elevate your cooking?
📋 Recipe

Spaghetti Squash Pizza Crust Recipe
5 from 3 votes
Print
Pin
Rate
Ingredients
- 4 cups cooked spaghetti squash (will reduce to 1 ½ cups after liquid removal; see notes for cooking methods. A 3 lb spaghetti squash yields 4-5 cups of cooked strands.)
- ½ cup shredded mozzarella cheese
- 1 large egg
- ¼ teaspoon dried oregano
- ¼ teaspoon garlic powder
Instructions
Preparation of Spaghetti Squash Strands
- After cooking, scrape 4 cups of spaghetti squash strands into a fine-mesh strainer. Place a clean bowl on top of the squash strands, press down firmly, and allow a significant amount of liquid to drain. Fold the strands towards the middle of the strainer and repeat the pressing process. This method helps to remove much of the excess moisture.
- To remove any remaining liquid, transfer the partially drained strands from the strainer to a clean, lint-free dishcloth. Gather the corners of the cloth and twist tightly, squeezing vigorously over a sink or bowl. Continue squeezing until no more liquid comes out. This crucial step will reduce the amount of squash to about 1.5 cups and is essential for a crispy, firm crust.
Forming and Baking the Crust
- Preheat your oven to 400°F (200°C).
- In a large mixing bowl, use a fork to break up the compressed spaghetti squash strands. Add the shredded mozzarella cheese, a large egg, dried oregano, and garlic powder. Mix all ingredients thoroughly until well combined and cohesive.
- Scoop portions of the mixture onto a baking sheet lined with parchment paper that has been lightly sprayed with cooking spray. Shape and flatten the “dough” into individual round crusts, aiming for an even thickness of about ¼ inch. Smaller, personal-sized pizzas are often easier to handle and crisp, but a large round or free-form crust can also be made.
- Place the prepared baking sheet into the preheated oven.
- Bake for approximately 15 minutes, or until the crusts are firm to the touch and the edges begin to turn golden brown and slightly crispy.
- The pre-baked pizza crust is now ready. It’s delicious on its own and can be enjoyed immediately, or allowed to cool completely before freezing for later use.
Adding Toppings and Final Bake
- Remove the pre-baked crusts from the oven and top with your desired pizza sauce and ingredients. Return the topped pizzas to the oven and bake for an additional 5-7 minutes, or until the cheese has melted and the toppings are heated through. Serve hot and enjoy your healthy, homemade spaghetti squash pizza!
Notes
To cook spaghetti squash whole in a slow cooker or oven:
- Poke 8-10 holes in the outer surface of the squash with a knife or fork.
- Place squash in a slow cooker or on a baking sheet in an oven preheated to 425 °F (220°C).
- Cook squash until the outer surface is soft to the touch and a knife can be inserted easily.
- Slow Cooker: 3-4 hours on high or 5-6 hours on low.
- Oven: 30 minutes, rolling over halfway through cooking.
- Allow spaghetti squash to cool for about 10 minutes, then carefully transfer to a cutting board using oven mitts or a towel. It will easily break apart.
- Cut in half lengthwise and remove seeds and fibrous strands.
To cut spaghetti squash in half and roast (for deeper flavor):
- To soften spaghetti squash for easier cutting:
- Poke 8-10 holes in the outer surface of the squash with a knife to allow steam to escape.
- Place squash on a microwave-safe plate and microwave for about 2 minutes, rotate, and microwave for up to 2 minutes more.
- Remove from microwave, cut the squash in half lengthwise, and remove seeds.
- Brush the inside of the squash halves with olive oil and season with salt and pepper.
- Place squash halves, cut-side down, on a sheet pan lined with parchment paper and bake for about 40 minutes at 375 °F (190°C), or until tender.
Freezer instructions for meal prep:
Once cooked and cooled, place pizza crusts with parchment paper in between each in a freezer-safe ziplock bag or airtight container. Remove excess air and store them in the freezer for up to 2 months. To enjoy, remove crusts to the refrigerator and defrost overnight. The next day, top and cook them in the oven as usual with your pizza toppings. Microwaving is not recommended, as it will cause the crust to become soggy.
Nutrition
Nutritional and Food Safety Disclaimer
This recipe was originally published on November 20, 2017, and has been thoroughly updated and revised to enhance the reader’s experience, incorporate more detailed instructions, and improve SEO compatibility.
