Crustless Quiche: The Ultimate Make-Ahead, Low-Carb Meal
Discover the effortless joy of preparing and freezing delicious crustless quiche with this comprehensive guide. This foundational recipe and process have been perfected over years in make-ahead meal prep kitchens, ensuring consistent, delightful results every time.
Perfect for those embracing a low-carb, ketogenic, or gluten-free lifestyle, skipping the crust transforms this classic dish into a healthy, satisfying option. Beyond the popular Ham and Cheese variant, we’ll explore easy substitutions, offer a wealth of tips, and answer all your essential questions to help you master this versatile dish.
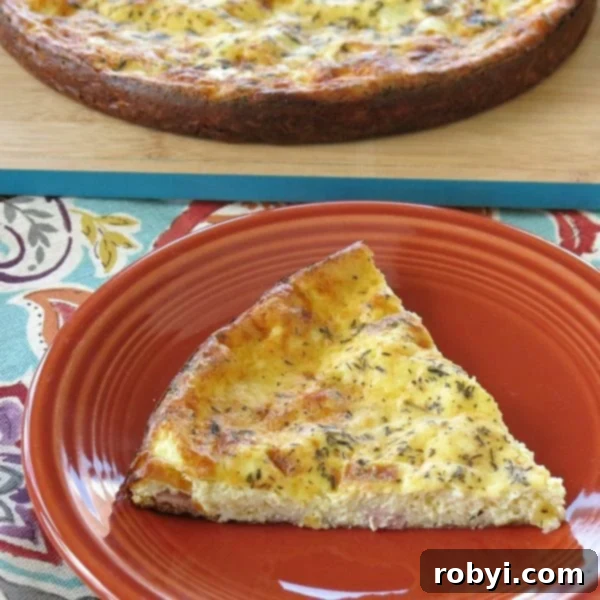
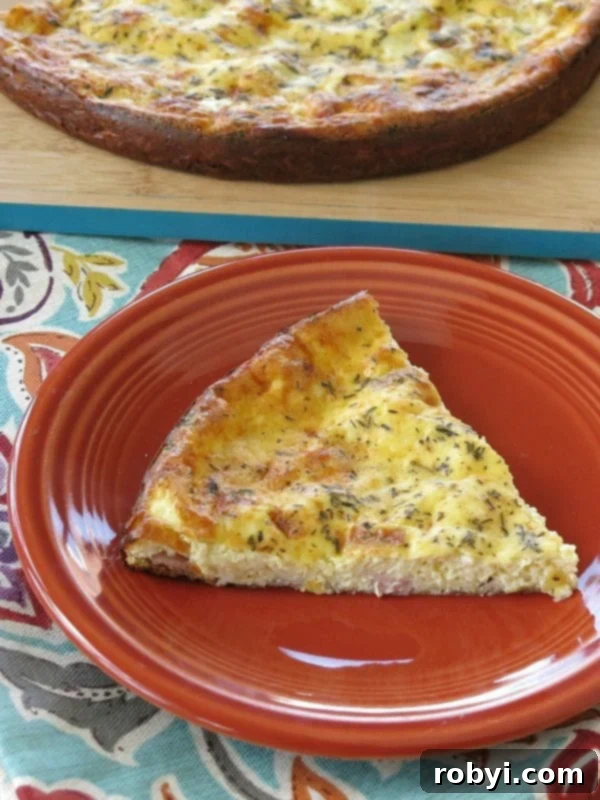
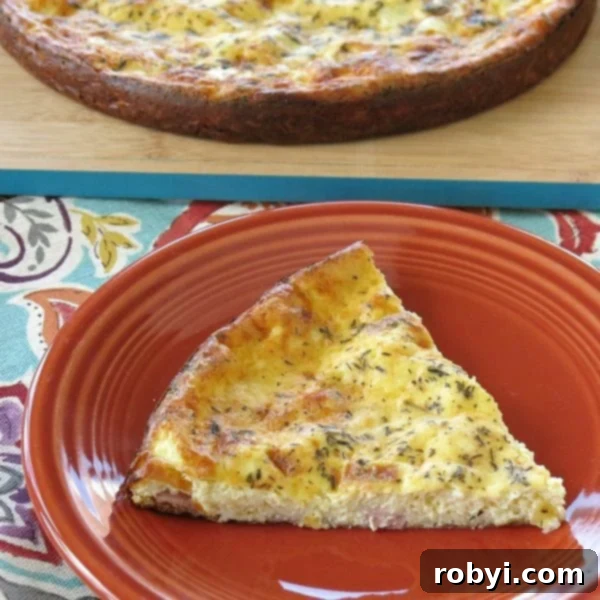
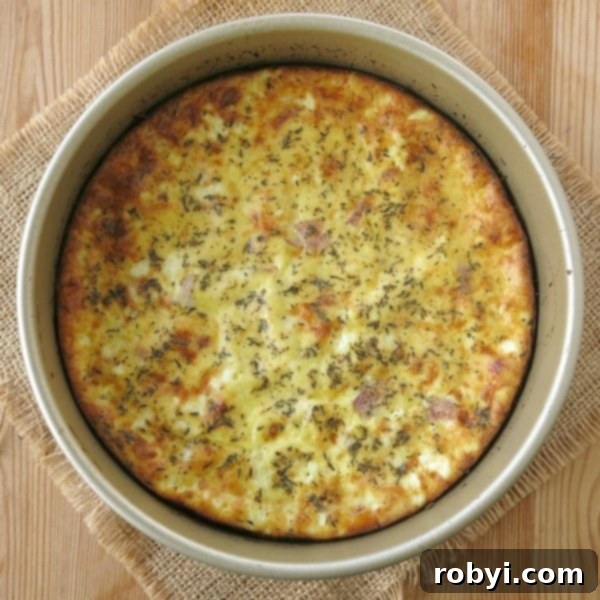
The image above showcases a perfectly baked Crustless Ham and Cheese Quiche, visually demonstrating the rich texture and appealing presentation achievable without a traditional crust. Its inviting appearance is quite similar to other popular variations like our Crustless Asparagus Quiche or even the savory Tomato Bacon Quiche. This consistency isn’t by chance; these recipes all leverage the same easy, adaptable formula for success. Even smaller portions, such as Ham Quiche Cups, utilize this basic, robust template.
It’s fair to say that a well-made crustless quiche is a freezer staple everyone should have on hand, especially for those committed to a low-carb diet. It seamlessly transitions from a hearty breakfast or brunch item to a light lunch or dinner when paired with a fresh salad. The convenience is unparalleled: simply grab a prepared bag from your freezer, allow it to defrost, and bake to perfection. This method ensures you have a consistently perfect crustless quiche, ready whenever hunger strikes. (And for those who prefer, rest assured that this adaptable filling works equally well with a traditional crust!)
Continue reading to delve into our tried-and-true process, discover the easy substitution formula to create your own unique flavors, and gather plenty of expert tips to elevate your quiche-making skills!
Why Choose Crustless Quiche?
Crustless quiche offers a multitude of benefits, making it a fantastic addition to any meal plan, particularly for health-conscious individuals or busy families:
- Dietary Adaptability: By omitting the crust, you instantly make this dish low-carb, ketogenic, and gluten-free. This opens up a world of culinary possibilities for those with specific dietary needs or preferences without compromising on flavor or satisfaction.
- Effortless Meal Prep: The inherent design of crustless quiche lends itself beautifully to make-ahead preparation. Whether you assemble it days in advance or freeze components for weeks, it significantly cuts down on active cooking time when you need a quick meal.
- Versatility for Any Meal: From a protein-packed breakfast to a light lunch or a comforting dinner served with a side salad, quiche is incredibly versatile. It’s also an excellent option for brunches, picnics, or potlucks.
- Reduced Calorie and Carb Intake: Eliminating the crust significantly lowers the overall calorie and carbohydrate count of the dish, supporting weight management and blood sugar control.
- Ingredient Flexibility: Quiche is a blank canvas for flavors. You can easily incorporate seasonal vegetables, leftover meats, and various cheeses, making it a great way to use up ingredients and prevent food waste.
- Freezer-Friendly: Both cooked and uncooked quiche fillings freeze exceptionally well, offering ultimate convenience for future meals. This means less stress during busy weekdays and more homemade goodness.
Mastering the Base Recipe: How to Make Crustless Quiche
At its heart, crustless quiche is simply a savory custard filling baked in a pan without a crust. The principle is straightforward: if a filling bakes well within a crust, it will certainly bake beautifully without one. Our tried-and-true recipe forms the perfect foundation for countless variations. Here’s a detailed breakdown of the components and process:
The Perfect Egg-to-Milk Ratio
The success of your quiche largely depends on achieving the right creamy yet firm texture. Our recipe advocates for a 5-to-1 ratio of large eggs to milk. For instance, five large eggs would be combined with one cup of milk. If you opt for extra-large eggs, adjusting to a slightly denser 4-to-1 ratio will yield an even firmer quiche. Remember to gently whisk the eggs until they are just combined, avoiding over-aeration, which can lead to a puffier, less stable quiche.
Choosing Your Dairy
While we typically use whole milk for its rich flavor and creamy texture, feel free to experiment with other dairy options. Skim milk will result in a lighter quiche, while half-and-half or heavy cream will produce an even more luxurious, decadent texture. The higher the milk fat content, the creamier and richer your finished quiche will be. Dairy alternatives like unsweetened almond milk can also work for those with specific dietary needs, though they may slightly alter the texture and richness.
Selecting the Right Cheese
Cheese is a fundamental element, adding both flavor and structure. Approximately 1 cup of shredded cheese is ideal for this recipe. Swiss cheese is a classic choice for egg-based dishes due to its mild, nutty flavor and excellent melting properties. However, cheddar, Gruyère, or Colby Jack are equally delicious alternatives that melt beautifully and offer distinct flavor profiles. Consider your personal preference and what pairs well with your chosen fillings. In our experience, very mild cheeses like mozzarella tend to disappear into the overall flavor profile, so opting for a cheese with more character is often recommended for maximum impact.
Incorporating Meats and Vegetables
The beauty of quiche lies in its adaptability when it comes to fillings. Aim for a total of about 1 ½ cups of your preferred meats and/or vegetables. Whether it’s diced ham, crumbled bacon, sautéed spinach, mushrooms, or asparagus, ensure all ingredients are cooked (if necessary) and thoroughly drained to prevent excess moisture from making your quiche watery. Excess moisture can be the enemy of a perfectly set quiche, so patting down cooked vegetables or squeezing liquid from spinach is a crucial step.
Seasoning Your Quiche
Proper seasoning elevates your quiche from good to great. For a balanced base flavor, we recommend starting with ¼ teaspoon of salt and ⅛ teaspoon of black pepper. Beyond the basics, experiment with herbs and spices to complement your chosen fillings. Thyme, basil, nutmeg, or a pinch of garlic powder are excellent additions. When developing new flavor combinations, use this initial seasoning as a benchmark and adjust according to taste in subsequent batches.
Once all your ingredients are prepped, combine them in a large mixing bowl. Whisk gently until everything is evenly distributed. Then, pour the mixture into your chosen pan, which should be thoroughly coated with cooking spray or butter to prevent sticking.
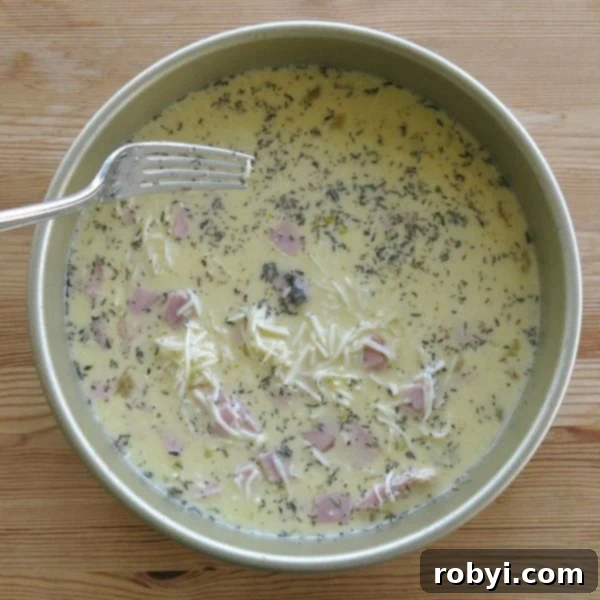
A Very Important Step: After pouring the mixture into the pan, take a fork and gently distribute the contents. This ensures that the meats, cheeses, and vegetables are evenly spread throughout the quiche, preventing clumping in one area. As seen in the example picture, ingredients can settle, so a quick stir with a fork ensures every slice is equally flavorful.
Baking Instructions
Preheat your oven to 350 degrees Fahrenheit (175°C). Bake the quiche for approximately 50-60 minutes, or until a knife inserted into the center comes out clean. The top should be lightly golden brown. If the top begins to brown too quickly before the center is fully set, simply cover it loosely with a piece of aluminum foil for the remainder of the baking time. Once baked, allow the quiche to set for another 10-15 minutes outside the oven before slicing and serving. This resting period is crucial for the quiche to firm up and prevent it from falling apart when cut.
It’s worth noting that this exact same process is followed when preparing a quiche with a traditional crust; the filling preparation and baking principles remain consistent.
Choosing the Right Pan for Your Crustless Quiche
One of the advantages of making crustless quiche is the freedom it offers in pan selection. Without the need to accommodate a pastry crust, you have many more options for shapes and sizes, each influencing the quiche’s thickness and baking time.
- Standard Round Pans: The quiche pictured in this article was baked in a 9-inch round aluminum pan. This size yields a moderately thick quiche, ideal for serving slices. Using an 8-inch round pan for the same amount of filling would result in a slightly thicker, denser quiche, which may require a few extra minutes of baking time.
- Muffin Tins: For individual portions perfect for grab-and-go breakfasts or appetizers, muffin tins are an excellent choice. This recipe easily adapts to standard muffin tins for mini crustless quiches. For even smaller bites, mini muffin tins work wonderfully. When using muffin tins, significantly reduce the baking time, typically to 15-25 minutes, depending on size. Always ensure they are thoroughly greased or lined with paper cups.
- Springform Pans: A springform pan is ideal if you want a tall, impressive quiche that’s easy to remove and present beautifully. The removable sides make unmolding a breeze, showcasing the clean edges of your crustless creation.
- Brownie Pans (Square or Rectangular): For a more casual, sliceable quiche, a square or rectangular brownie pan is a great option. This allows for easier cutting into uniform portions, especially useful for meal prepping or serving a crowd.
- Glass Pans: Glass baking dishes (like Pyrex) are also suitable. They distribute heat evenly and allow you to see when the edges are browning. Be aware that glass can sometimes cook a bit faster than metal, so monitor your quiche closely.
Regardless of the pan type you choose, remember that the cooking time will vary. Thicker quiches or those in denser materials like ceramic or glass may require a longer bake. Always use the “knife inserted comes out clean” test as your ultimate indicator of doneness.
Freezing for Future Feasts: How to Freeze Crustless Quiche
The make-ahead aspect is one of the greatest advantages of crustless quiche. You can freeze it either before or after cooking, depending on your meal prep strategy. Once your ingredients are prepped, assembling multiple bags for future meals becomes incredibly easy.
Freezing Uncooked Quiche Filling
If you plan for the quiche to ultimately be baked in a crust (which you’d add later) or prefer to bake fresh, freezing just the filling is an excellent method.
To freeze the filling before cooking:
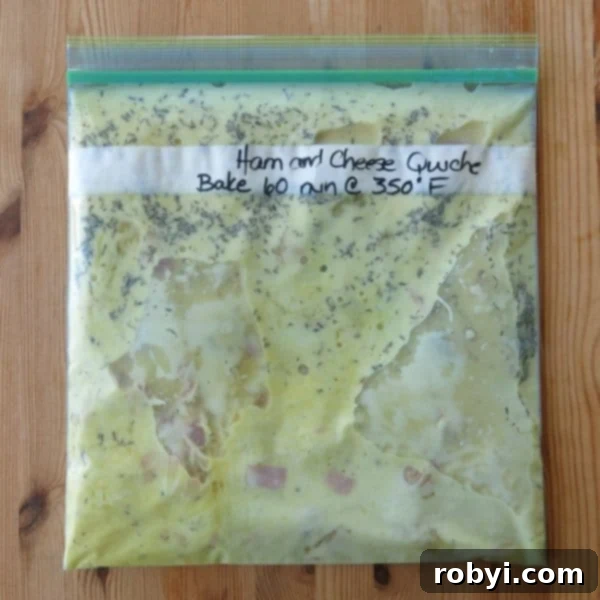
- Combine all prepped ingredients (eggs, milk, cheese, meat, vegetables, seasonings) in a gallon-sized freezer-safe ziplock bag.
- Seal the bag, removing as much excess air as possible, and gently shake or knead to mix the contents thoroughly.
- For extra protection against freezer burn and potential spills during defrosting, consider double bagging the filling by placing the first ziplock bag inside another.
- Lay the bag flat in your freezer. Freezing flat allows for quicker defrosting later and optimizes storage space.
- Don’t forget to label the bag with the recipe name, date, and basic cooking instructions. This ensures anyone in your household can easily prepare it.
To cook from frozen: Thaw the quiche filling in the refrigerator for approximately 24-36 hours. Once thawed, pour it into a greased pan and bake according to the cooking directions provided.
Freezing Cooked Crustless Quiche
Freezing a fully cooked quiche is perfect for instant meals or single-serving portions.
To freeze cooked quiche:
- Allow the freshly baked quiche to cool completely to room temperature. This is crucial to prevent ice crystals and maintain texture.
- For individual servings, cut the quiche into slices. Wrap each slice tightly in plastic wrap, then place the wrapped slices in a freezer-safe container or a larger freezer bag. This method makes it easy to grab just one portion at a time.
- To freeze an entire cooked quiche, wrap it tightly in several layers of plastic wrap, followed by a layer of aluminum foil. This double-layer protection is essential to prevent freezer burn.
- Label with the date.
Regardless of whether you freeze it cooked or uncooked, aim to use your frozen quiche within approximately 2 months for the best quality and flavor.
Reheating Your Frozen Crustless Quiche
Properly reheating ensures your make-ahead quiche tastes just as good as fresh. Here are a few methods:
- From Frozen (Individual Slices): For single portions, microwave from frozen on high in 30-second intervals until heated through. This usually takes about 1-2 minutes, depending on your microwave.
- From Frozen (Entire Quiche – Oven Method): If reheating an entire cooked quiche, preheat your oven to 350°F (175°C). Place the frozen quiche (unwrapped) in an ovenproof dish (the one it was originally baked in works perfectly). Cover it loosely with aluminum foil to prevent the top from burning or drying out. Heat for about 30-45 minutes, or until thoroughly heated through. Remove the foil for the last 5-10 minutes if you want to crisp up the top.
- From Thawed (Oven Method): If you’ve thawed a cooked quiche in the refrigerator, it will reheat much faster. Place it in a 350°F (175°C) oven, covered with foil, for 15-20 minutes, or until hot.
- Air Fryer (Individual Slices): An air fryer is excellent for reheating individual slices, making them crispy on the outside. Place a slice in the air fryer at 325°F (160°C) for 5-10 minutes, checking for doneness.
Creative Variations to Basic Crustless Quiche Recipe
The flexibility of this crustless quiche recipe allows for endless creativity. The key is to maintain a balance of approximately 1 ½ cups of cooked meat and/or vegetables and about 1 cup of shredded cheese. Don’t forget to adjust your seasonings to complement your chosen mix-ins!
- Quiche Lorraine: A timeless classic. Replace the diced ham with crispy, crumbled bacon. Enhance the flavor with about ½ cup of finely diced onion (sautéed until translucent) and a pinch of nutmeg, typically ⅛ teaspoon, instead of thyme.
- Quiche Florentine: For a vibrant, savory option, swap the ham for well-drained chopped spinach (ensure you squeeze out all excess moisture!). Add about ½ cup of sautéed diced onion and, as with Lorraine, a touch of nutmeg (⅛ teaspoon) for warmth.
- Mediterranean Delight: Combine crumbled feta cheese, chopped sun-dried tomatoes, Kalamata olives, and fresh oregano.
- Spicy Southwest: Mix in cooked ground sausage, diced bell peppers, corn, a sprinkle of chili powder, and Monterey Jack cheese.
- Garden Vegetable: Use a medley of your favorite seasonal vegetables like roasted red peppers, zucchini, broccoli florets, and sharp cheddar cheese.
- Other Popular Mix-ins: Experiment with Canadian bacon, sautéed mushrooms, cherry tomatoes (halved), or blanched asparagus spears.
Here are a couple of other fantastic flavor combinations that would also freeze exceptionally well:
- Tomato Bacon Quiche for a smoky and tangy profile.
- Spinach Feta Cheese Quiche by Organized Island, offering a salty, tangy, and earthy combination.
Looking for more easy, healthy, carb-conscious recipes and meal prep ideas?
Recipe: Make-Ahead & Freeze Crustless Ham and Cheese Quiche
Crustless Quiche to Make Ahead and Freeze
Pin Recipe
Don’t miss out on more delicious recipes! Enter your email below to get this recipe sent directly to your inbox, plus receive new healthy recipes each week!
Ingredients
- 5 large eggs lightly beaten
- 1 cup whole milk
- ½ cup diced ham
- 1 cup shredded Swiss cheese
- ¼ cup chopped green onion
- ½ teaspoon thyme
- ¼ teaspoon salt
- ⅛ teaspoon pepper
Instructions
Assembly
- Prepare all ingredients as indicated before beginning assembly.
- Add all ingredients to a gallon-sized ziplock bag (or a large bowl if you will be cooking it immediately) and combine them well.
- If cooking right away, proceed to the “Cooking Instructions” below.
- To freeze, seal the ziplock bag, ensuring you remove any excess air.
- For additional protection during freezing and defrosting, place the ziplock bag containing the egg mixture inside another ziplock bag.
- Consider printing these Recipe/Cooking instructions and placing them between the two bags for easy reference when you’re ready to cook the quiche.
- Store the bags in a flat position in your freezer to minimize defrosting time and maximize storage efficiency.
Cooking
- If frozen, thaw the quiche filling in the refrigerator for 24-36 hours.
- Preheat your oven to 350°F (175°C).
- Pour the thawed mixture into a pie or cake pan (or a prepared pie shell if you’re using one) that has been coated with cooking spray.
- Gently distribute the egg mixture and any fillings evenly with a fork.
- Bake uncovered for approximately 60-70 minutes, or until a knife inserted into the center comes out clean. The top should be lightly golden brown and the quiche will continue to set after being removed from the oven.
- Allow the quiche to sit for 10-15 minutes before cutting and serving. The internal temperature should reach 160°F (71°C) for food safety.
Nutrition
Troubleshooting Common Crustless Quiche Issues
Even with a straightforward recipe, sometimes things don’t go exactly as planned. Here are some common issues you might encounter and how to fix them:
- Quiche is Watery: This is almost always due to excess moisture from vegetables. Ensure you thoroughly cook and drain any high-water-content vegetables (like spinach, mushrooms, or zucchini) before adding them to the egg mixture. Squeeze out as much liquid as possible from cooked spinach. Also, avoid adding too many watery ingredients.
- Quiche is Too Rubbery: Overcooking is the usual culprit. Eggs can become rubbery when exposed to high heat for too long. Stick to the recommended baking time and temperature, and use the “knife inserted comes out clean” test as your guide. A slightly jiggly center that sets upon resting is often perfect.
- Quiche Doesn’t Set: If your quiche remains liquid in the center, it’s undercooked. Return it to the oven and continue baking, checking every 5-10 minutes. Ensure your oven temperature is accurate (an oven thermometer can help). An incorrect egg-to-milk ratio (too much liquid) can also be a factor.
- Ingredients Settle at the Bottom: While a quick stir with a fork after pouring into the pan helps, some heavier ingredients might still settle. To minimize this, ensure your heavier fillings are not too large or dense. You can also try chilling the quiche mixture slightly for 15-20 minutes before baking to help suspend ingredients.
- Top Browns Too Quickly: If the surface is getting too dark before the center is cooked, simply tent the quiche loosely with aluminum foil for the remaining baking time.
Frequently Asked Questions About Crustless Quiche
Can I make crustless quiche ahead of time for a party?
Absolutely! Crustless quiche is an excellent make-ahead dish. You can bake it completely, let it cool, then cover and refrigerate it for up to 3-4 days. Reheat gently in the oven at 300-325°F (150-160°C) until warm, or serve at room temperature.
How long does crustless quiche last in the refrigerator?
Cooked crustless quiche will keep well in an airtight container in the refrigerator for 3-4 days. For longer storage, freezing is recommended.
Is crustless quiche suitable for weight loss?
Yes, removing the crust significantly reduces the calorie and carbohydrate content, making it a very weight-loss-friendly option, especially when filled with plenty of vegetables and lean protein.
Can I use egg whites only?
You can, but using only egg whites will result in a much firmer, less creamy quiche. The yolks contribute richness and help with the custard’s texture. A blend of whole eggs and egg whites can offer a compromise if you’re looking to reduce fat or cholesterol.
What are some good low-carb vegetable additions?
Excellent low-carb vegetable choices include spinach, mushrooms, asparagus, broccoli, bell peppers (in moderation), zucchini, cauliflower, and onions. Always cook and drain them properly before adding to the mixture.
Do I need to grease the pan even if it’s non-stick?
Yes, it’s always a good idea to lightly grease or spray a non-stick pan, especially for crustless quiche. This provides an extra layer of insurance against sticking and helps ensure the quiche slides out cleanly.
Can I use frozen vegetables?
Yes, you can use frozen vegetables, but it’s crucial to thaw them completely and squeeze out any excess moisture before adding them to the egg mixture. Failure to do so will result in a watery quiche.
What’s the best way to tell if the quiche is fully cooked?
The most reliable method is to insert a thin knife or toothpick into the center of the quiche. If it comes out clean with no liquid egg clinging to it, the quiche is done. The center might have a slight jiggle, which will firm up as it cools.
