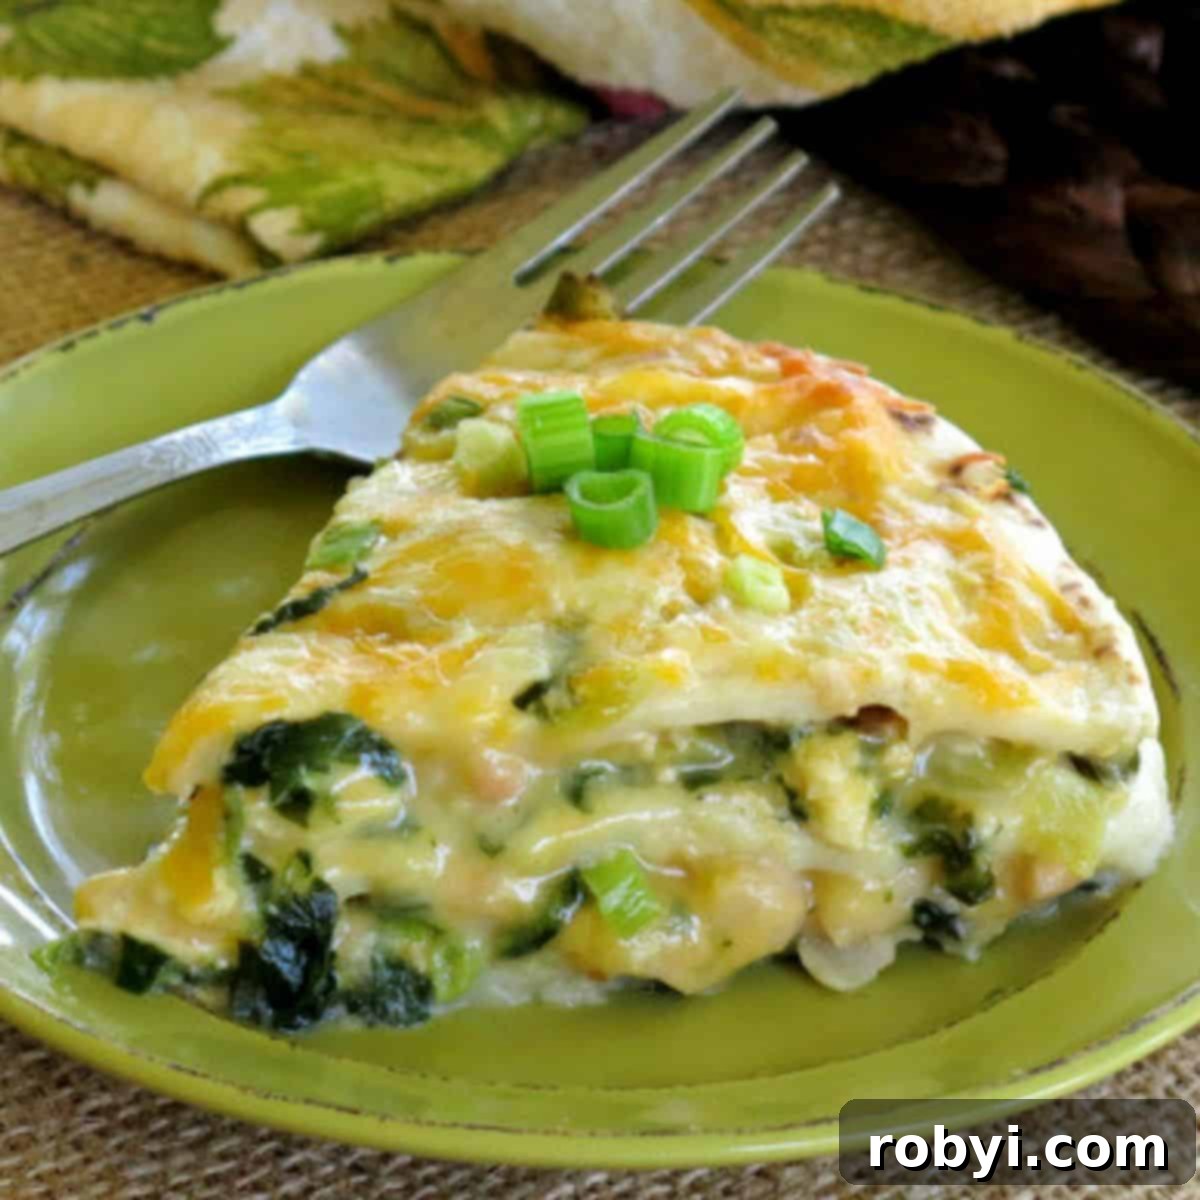
Welcome to the ultimate solution for effortless weeknight dinners: the Creamy White Chicken Enchilada Pie Casserole. This incredibly easy-to-make dish simplifies the traditional enchilada process by layering ingredients in a pan, completely eliminating the need for tedious rolling. Imagine a hearty, satisfying meal that’s not only a breeze to prepare but also perfect for feeding a crowd, making ahead for busy weeks, or stashing in the freezer for an emergency meal. Simply slice and serve this comforting casserole, especially when crafted with tender, flavorful leftover chicken.
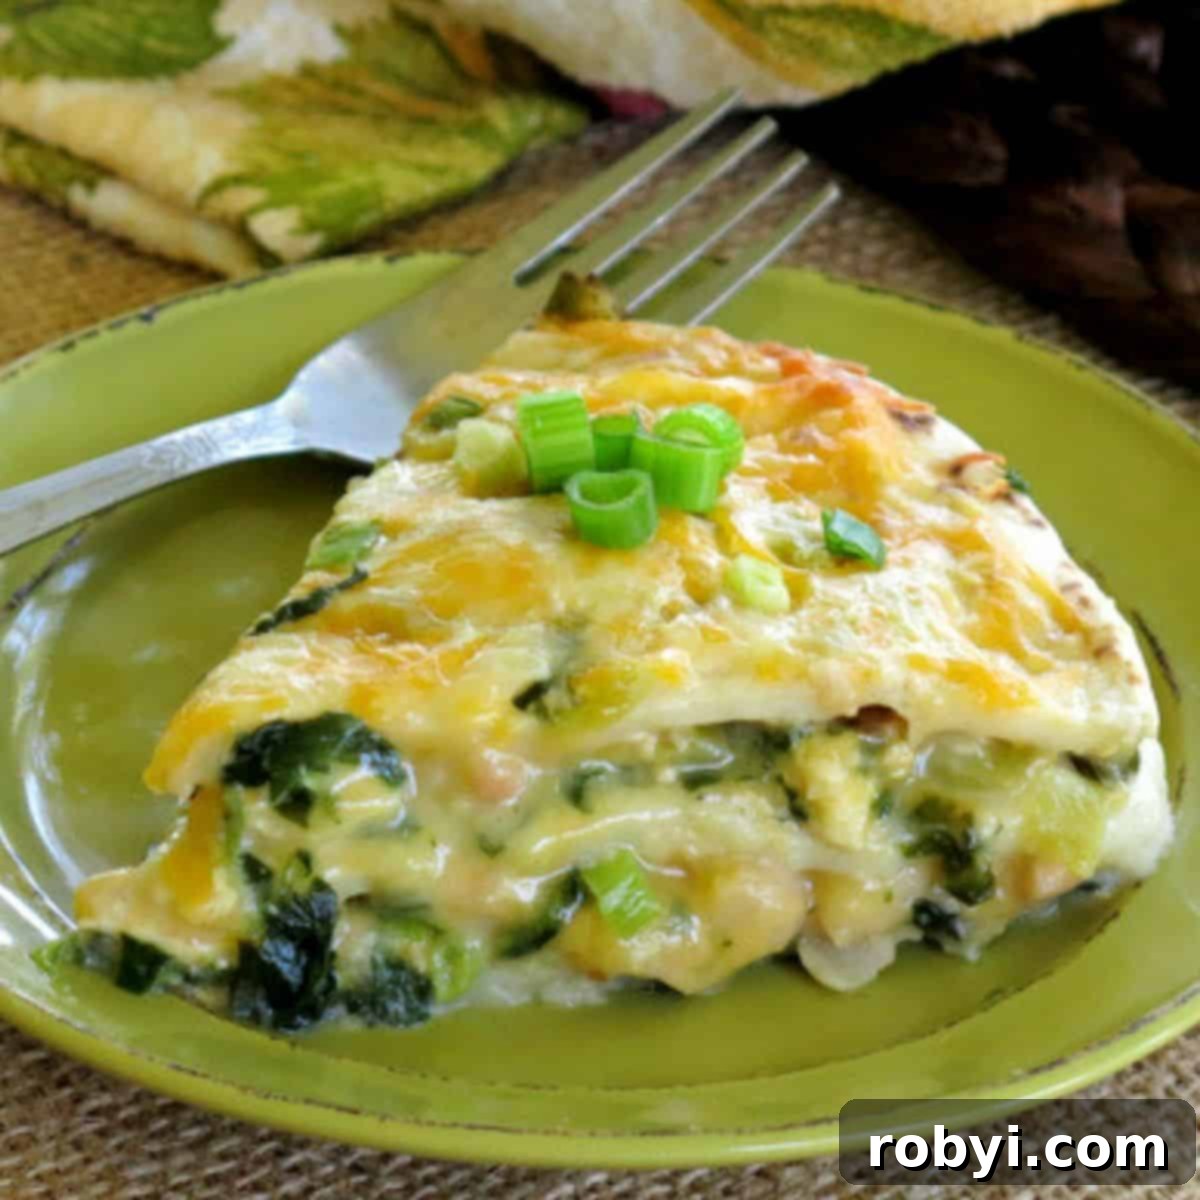
There’s nothing quite like the satisfaction of pulling a homemade meal from the freezer that tastes as fresh as if it were just prepared. This chicken enchilada pie is a prime example of such culinary magic. We often prepare this dish weeks in advance, knowing it will be a welcome treat on a night when cooking feels like too much effort. It’s a staple in our Healthy Make Ahead Freezer Meals collection, consistently delivering on flavor and convenience. Much like our popular Stacked Burrito Pie, this enchilada pie follows a simple layering concept, but it offers a distinct, creamy flavor profile that truly sets it apart.
The beauty of this recipe lies in its sheer simplicity and versatility. You’ll find yourself reaching for this recipe time and again for several compelling reasons:
- No Rolling Required: Forget the fuss and mess of rolling individual enchiladas. This pie-style casserole comes together quickly with layers of tortillas, chicken, beans, cheese, and a luscious sauce, making assembly a dream.
- Effortless Meal Prep: With only about 10-15 minutes of active preparation, this dish is a weeknight lifesaver. The oven does most of the work, leaving you hands-free to enjoy other activities. It’s even perfect for entertaining, as you can easily assemble it beforehand.
- Freezer-Friendly Marvel: This recipe is designed for freezing. Cook one tonight and freeze another for a busy week next month! It holds up beautifully, offering a delicious homemade meal whenever you need it most.
- Sneaky Veggies: We’ve cleverly incorporated extra vegetables, like spinach, into the creamy sauce, providing a stealthy health boost without compromising on taste. Even picky eaters won’t notice!
- Dietary Adaptability: Easily modifiable for various dietary needs, including low-carb. By simply swapping out a few ingredients, you can significantly reduce the carb count without sacrificing flavor.
- Uses Leftover Chicken: A fantastic way to utilize cooked chicken, whether it’s last night’s dinner, a store-bought rotisserie chicken, or a batch of Baked Lemon Pepper Chicken prepared specifically for this recipe.
The Heart of the Dish: Creamy White Enchilada Sauce
What truly distinguishes this enchilada pie from its traditional red sauce counterparts is its velvety, rich, and utterly irresistible creamy white sauce. This signature sauce infuses the casserole with a milder, yet deeply flavorful profile that is both comforting and sophisticated. Our unique blend combines everyday ingredients to create something extraordinary:
- Sour Cream or Yogurt: The base for creaminess. Using Greek yogurt can add a tangy twist and extra protein while keeping it lighter.
- Milk: Thins the sauce to the perfect consistency, ensuring it spreads evenly and melds beautifully with the other layers.
- Mild Green Chilies: These provide a subtle, earthy heat and authentic Southwestern flavor without overwhelming the dish. They are essential for that classic enchilada taste.
- Cumin: A touch of ground cumin adds warmth and a distinctive aromatic spice that complements the chicken and cheese wonderfully.
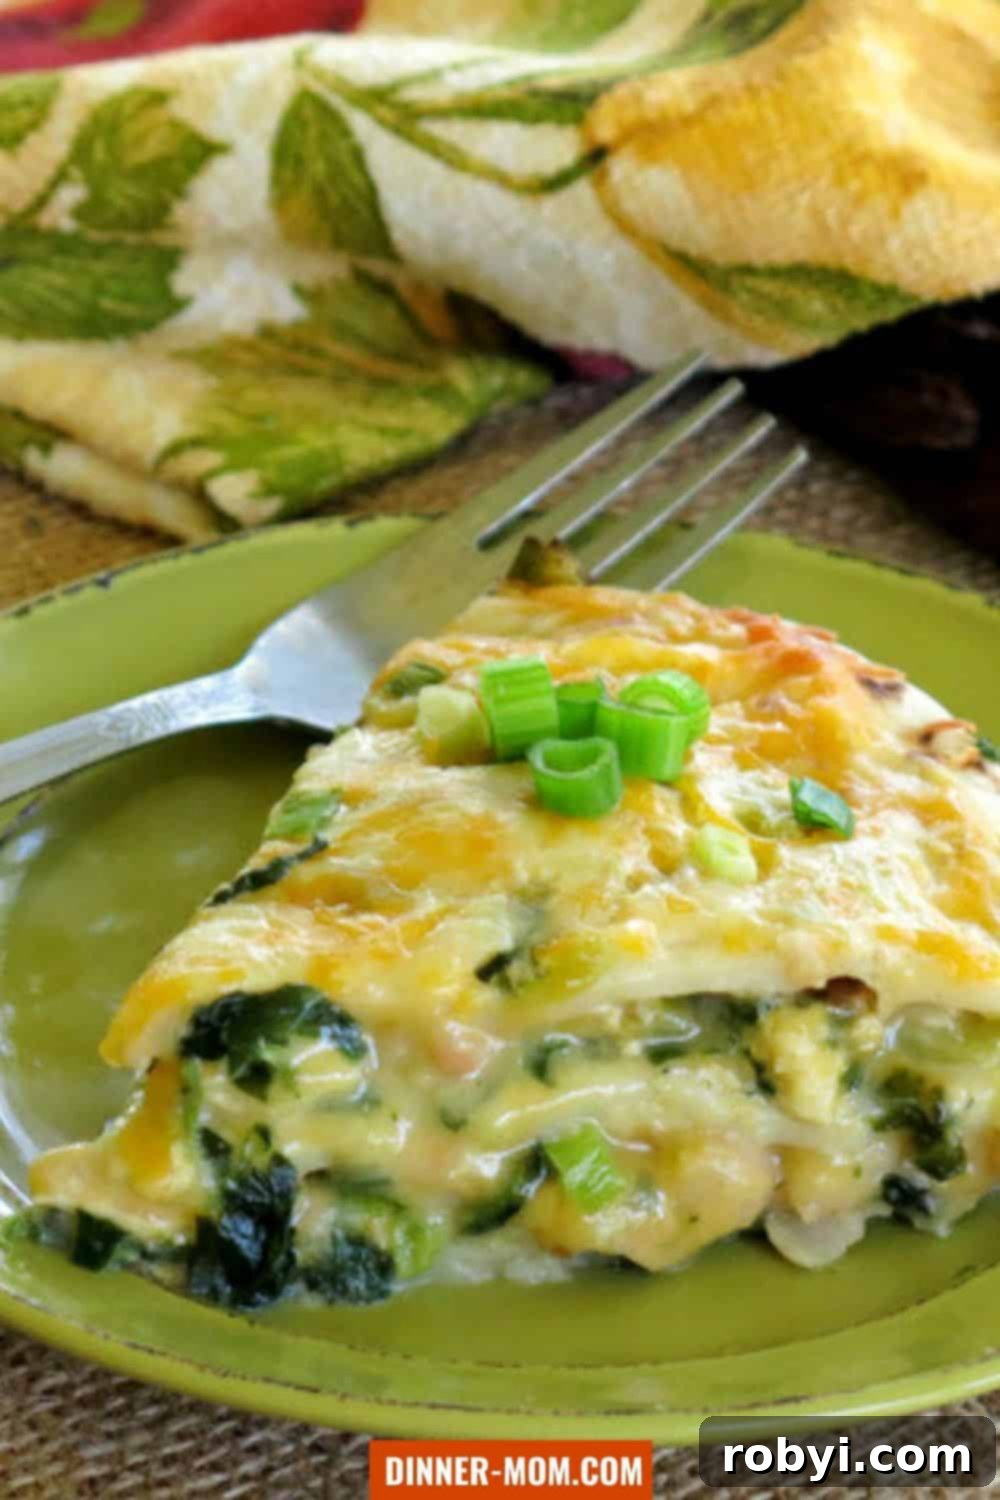
For an added nutritional kick, we love to stir in finely chopped spinach. As you’ll notice in the image below, the vibrant green blends seamlessly into the creamy white sauce. It’s incredibly difficult to detect among the savory chicken, rich cheese, and other components, making it an ideal way to incorporate extra greens into your family’s diet without a fuss. It’s a small addition that makes a big difference, allowing you to feel good about serving a truly wholesome meal.
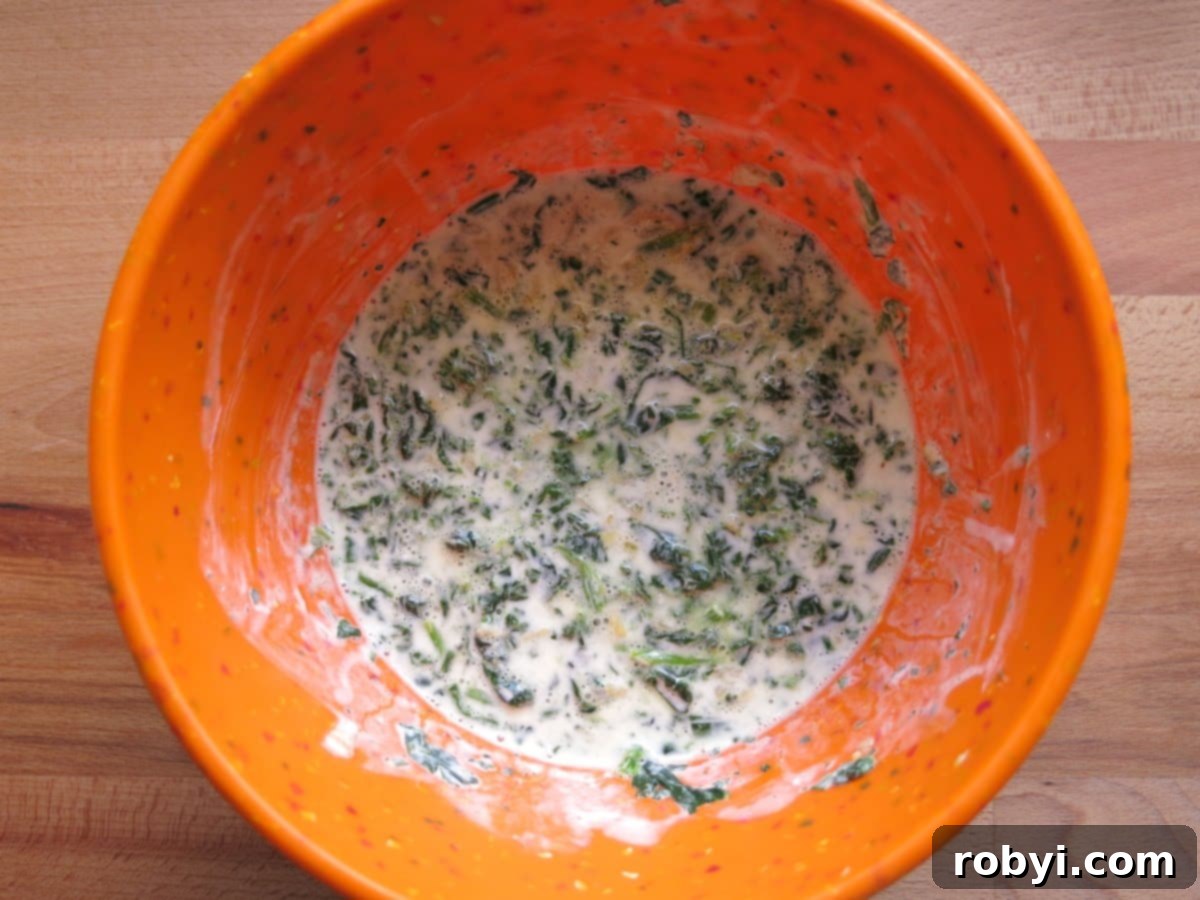
While this recipe celebrates the creamy white sauce, we understand some prefer the classic red enchilada flavors. If you’re craving a bold red sauce, we highly recommend checking out this fantastic homemade enchilada sauce recipe from Skinnytaste. It provides a different, but equally delicious, experience.
Assembling Your Enchilada Masterpiece: A Step-by-Step Guide
The beauty of this chicken enchilada pie lies in its effortless assembly. Forget the meticulous rolling of individual enchiladas; here, we focus on simple, impactful layers. To begin, select your baking dish. A round cake pan (8-9 inches) works perfectly for a pie-like presentation, but a square glass baking dish of similar dimensions is equally effective. The goal is for the tortilla to fit snugly or be easily trimmed to size at the bottom.
For larger gatherings or meal prepping, you might want to double the recipe. You can achieve this by preparing two separate cake pans or, more conveniently, by layering two tortillas side-by-side in a larger 9×13 inch casserole dish. This allows for a wider, rectangular pie that’s just as delicious and easy to serve.
The layering process is intuitive and satisfying:
- First Tortilla Layer: Place one flour tortilla firmly at the bottom of your chosen pan. This forms the base of your enchilada pie.
- First Sauce Layer: Generously spread a portion of your creamy white enchilada sauce over the tortilla. Ensure it’s an even coating to infuse flavor throughout.
- Protein & Bean Layer: Next, distribute half of your cooked chicken and half of the rinsed and drained Great Northern beans over the sauce. The beans add a wonderful texture and additional protein.
- Cheese & Aromatic Layer: Sprinkle about half a cup of shredded Monterey Jack cheese, followed by a spoonful or two of sliced green onions, adding freshness and a mild oniony bite.
You can see the perfect start to this layered delight in the image below.
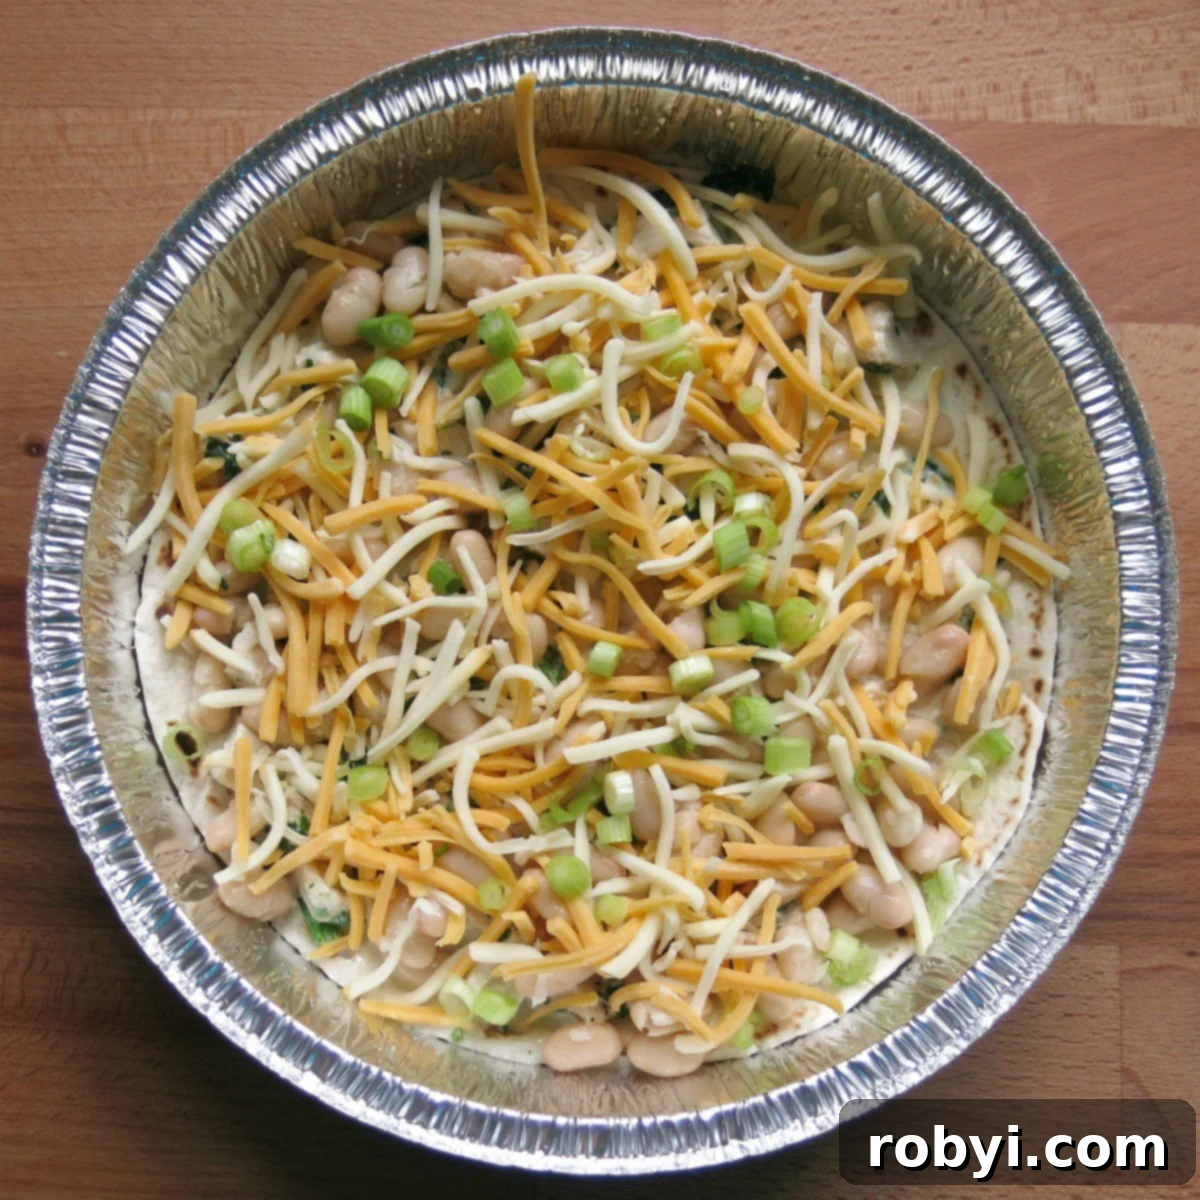
Once your first layer is complete, simply repeat the process. Place another flour tortilla on top, then add the remaining white sauce (reserving a small amount for the very top), the rest of the chicken and beans, and more shredded cheese and green onions. Finally, cap it all off with a third and final tortilla, spreading any leftover sauce and a generous final sprinkle of cheese for that golden-brown, bubbly finish. This three-layered structure ensures a substantial and satisfying pie.
While we typically use flour tortillas for their soft texture and ease of layering, don’t hesitate to substitute with corn tortillas if you prefer their distinct flavor and slightly firmer structure. For the cooked chicken, which is a key ingredient, you have several convenient options. Leftover roasted or grilled chicken works beautifully. A store-bought rotisserie chicken is a fantastic shortcut for busy days. Alternatively, you can always prepare a fresh batch of tender, shredded or diced chicken using our popular Baked Lemon Pepper Chicken recipe. Simply shred the cooked chicken with two forks or dice it into small cubes to integrate seamlessly into the pie.
Achieving a Low-Carb Chicken Enchilada Pie
For those mindful of their carbohydrate intake, this chicken enchilada pie recipe is surprisingly adaptable. With a few simple substitutions, you can significantly reduce the carb count without compromising on the rich, satisfying flavors you love. Here are our top suggestions for making this dish low-carb friendly:
- Choose Your Tortillas Wisely: The most significant carb reduction comes from replacing standard flour tortillas. Opt for low-carb or even zero-carb flour tortillas, which are widely available in most grocery stores today. These alternatives provide the necessary structure without the added carbs.
- Bean Alternatives: Great Northern beans, while nutritious, do contribute to the carb count. For a truly low-carb version, consider replacing them entirely with more non-starchy vegetables. Sautéed zucchini slices, riced cauliflower, or finely chopped bell peppers are excellent choices that add volume, nutrients, and flavor without the carbohydrates.
- Moderate Your Cheese: While cheese is a delightful part of any enchilada, portion control can help. Use cheese in moderation, focusing on high-flavor varieties like sharp cheddar or Monterey Jack, so a little goes a long way.
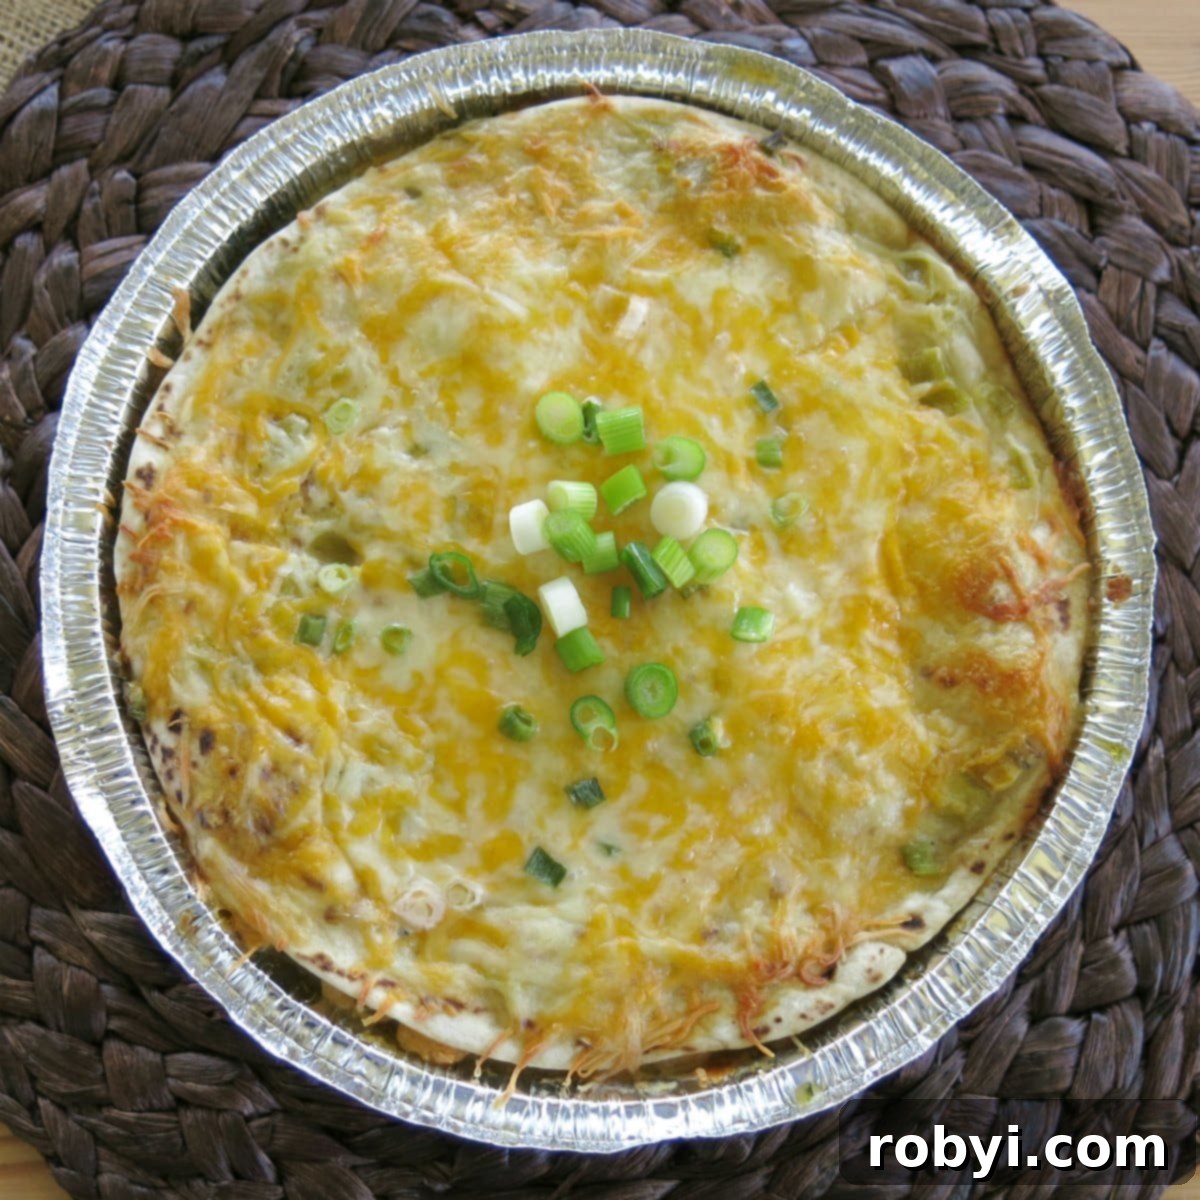
With these simple adjustments, you can enjoy a delicious and satisfying low-carb chicken enchilada pie that fits perfectly into your dietary goals. The finished product, as seen below, will still be a golden, bubbly, and incredibly appealing casserole.
The Ultimate Convenience: Freezer Instructions
One of the standout features of this Creamy White Chicken Enchilada Pie is its incredible freezer-friendliness. This makes it an ideal candidate for batch cooking and meal prepping, saving you invaluable time and effort on busy days. Why make just one when you can easily prepare two (or even more!) for later enjoyment? These pies freeze beautifully, maintaining their delicious flavor and texture once reheated.
For example, the enchilada pie pictured throughout this article was assembled approximately three weeks before it was finally baked and devoured. The process for freezing is straightforward:
- Assemble as Directed: Follow the recipe instructions to assemble the enchilada pie in an 8-9 inch round or square pan, up to the point where it’s ready for baking (before covering with foil for the initial bake).
- Freezing Method 1 (Direct Freeze): If your baking dish is freezer-safe and you plan to bake in it later, simply cover the assembled pie tightly with aluminum foil, then wrap it again with plastic wrap to prevent freezer burn. Label with the date and cooking instructions, then place directly into the freezer.
- Freezing Method 2 (Foil Sling Method): For easier storage and to free up your baking dish, line your cake pan with aluminum foil, leaving enough overhang to cover the top. Assemble the pie directly in the foil-lined pan. Once assembled, place the pan in the freezer for a few hours, or until the pie has firmed up completely. Once solid, you can lift the entire foil-wrapped pie out of the pan, fold the foil securely over the top, and store it as a compact block in the freezer. When you’re ready to cook, simply unwrap it and return it to the original cake pan you plan to bake in. This “easy peasy” method is excellent for maximizing freezer space!
When the time comes to enjoy your frozen enchilada pie, you have a couple of options:
- Defrosting First: For best results, transfer the frozen pie to the refrigerator approximately 24 hours before you plan to cook it. Once defrosted, bake according to the recipe directions.
- Cooking from Frozen: If you’re in a pinch, you can bake the pie directly from frozen. Be aware that this will approximately double the cooking time. Ensure the pie is thoroughly heated through by using a meat thermometer to check that the internal temperature reaches 145°F (63°C).
Regardless of whether you defrost it or cook it from frozen, the result will be a warm, bubbly, and incredibly satisfying meal that tastes just like homemade without the last-minute rush.
Ready for more easy, healthy, and carb-conscious recipes delivered straight to your inbox?
📋 Recipe: Creamy White Chicken Enchilada Pie Casserole
This Creamy White Chicken Enchilada Pie Casserole offers all the beloved flavors of chicken enchiladas in a convenient, layered pie format. Say goodbye to rolling and hello to an easy-to-make, freezer-friendly meal that’s perfect for busy weeknights or entertaining guests. The unique creamy white sauce, packed with mild green chilies and a hint of cumin, sets this dish apart, making it a family favorite.
Ingredients
- ½ cup sour cream or plain Greek yogurt
- ½ cup milk (any kind)
- ¼ teaspoon ground cumin
- 1 (4.5 ounce) can mild chopped green chilies, undrained
- 1 cup chopped spinach, partially defrosted (if frozen) and squeezed dry so it crumbles easily
- 2 cups cooked chicken, diced or shredded
- 3 flour tortillas (8-9 inches), low-carb or whole wheat recommended
- 1 (15 ounce) can Great Northern beans, rinsed and drained
- 1 ½ cups shredded Monterey Jack cheese (or a Mexican blend)
- 1 bunch green onions, thinly sliced (for garnish and layers)
Instructions
- Preheat your oven to 350°F (175°C).
- In a small bowl, combine the sour cream (or yogurt), milk, cumin, and the can of mild green chilies. Mix well until thoroughly combined.
- Remove about ¼ cup of this creamy mixture and set it aside. This will be used for the top layer.
- Add the chopped spinach to the remaining creamy mixture and stir until the spinach is evenly distributed.
- Place one flour tortilla in the bottom of an 8 or 9-inch round cake pan or square baking dish.
- Spread half of the spinach-infused white sauce (about ¾ cup) evenly over the tortilla.
- Layer over the sauce mixture: half of the cooked chicken, half of the rinsed Great Northern beans, ½ cup of shredded cheese, and 2 tablespoons of sliced green onion.
- Place a second flour tortilla on top of these layers. Repeat steps 6 and 7 with the remaining chicken, beans, sauce, cheese, and green onions.
- Place the third and final flour tortilla on top of the second layer.
- Spread the ¼ cup of reserved plain white sauce mixture evenly over the top tortilla, then sprinkle with the remaining ½ cup of shredded cheese.
- Garnish generously with extra sliced green onions.
- Cover the pan loosely with aluminum foil and bake for 30 minutes.
- Remove the foil and continue to bake for another 10-15 minutes, or until the cheese is melted, bubbly, and slightly golden, and the casserole is heated through.
- Allow the enchilada pie to rest for about 5 minutes before slicing and serving. This helps the layers set for cleaner cuts.
Notes and Tips for Success
- Make Ahead and Freeze: To prepare this enchilada pie for freezing, assemble the recipe through step 11 (before baking). Wrap the assembled pie tightly with multiple layers of aluminum foil, then an outer layer of plastic wrap to prevent freezer burn. Store in the freezer for up to two months. When ready to enjoy, defrost the pie in the refrigerator for approximately 24 hours. Once thawed, bake according to the directions.
- Cooking from Frozen: If you’re short on time, you can bake the assembled pie directly from frozen. This will likely double the cooking time. Ensure the internal temperature reaches 145°F (63°C) using a meat thermometer to confirm it’s thoroughly heated.
- Cooked Chicken Options: The recipe calls for cooked chicken, offering great flexibility. Utilize leftover chicken from a previous meal, shred a store-bought rotisserie chicken for ultimate convenience, or prepare extra chicken specifically for this recipe using your preferred method, like our Baked Lemon Pepper Chicken. Shred or dice the chicken to your liking.
- Doubling the Recipe: Easily scale up this recipe for larger families or future meals. Simply make two separate pies in two 8 or 9-inch pans, or arrange two tortillas side-by-side in a larger 9×13 inch casserole dish to create a rectangular pie. Adjust ingredient quantities accordingly.
- Low-Carb Modifications: If you are monitoring your carbohydrate intake, these simple substitutions can help:
- Swap regular flour tortillas for low-carb or no-carb varieties.
- Replace Great Northern beans with additional non-starchy vegetables such as zucchini, cauliflower rice, or bell peppers.
- Consciously limit the amount of cheese used to further reduce calories and carbs.
Don’t miss out on delicious, healthy eating! Grab our guide to 5 Low-Carb Sauces and get more easy, healthy recipes delivered weekly. JOIN HERE
Nutrition Information (Approximate Per Serving)
Calories: 367kcal | Carbohydrates: 28g | Protein: 20g | Fat: 20g | Saturated Fat: 12g | Cholesterol: 56mg | Sodium: 385mg | Potassium: 530mg | Fiber: 7g | Sugar: 4g | Vitamin A: 1288IU | Vitamin C: 8mg | Calcium: 446mg | Iron: 2mg
Please note: Nutritional information is an estimate based on ingredients used and may vary depending on specific brands and preparation methods.
Nutritional and Food Safety Disclaimer
