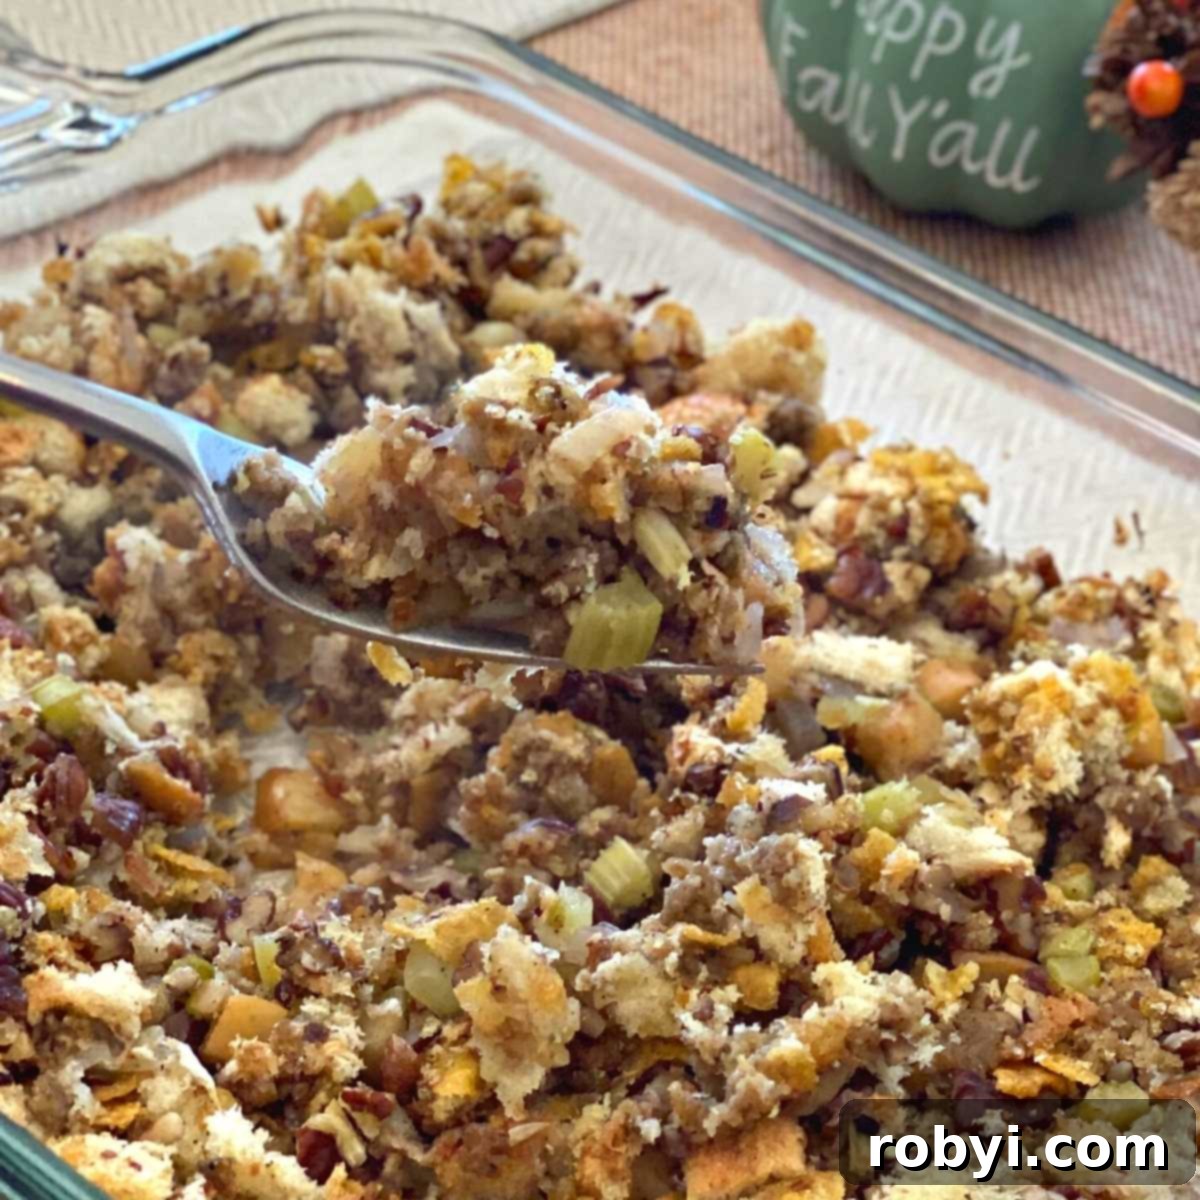
Oven Baked Stuffing, lovingly crafted with fresh bread, crisp apples, and crunchy pecans, is destined to be the crowning glory of your holiday dinner table. Imagine the ease of preparing this magnificent side dish ahead of time, allowing you to simply cross it off your bustling holiday to-do list and savor the festive moments.
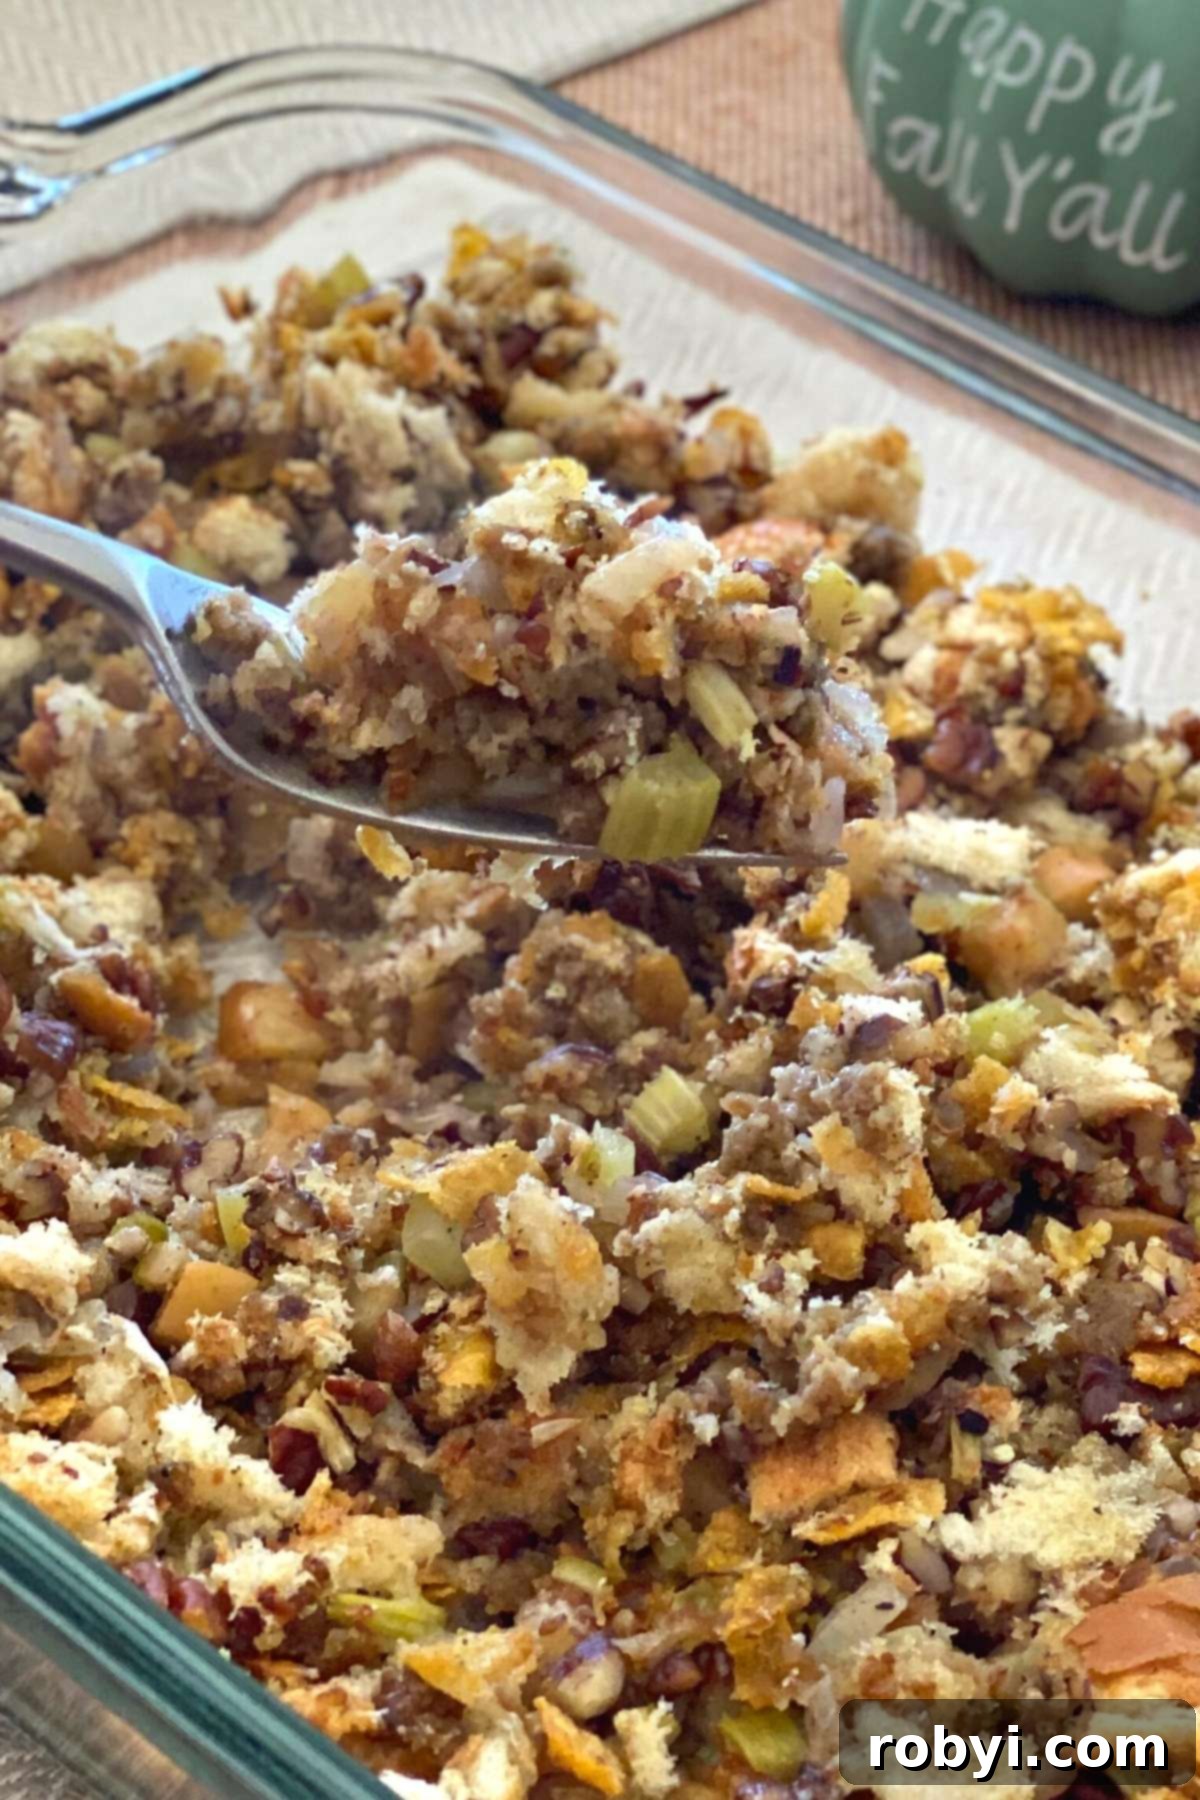
Unlock the secrets to crafting the best bread stuffing from scratch, using our cherished family recipe. This treasured culinary gem has been passed down through generations, its perfection so undeniable that not a single ingredient or step has been altered. A single bite, and you too will understand why it’s so incredibly good – you’ll be utterly captivated!
While this versatile recipe can certainly be used to stuff a turkey, we traditionally bake it separately in casserole dishes. This method ensures every portion boasts a perfectly crispy, golden-brown, buttery top, a beautifully moist and flavorful interior, with delightful pops of sweet apple and an unexpected, satisfying crunch from our secret ingredient: cornflakes!
We often prepare at least two pans for holiday gatherings – one classic vegetarian version, and another rich with savory sausage for those who enjoy a meatier option. Given its immense popularity, we always make extra. These delicious leftovers are absolutely divine when paired with sliced turkey and our creamy mashed potatoes, extending the holiday cheer well beyond the main event.
This is the very same make-ahead stuffing recipe we perfected and served at our family stores, renowned for its incredible convenience and consistent flavor. Preparing it a day or two in advance not only saves valuable time on busy holiday mornings but also allows the flavors to meld and deepen beautifully. For ultimate convenience, consider freezing a few pans for later occasions, especially if you plan to host another turkey dinner in December or simply want a taste of the holidays anytime.
Whether gracing your grand holiday table, complementing a weeknight meal of succulent pork chops, or serving alongside flavorful herb-crusted chicken, this delightful dressing is guaranteed to be a spectacular hit with everyone who tries it. Its rich flavors and comforting textures make it a universally loved dish.
Why This Homemade Stuffing is a Must-Make
What makes our Oven Baked Stuffing truly exceptional and a perennial favorite? It’s a harmonious blend of classic comfort and delightful surprises, ensuring it shines on any plate. Unlike many dry or overly soft stuffings, ours strikes the perfect balance: a gloriously crisp, golden-brown crust gives way to a tender, moist interior. Each spoonful offers a symphony of textures and flavors – the comforting softness of bread, the subtle sweetness of apple, the savory depth of sautéed aromatics, and the satisfying crunch of pecans and our secret ingredient, cornflakes.
The beauty of this recipe also lies in its adaptability and make-ahead convenience. Holiday cooking can be notoriously stressful, but this stuffing allows you to tackle a significant portion of the prep work days in advance, freeing you up to enjoy your guests and the festive atmosphere. Its robust flavor profile makes it suitable for both elaborate feasts and simple weeknight dinners, proving that a truly great dish transcends special occasions.
Essential Ingredients for Perfect Homemade Stuffing
Creating an unforgettable oven-baked stuffing begins with a selection of high-quality ingredients, each playing a crucial role in the final flavor and texture. Below, we’ve detailed the components of our beloved recipe, along with thoughtful variations to inspire you. Feel empowered to customize this recipe by adjusting quantities or adding your favorite elements, making it truly your own heirloom creation.
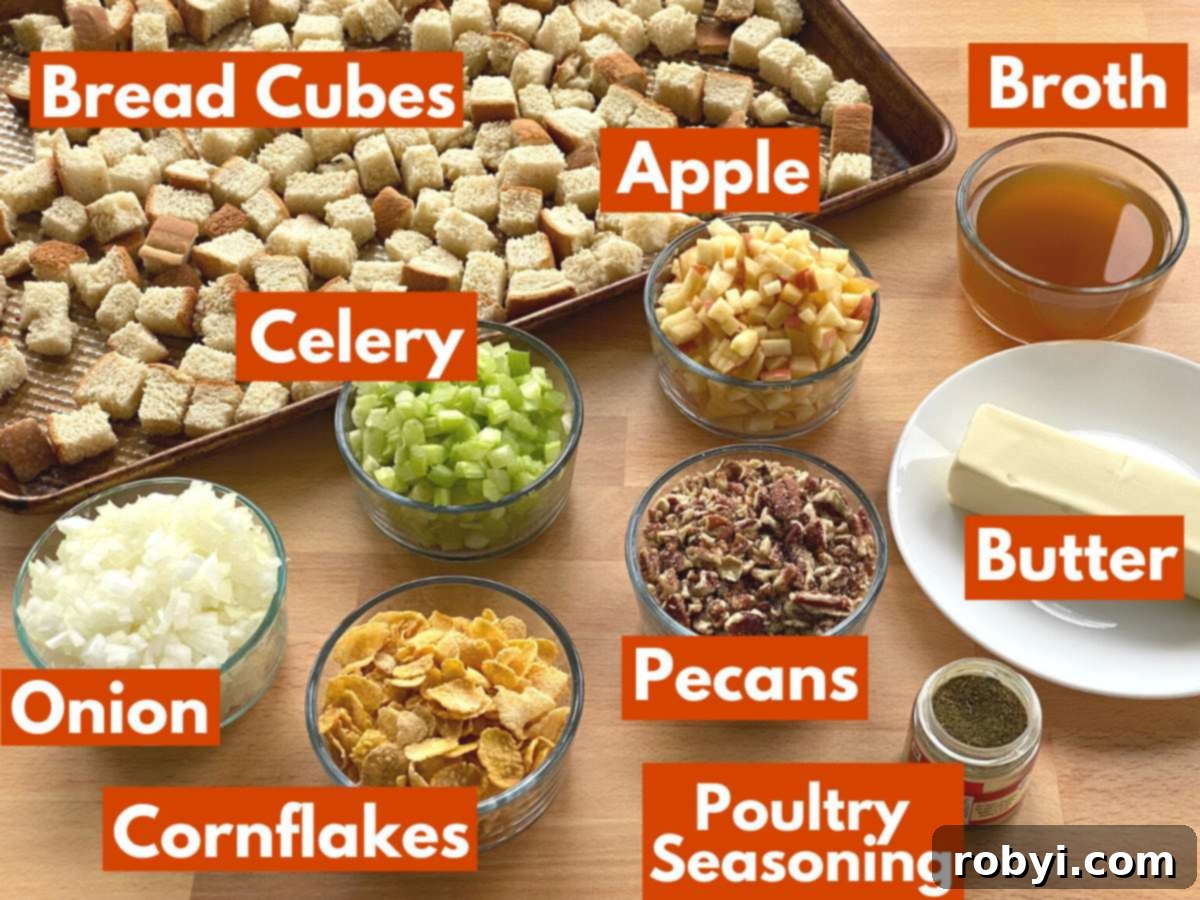
- Fresh Bread: The Foundation
- We always begin with a quality, fresh loaf of sandwich bread. Its inherent moisture and structure are ideal for absorbing flavors without becoming overly dense. Opt for bread with dense, thick slices as they hold up beautifully during the cooking process, providing a satisfying chew.
- Bread Choices: While some cooks swear by the classic softness of Wonder Bread, others prefer the rustic texture of French bread or sourdough for a tangier note. For those with dietary considerations, readily available egg-free, dairy-free, or gluten-free bread options can be seamlessly incorporated. To make this recipe low-carb, simply substitute with keto-friendly bread.
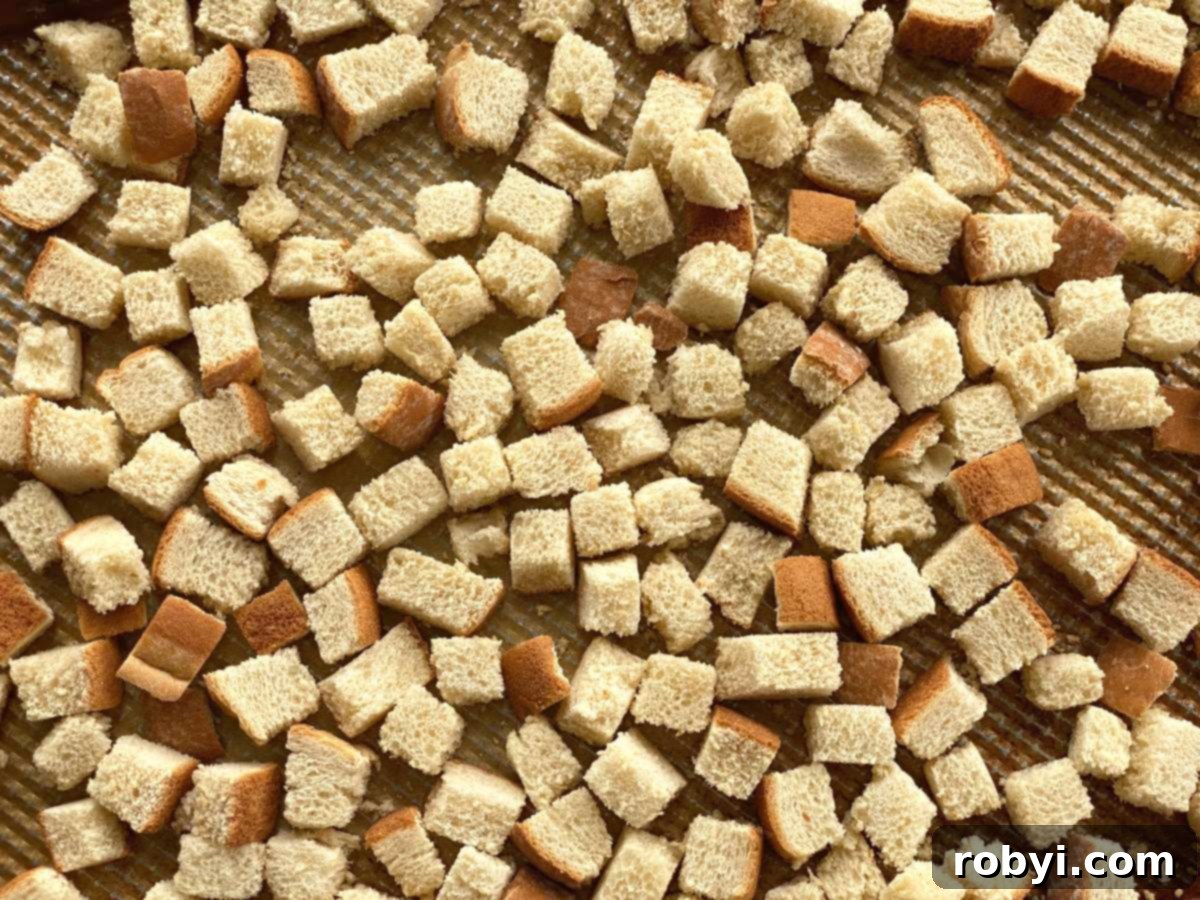
- Preparation: Using a sharp serrated knife, cut the bread into uniformly-sized ½-inch cubes. Uniformity is key for even drying and cooking. Alternatively, you can tear the bread into rustic pieces for a more varied texture. The next crucial step is lightly drying these bread cubes to prevent a soggy stuffing, which we’ll detail below.
- Celery and Onion: The Aromatic Base
- These quintessential ingredients form the aromatic backbone of any classic stuffing recipe. Finely dicing them allows their flavors to meld seamlessly into the dish and ensures they soften perfectly during sautéing, releasing their sweet and savory notes.
- Pecans or Walnuts: The Nutty Crunch
- Chopped pecans or walnuts add a delightful textural contrast and a rich, earthy flavor that complements the other ingredients beautifully. Chop them coarsely with a knife or use a food processor for a quicker chop. For a nut-free stuffing, simply omit this ingredient; the cornflakes will still provide a satisfying crunch.
- Apple: Sweet and Tangy Surprises
- Sweet apples, such as Ambrosia, Honey Crisp, Royal Gala, Pink Lady®, Red Delicious, and Fuji, are ideal for this recipe. Cut them into small, uniform cubes to ensure they soften and release their sweet-tart juices evenly, adding a bright, fresh counterpoint to the savory elements.
- Fruit Variations: For an alternative twist, consider incorporating dried cranberries, tart cherries, or chopped dried apricots. These add a concentrated burst of fruit flavor and a chewy texture, creating a wonderful depth to the stuffing.
- Cornflakes: Our Secret Crunchy Weapon
- This unassuming ingredient is our secret weapon, delivering an unexpected and utterly delightful crunch that elevates the stuffing beyond the ordinary. Lightly crushed, cornflakes create a unique texture that sets this recipe apart.
- Butter: Richness and Flavor
- Unsalted butter provides rich flavor and helps achieve that irresistible crispy, golden crust. For a vegan stuffing recipe, a high-quality plant-based alternative can be used without compromising taste or texture.
- Poultry Seasoning: The Essence of Tradition
- This carefully balanced spice blend is vital for imparting that classic, comforting “cooked in the bird” flavor profile, even when baked separately. You can purchase a pre-made jar or easily prepare your own blend using herbs like sage, thyme, rosemary, and marjoram.
- Broth: Moisture and Depth
- Vegetable or chicken broth adds essential moisture and savory depth, ensuring the stuffing remains tender and flavorful. If preferred, water can be used, though broth will enhance the overall richness.
- Sausage (Optional): A Hearty Addition
- For a heartier, meat-lover’s version, mild pork sausage is an excellent addition. Be sure to cook it thoroughly and drain any excess grease on a plate lined with paper towels before incorporating it into the stuffing mixture. This step is crucial for preventing a greasy final product.
If you appreciate the flavors of this recipe, you might also enjoy our individual Stuffing Muffins, which share many of these delightful ingredients!
Please refer to the complete recipe card below for the full list of ingredients with precise measurements and detailed, step-by-step instructions.
The Secret to Perfect Texture: How to Dry Fresh Bread in the Oven
A crucial step in achieving perfectly textured stuffing – one that is moist yet never soggy – is to properly dry out your bread. Traditionally, stale bread was used, but modern recipes often call for fresh bread that is then lightly dried. This process allows the bread cubes to absorb the flavorful broth and other liquids without turning into an unappetizing mush.
While drying the bread is less critical when the stuffing is cooked outside the turkey, as it won’t absorb raw turkey juices, having slightly firm bread is still a very good idea. The other ingredients, particularly the broth, apples, and sautéed vegetables, introduce a significant amount of moisture during the cooking process, and properly dried bread will maintain its structure and contribute to a superior texture.
Simple Steps to Oven-Dry Your Bread Cubes:
- Preheat your oven: Set your oven to a low temperature, specifically 250°F (120°C). The goal is to gently dry the bread, not toast or brown it.
- Arrange the bread: Spread your ½-inch bread cubes in a single, even layer on a large baking sheet. Avoid overcrowding, as this can lead to uneven drying. If necessary, use two baking sheets.
- Bake and toss: Cook the bread cubes for approximately 15 minutes. During this time, toss them gently every 5 minutes or so with a spatula or your hands to ensure they dry evenly on all sides.
- Check for doneness: The bread cubes should feel firm and somewhat crisp on the outside, but still retain a slight softness in the center. They should not be browned or crunchy like croutons.
- Taste test: Pick one cube and give it a try. It should be firm enough to hold its shape but still tender inside, ready to soak up all the delicious flavors of your stuffing.
Step-by-Step Guide to Making Oven Baked Stuffing
The hands-on preparation for this delightful recipe is primarily focused on the initial chopping and dicing of ingredients. Once your components are prepped, assembling and baking this oven baked stuffing is remarkably straightforward and rewarding. Follow these detailed steps to create a dish that will impress every guest:
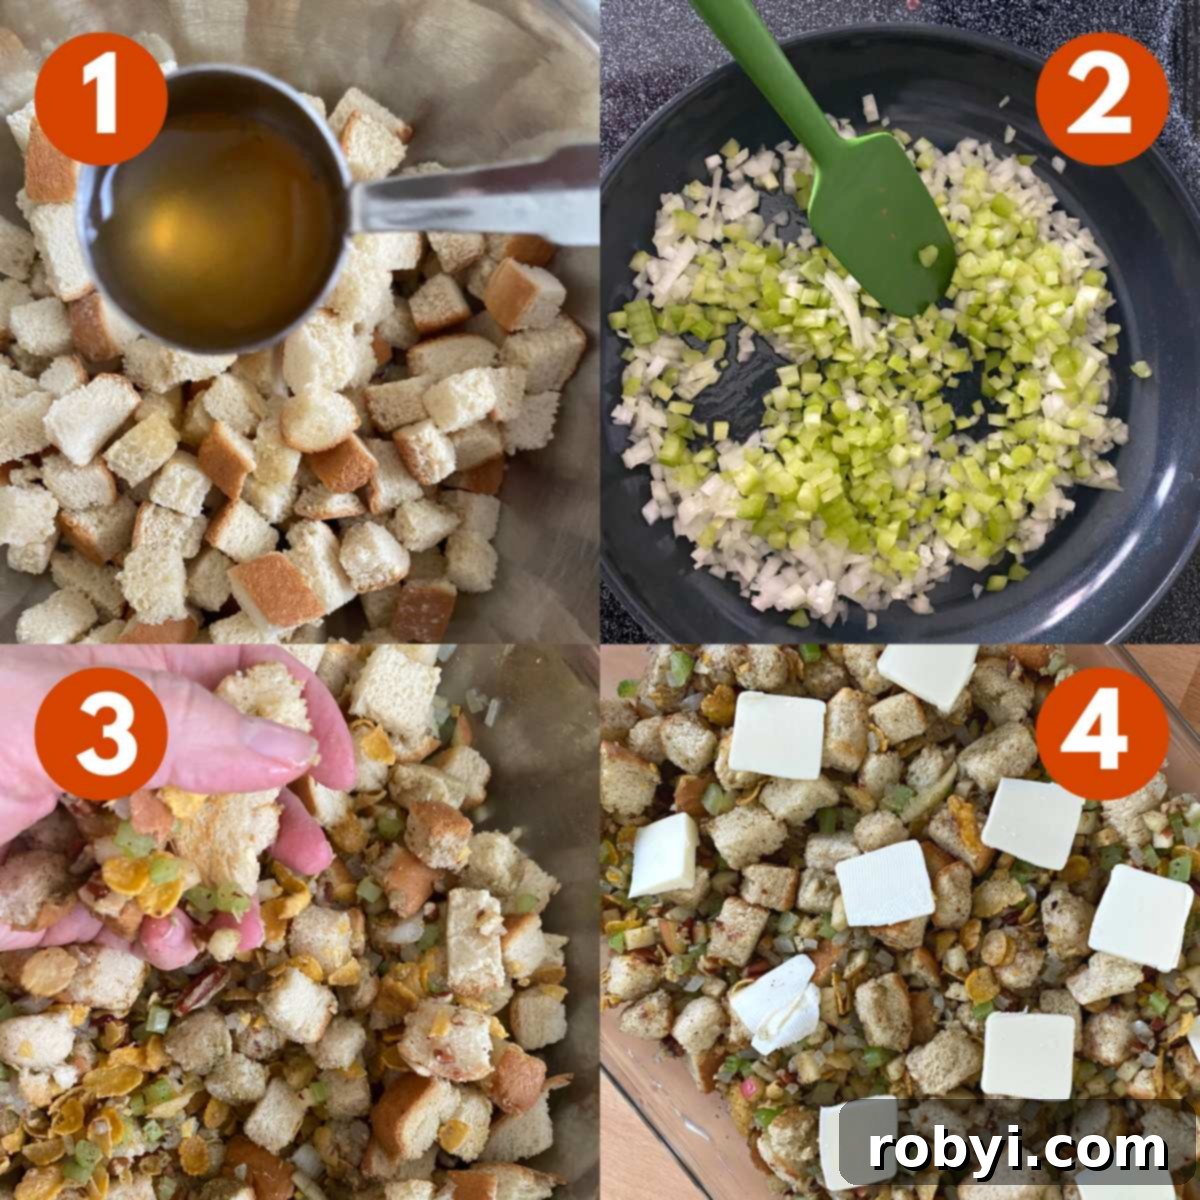
- Moisten the Bread: Place your dried bread cubes into a very large mixing bowl. Begin to gently spoon the vegetable or chicken broth over the cubes, adding a few tablespoons at a time. After each addition, gently toss the bread cubes with your hands or a large spoon. Continue this process until the bread cubes are evenly moistened throughout but do not appear soggy or saturated. The goal is soft, pliable bread, not mush.
- Sauté the Aromatics: In a large skillet, melt 1 tablespoon of butter (or use olive oil for a dairy-free option) over medium heat. Add the finely diced onions and celery to the skillet. Sauté them for 5-10 minutes, stirring occasionally, until they become tender and translucent, releasing their sweet aroma. Remove from heat and allow the mixture to cool slightly before adding to the bread bowl.
- Combine All Ingredients: Add the cooled sautéed onions and celery to the large bowl with the moistened bread cubes. Next, incorporate the diced apples, chopped pecans (or walnuts), crushed cornflakes, and poultry seasoning. If you are including sausage, ensure it is cooked and well-drained, then add it to the bowl at this stage. Now, the fun part! Use your hands to thoroughly but gently combine all the ingredients, ensuring everything is evenly distributed and coated with the savory flavors.
- Prepare for Baking: Generously butter the bottom and sides of a 9×13-inch casserole dish. This prevents sticking and adds an extra layer of flavor. Evenly spread the combined stuffing mixture into the prepared dish, gently pressing it down. Take the remaining butter (approx. 1 tablespoon) and thinly slice it into small tabs. Arrange these butter tabs strategically over the entire surface of the stuffing. As the butter melts, it will contribute to that incredibly crispy, golden crust.
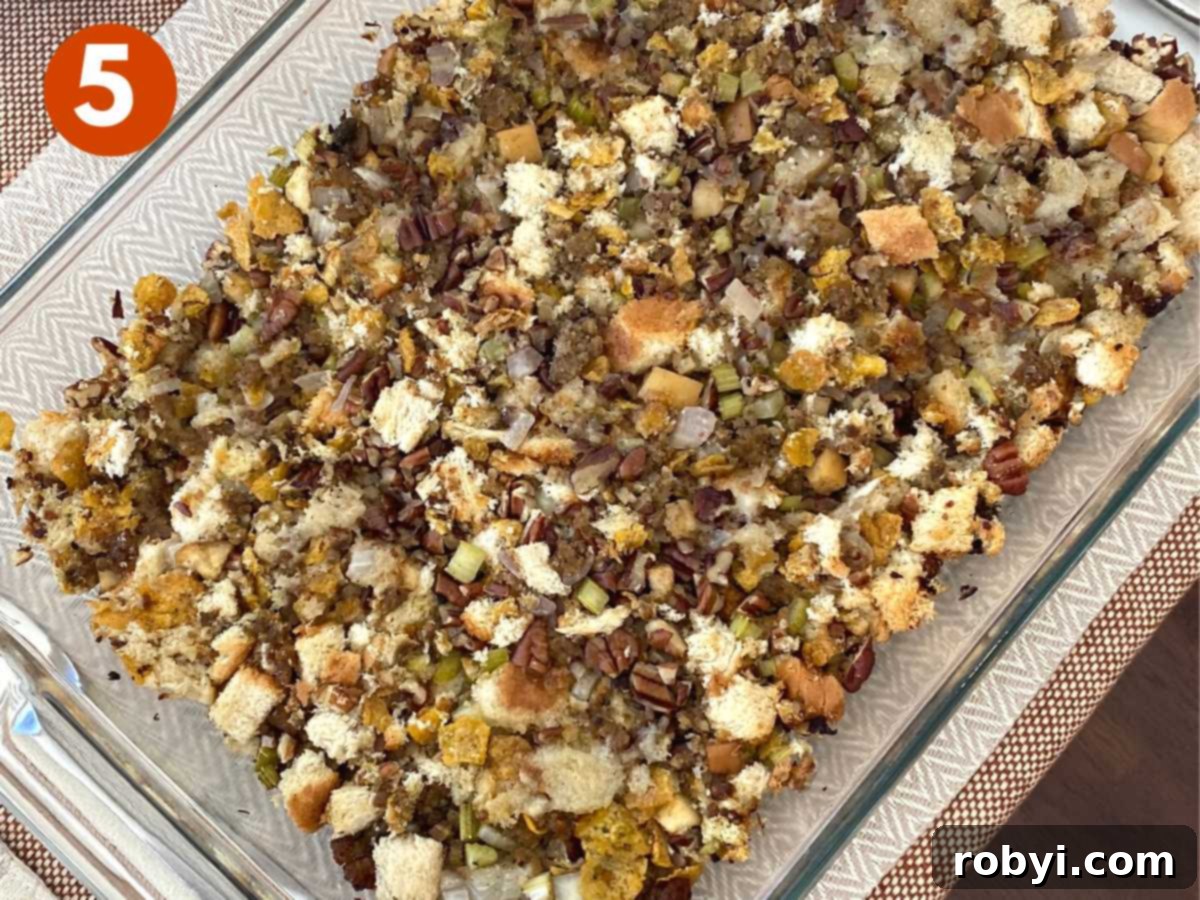
- Bake to Perfection: Cover the casserole dish tightly with aluminum foil. This helps to steam the stuffing, ensuring a moist interior. Bake in your preheated 350°F (175°C) oven for approximately 30 minutes. After this initial baking, remove the foil and continue to bake for another 10-15 minutes, or until the top is beautifully golden brown and crispy. To ensure food safety, the internal temperature of the stuffing should reach 165°F (74°C) when measured with a food thermometer.
Frequently Asked Questions About Stuffing
What’s the difference between stuffing and dressing?
While the terms “stuffing” and “dressing” are often used interchangeably in everyday conversation, there is a technical distinction, particularly in culinary traditions. Historically, “stuffing” refers to the mixture that is cooked inside the cavity of a bird, such as a turkey or chicken. The stuffing absorbs the delicious juices of the poultry as it cooks. “Dressing,” on the other hand, is cooked separately outside the bird, typically in a casserole dish, and served as a side dish. Our oven-baked recipe, cooked in a casserole, technically falls under the category of dressing, but we lovingly call it stuffing because of its classic flavor profile.
Should stuffing be cooked separately, or inside the turkey?
The U.S. Department of Agriculture (USDA) strongly recommends cooking stuffing outside the turkey for food safety reasons. When stuffing is cooked inside the bird, it absorbs juices from the poultry. To be safe for consumption, both the turkey and the stuffing must reach an internal temperature of 165°F (74°C). The challenge is that the stuffing often heats up much slower than the turkey itself. This can result in a situation where the turkey is perfectly cooked and safe, but the stuffing inside might still be at an unsafe temperature, potentially harboring harmful bacteria. Cooking them separately ensures that both components can reach their safe internal temperature reliably.
Can this recipe be used to stuff a turkey?
Yes, this versatile recipe can be used to stuff a turkey, but it requires extra precautions. If you choose to stuff your bird, it is highly recommended to heat the stuffing mixture to at least 140°F (60°C) before placing it inside the turkey. This gives the stuffing a head start in reaching the proper safe internal temperature. Crucially, you must use a food thermometer to check the temperature of the stuffing deep inside the turkey, ensuring it reaches a minimum of 165°F (74°C) before serving. Never rely solely on the turkey’s temperature; always verify the stuffing’s temperature independently for safety.
Storage and Reheating Tips for Leftover Stuffing
Properly storing and reheating your homemade bread stuffing ensures that every delicious bite is as good as the first. Here are our comprehensive guidelines to help you enjoy your leftovers safely and deliciously:
- Refrigerator Storage: After your meal, allow any leftover stuffing to cool completely to room temperature within two hours. Transfer it to an airtight container and store it in the refrigerator for up to 3-4 days. Prompt cooling and proper storage are key to maintaining freshness and safety.
- Freezer Storage: For longer preservation, stuffing freezes exceptionally well. Once completely cooled, transfer the stuffing to an airtight, freezer-safe container or heavy-duty freezer bags. It can be stored in the freezer for up to 2 months. When you’re ready to enjoy it, defrost the stuffing overnight in the refrigerator.
- Reheating Instructions:
- Oven Method (Recommended for Crispy Texture): Preheat your oven to 325°F (160°C). If reheating from the refrigerator, sprinkle a tablespoon or two of broth over the stuffing to add moisture. Cover the dish tightly with aluminum foil to prevent drying. Bake for 20-30 minutes, or until heated throughout and the internal temperature reaches 165°F (74°C). For a crispy top, remove the foil for the last 5-10 minutes of reheating.
- Microwave Method (Convenient, but Less Crispy): While convenient, reheating stuffing in the microwave tends to make it softer and less crispy. Place a serving of stuffing in a microwave-safe dish, sprinkle with a few drops of broth, and cover loosely. Heat on high in 1-minute intervals, stirring occasionally, until piping hot throughout. This method is excellent for speed but won’t replicate the oven’s crispy crust.
Maximize Your Holiday Prep with Make-Ahead Stuffing Tips
We are huge advocates for preparing our oven baked stuffing ahead of time, especially given the considerable ingredient preparation involved. This strategy significantly reduces holiday stress and allows you to enjoy the festive season more fully.
How to Prepare Stuffing in Advance:
You can prepare this recipe up to the point just before it goes into the oven. This means:
- Drying the bread cubes.
- Sautéing the celery and onion.
- Combining all the ingredients in the baking dish.
Once all ingredients are mixed and placed in your baking dish, tightly cover the dish with plastic wrap or aluminum foil. It can then be stored:
- In the refrigerator: For up to 2 days.
- In the freezer: For up to 2 months. Make sure the dish is freezer-safe and wrapped very well to prevent freezer burn.
Cooking Make-Ahead Stuffing:
When you’re ready to bake and enjoy your delicious stuffing:
- From the refrigerator: Simply remove it from the fridge and let it sit at room temperature for about 30 minutes while your oven preheats. Then, proceed with step 5 of the baking directions (cover with foil and bake). You might add an extra 5-10 minutes to the covered baking time to ensure it heats through evenly.
- From the freezer: Transfer the frozen stuffing to the refrigerator overnight to thaw completely. Once thawed, follow the same baking instructions as if it were prepared fresh or from the fridge.
This make-ahead approach ensures you have a spectacular side dish ready to go, without the last-minute rush, making your holiday cooking experience much more enjoyable and efficient.
Looking for an effortlessly delicious main dish to perfectly complement your savory stuffing? Our Turkey Breast Tenderloin recipe requires only minutes of prep and cooks swiftly in the oven, making it an ideal pairing!
More Delicious Make-Ahead Holiday Side Dishes
- Low-Sugar Cranberry Sauce Recipe
- Frozen Cauliflower Mash – Easy, Creamy Recipe
- Sautéed Baby Carrots with Garlic
- Easy Farro Pilaf
Craving more easy, healthy, and carb-conscious recipes to simplify your meals?
📋 Recipe: Make-Ahead Oven Baked Stuffing
Make-Ahead Oven Baked Stuffing
This delightful Oven Baked Stuffing, made with fresh bread, crisp apples, and crunchy pecans, is guaranteed to be the star of your holiday dinner. Prepare it in advance to simplify your holiday cooking and maximize your enjoyment!
Save this recipe?
Enter your email & get this recipe sent to your inbox! Plus receive new recipes each week!
Click here to join our email list and save this recipe!
Ingredients
- 8 cups bread cubes (approx. 8-10 slices of fresh sandwich bread, cut or torn into ½-inch cubes)
- ½ cup vegetable broth (chicken broth may be used instead)
- ¼ cup butter (½ stick, divided)
- 1 cup diced celery (3-4 stalks, finely diced)
- 1 cup diced onion (1 small onion, finely diced)
- 1 cup diced apple (1 large sweet apple, finely diced)
- 1 cup corn flakes (crushed)
- 1 cup chopped pecans (or walnuts)
- 1 Tablespoon poultry seasoning
- 1 cup mild ground sausage (optional, cooked and drained; omit for vegetarian version)
Instructions
- Dry the Bread: Preheat oven to 250°F (120°C). Spread bread cubes in a single layer on a baking sheet. Bake for about 15 minutes, tossing every 5 minutes, until firm on the outside but not browned. Set aside to cool.
- Prepare Ingredients: Gather and prepare all other ingredients as noted above: dice vegetables and apple, chop nuts, and cook/drain sausage if using.
- Preheat Oven for Baking: When bread drying is complete, increase oven temperature to 350°F (175°C).
- Moisten Bread: Add cooled dried bread cubes to a large bowl. Slowly drizzle several tablespoons of broth over the cubes, tossing gently after each addition, until moistened but not soggy.
- Sauté Aromatics: In a large skillet, heat 1 Tablespoon of the butter over medium heat. Add diced onion and celery and sauté for 5-10 minutes until softened. Remove from heat and cool slightly.
- Combine Mixture: Add the cooled sautéed onions and celery, chopped pecans, crushed cornflakes, diced apple, and poultry seasoning to the bowl with the bread cubes. Add cooked sausage if using. Use your hands to thoroughly combine all ingredients.
- Prepare for Baking: Butter a 9×13-inch baking dish. Pour the stuffing mixture into the prepared dish, spreading evenly.
- Add Remaining Butter: Cut the remaining butter into thin slices and arrange them on top of the stuffing mixture.
- Bake: Cover the dish tightly with foil and bake for about 30 minutes. Remove the foil for the last 10-15 minutes, or until the top is golden brown and crispy, and the internal temperature reaches 165°F (74°C).
Last Step: Please consider leaving a rating and comment below to let us know how you enjoyed this recipe! Your feedback helps our business grow and allows us to continue providing more free recipes!
Notes
For visual guidance, variations, and additional tips, please refer to the sections above!
Use these guidelines to store leftover bread stuffing:
- Refrigerator: Store leftovers in a covered, airtight dish for 3-4 days.
- Freezer: Store in an airtight container for up to 2 months. Defrost overnight in the refrigerator before reheating.
- Reheat: Sprinkle with a little broth, cover with foil, and bake in the oven at 325°F (160°C) until heated throughout and the internal temperature reaches 165°F (74°C). Reheating in the microwave is quicker but will not yield a crispy texture.
Make-Ahead Instructions:
Follow the recipe steps up to the point where you would cook it in the oven (after combining all ingredients in the baking dish and topping with butter). Then, tightly cover the dish and store in the refrigerator for up to 2 days, or in the freezer for up to 2 months. When ready to bake, defrost overnight in the refrigerator if frozen, then cook as per the instructions above (Step 9).
Grab 5 Low-Carb Sauces and get more easy, healthy recipes! JOIN HERE
Nutrition
Calories: 331kcal | Carbohydrates: 36g | Protein: 8g | Fat: 18g | Saturated Fat: 5g | Polyunsaturated Fat: 4g | Monounsaturated Fat: 7g | Trans Fat: 0.2g | Cholesterol: 15mg | Sodium: 347mg | Potassium: 225mg | Fiber: 5g | Sugar: 7g | Vitamin A: 327IU | Vitamin C: 4mg | Calcium: 97mg | Iron: 4mg
Nutritional and Food Safety Disclaimer
