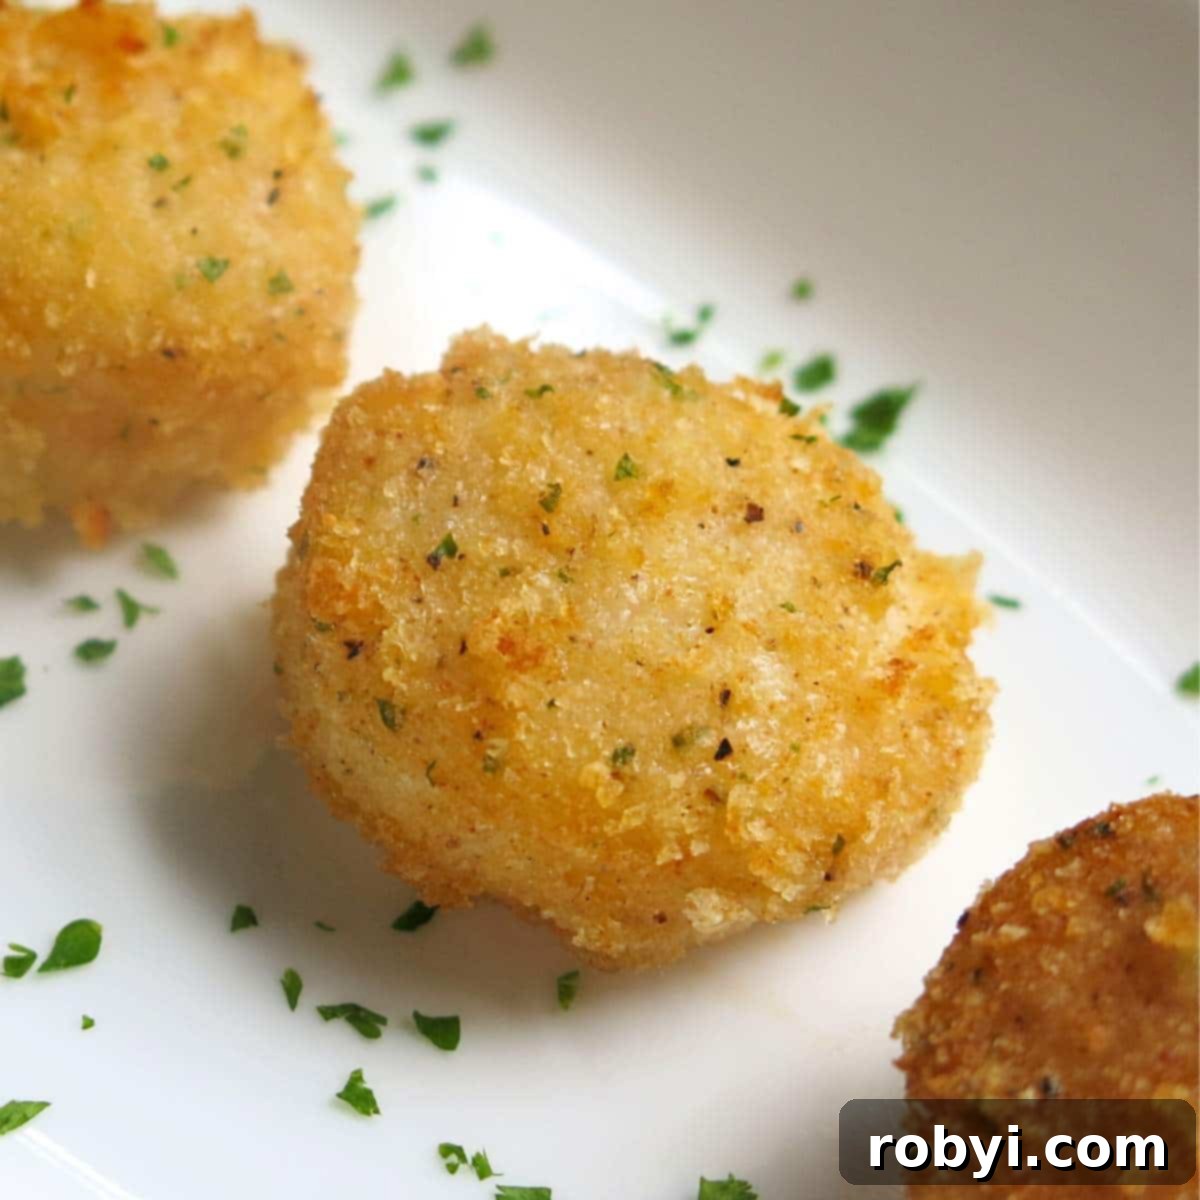
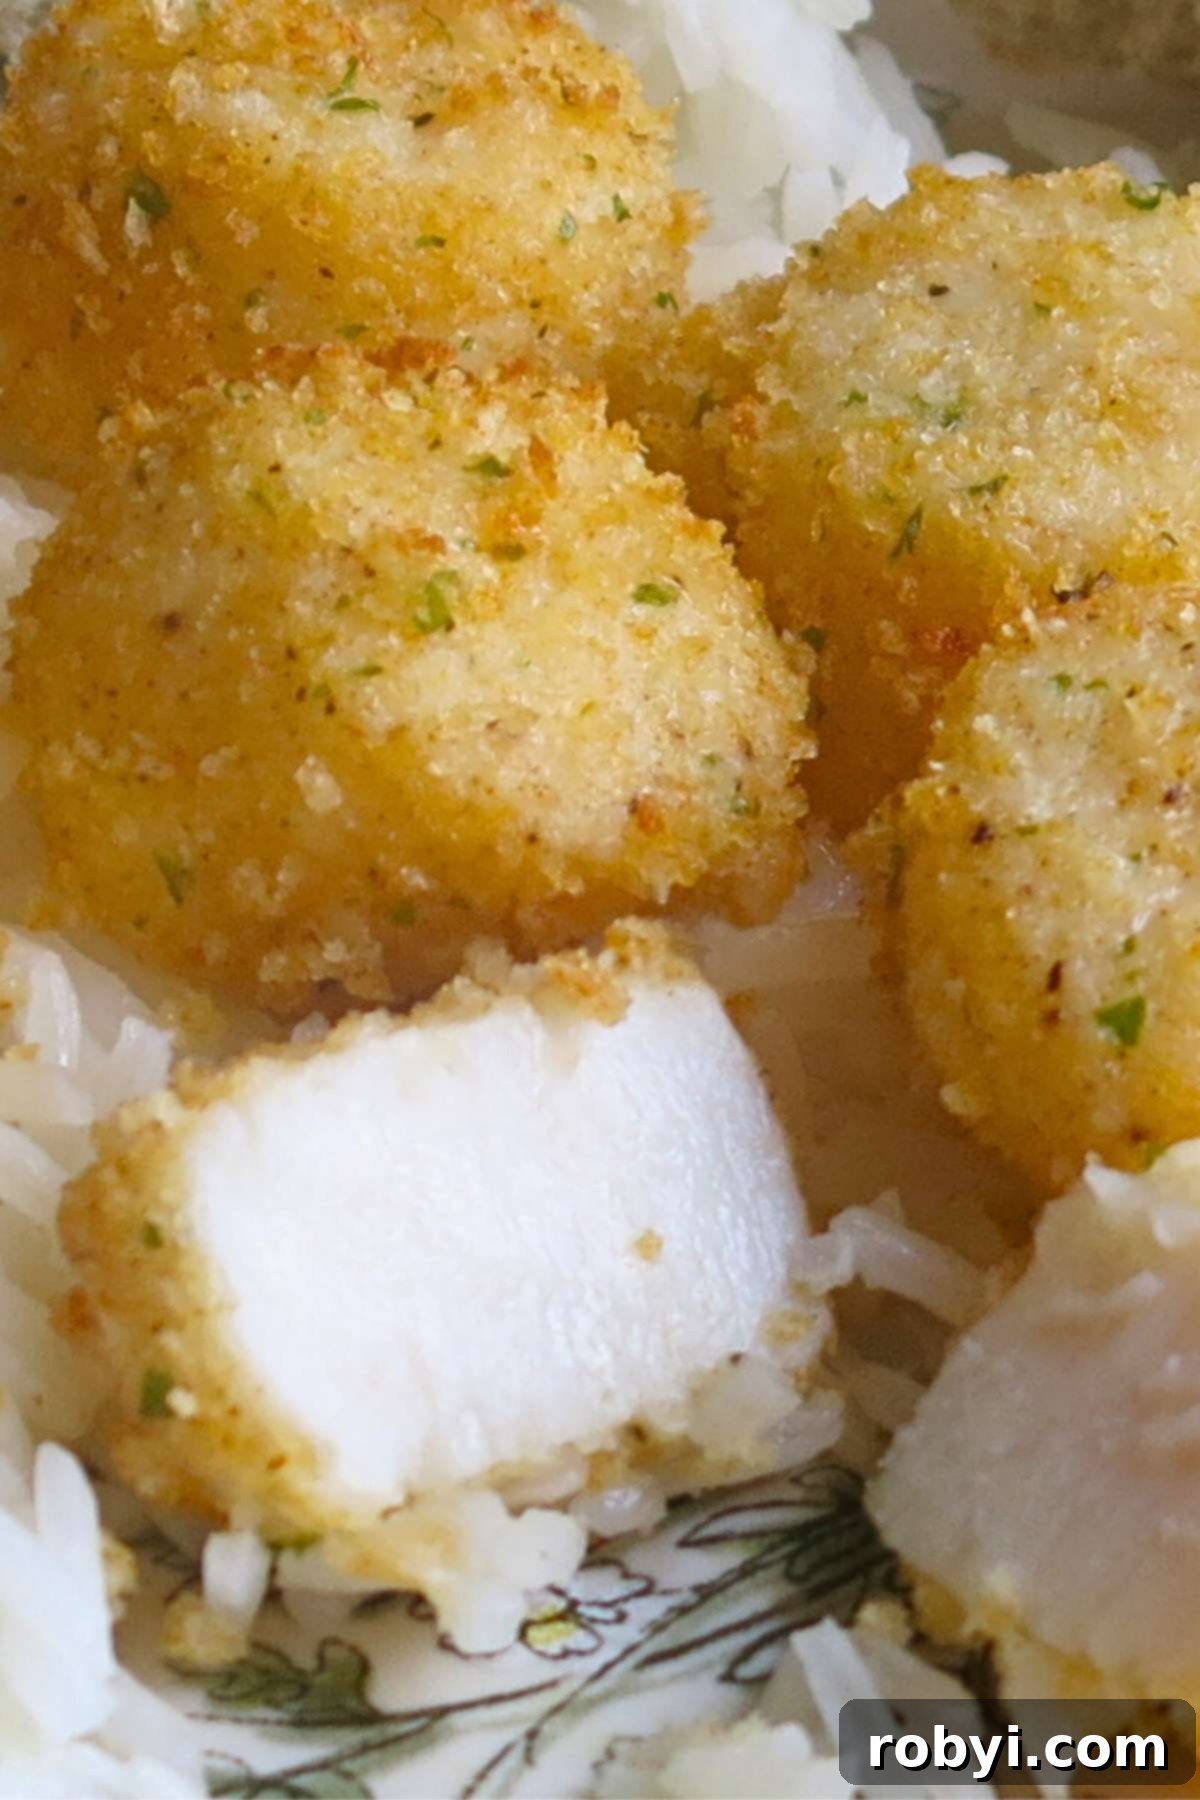
Unlock the secret to crafting perfect, restaurant-quality Broiled Scallops with a Parmesan Crust right in your own kitchen. This comprehensive guide provides an easy-to-follow recipe, ensuring you achieve tender, succulent scallops encased in a golden, crispy breading every single time. Prepare to elevate your seafood game with a dish that’s both effortlessly elegant and incredibly delicious.
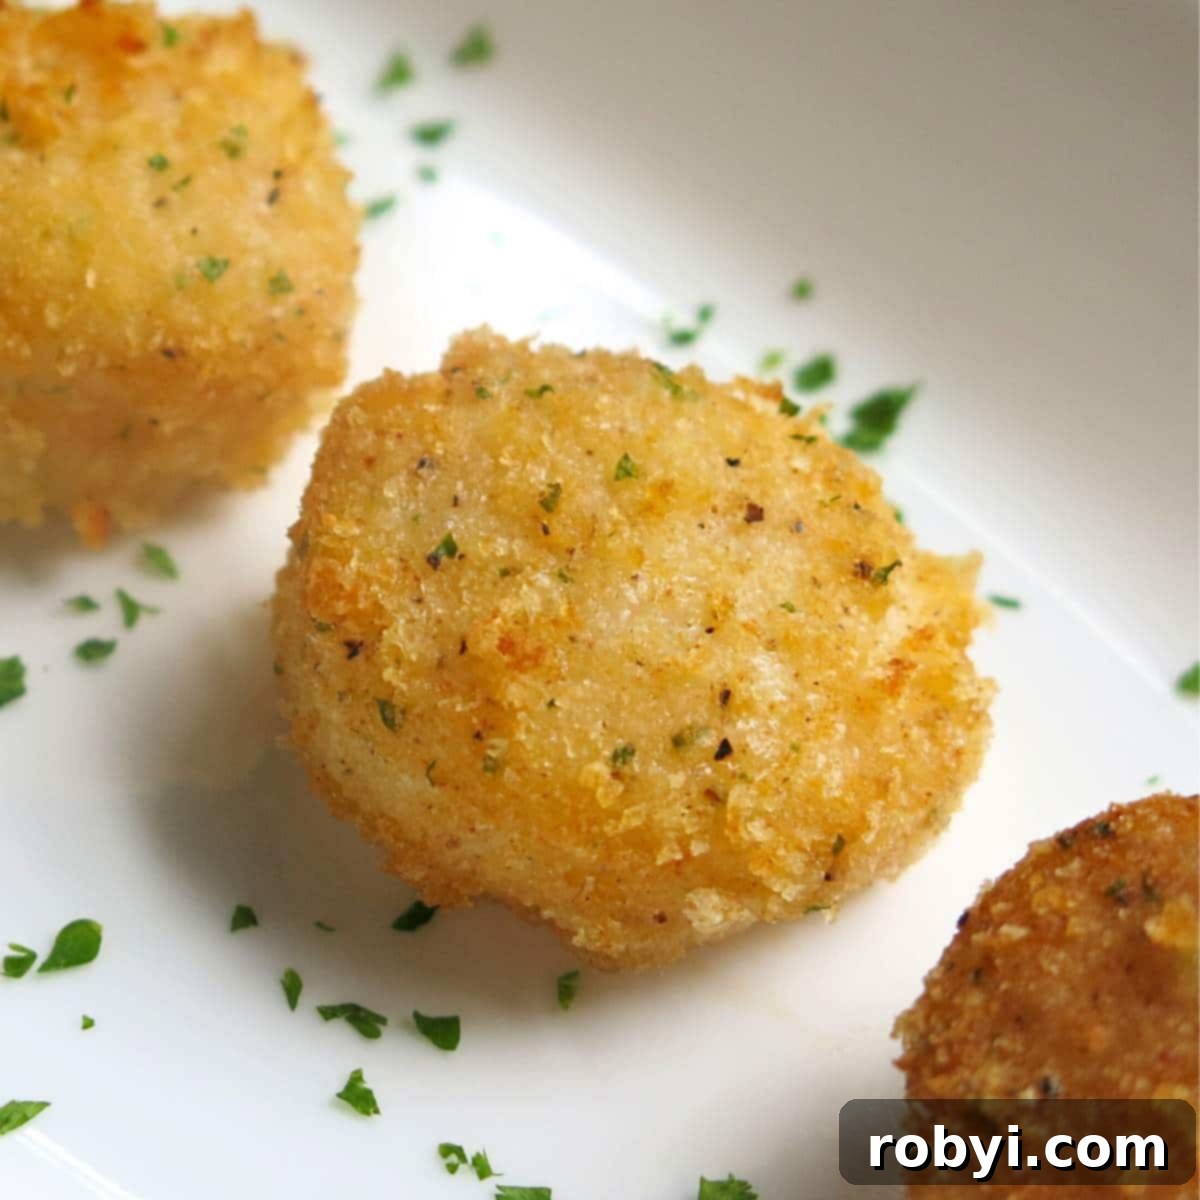
Parmesan Crusted Scallops are a true culinary delight, boasting a beautiful balance of sweet, moist centers and a wonderfully crunchy, savory top. Their exquisite flavor and appealing texture make them an ideal choice for a memorable dinner party, a romantic evening in, or a sophisticated appetizer that will impress any guest. The best part? This gourmet experience doesn’t demand hours of your time in the kitchen.
Much like other quick seafood dishes, such as scallops fettuccine or seared scallops and spinach, this recipe is designed for convenience. You can prepare the scallops in advance, setting them aside until you’re ready to cook. When it’s time to serve, simply place them under the broiler for a mere 10 minutes, and watch as they transform into golden perfection.
This cherished recipe originates from our collection of reliable meal prep favorites and has graced countless tables with its presence. If you’ve invested in gorgeous, plump sea scallops and are searching for a trustworthy recipe that guarantees stellar results, look no further. I’m here to guide you through each step of broiling scallops with a delectable breadcrumb coating, sharing invaluable tips and tricks refined over years of culinary experience.
These Parmesan-crusted scallops are more than just a meal; they’re an experience, perfect for festive holiday gatherings and intimate romantic dinners. They’ve certainly earned their prominent spot in our special occasion dinners collection. But why wait for a special event? Treat yourself and your loved ones to this extraordinary dish today!
Feeling hungry and inspired? Let’s dive into the details and get cooking!
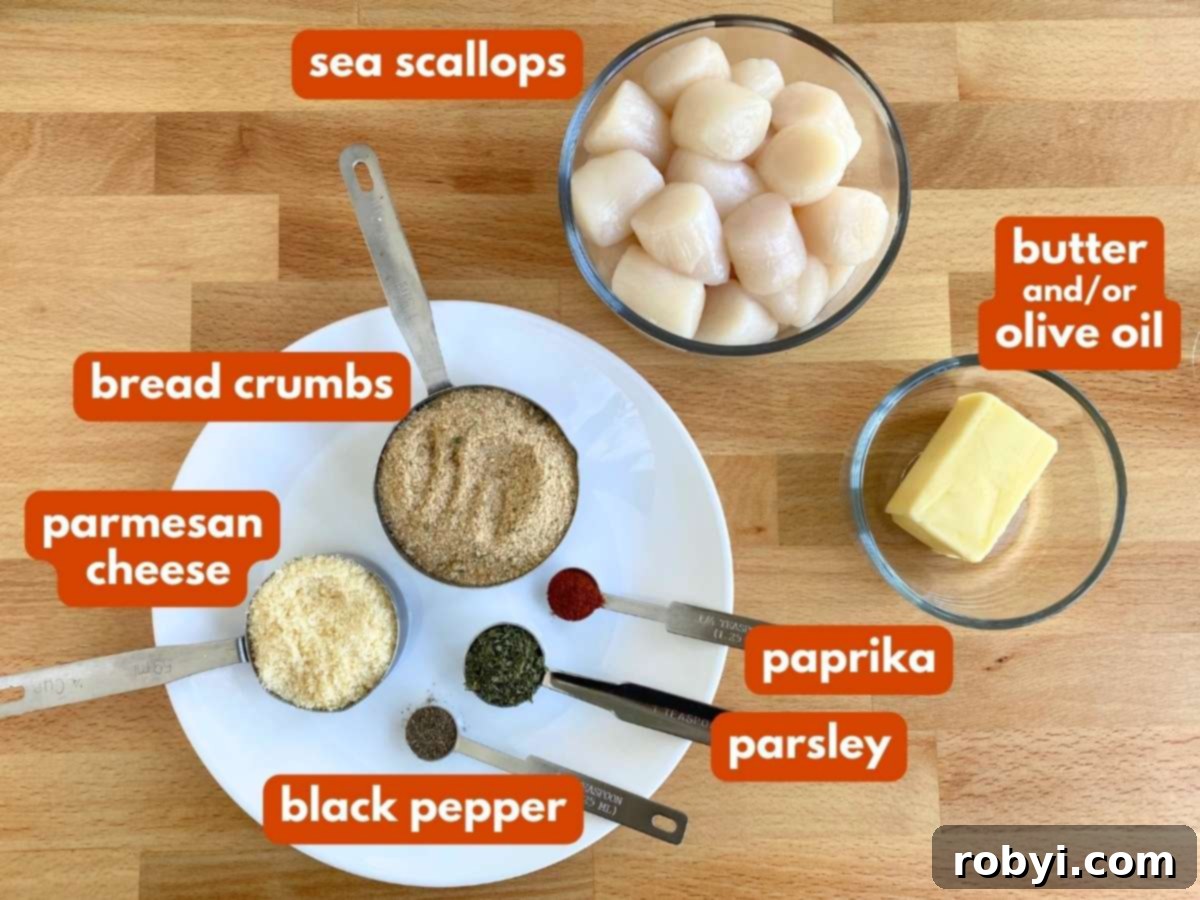
- Sea Scallops: These are the star of the show and the absolute best choice for this recipe. Their generous size and sweet, succulent flesh are ideal for broiling. Bay scallops are generally too small and tend to overcook quickly, becoming rubbery. Larger Patagonian scallops can also work beautifully. For tips on selecting the highest quality scallops, see the dedicated section below.
- Butter and/or Olive Oil: This crucial combination serves as the adhesive for our flavorful breading. The butter imparts a rich, decadent taste, while the olive oil helps create a crispier crust. Using both ensures a perfect balance of flavor and texture.
- Breadcrumbs: Italian seasoned breadcrumbs are highly recommended as they come pre-seasoned with herbs and spices, adding an instant depth of flavor. If you prefer, unseasoned breadcrumbs or panko breadcrumbs can be used. Panko will yield an even crispier, lighter coating, while unseasoned allows you to control the spice profile completely.
- Parmesan Cheese: For the best flavor and melting quality, finely grate fresh Parmesan cheese. Pre-grated varieties can sometimes be drier and less flavorful, but will work in a pinch. The Parmesan adds a sharp, salty, and nutty dimension to the crust, complementing the sweetness of the scallops.
- Parsley: Fresh minced parsley adds a vibrant burst of color and a fresh, herbaceous note. If fresh isn’t available, dried parsley flakes can be used, though the flavor will be less intense.
- Sweet Paprika: This spice not only gives the breading an inviting golden hue but also enhances the overall savory taste with its mild, sweet undertones. It’s important to use *sweet* paprika; avoid smoked paprika, which has a much stronger, distinct flavor that can overpower the delicate scallops.
- Black Pepper: A simple addition, freshly ground black pepper adds a subtle warmth and a gentle bite to the breading mixture, balancing the other flavors.
For the precise measurements and a detailed step-by-step cooking guide, please refer to the comprehensive recipe card provided further down this page.
What to Look for When Buying Scallops: A Buyer’s Guide
Navigating the seafood counter for scallops can present a few choices. Knowing what to look for will ensure you bring home the freshest, most flavorful scallops for your dish. Here’s what you need to consider to make an informed decision:
- Dry vs. Wet Scallops: The Critical Difference
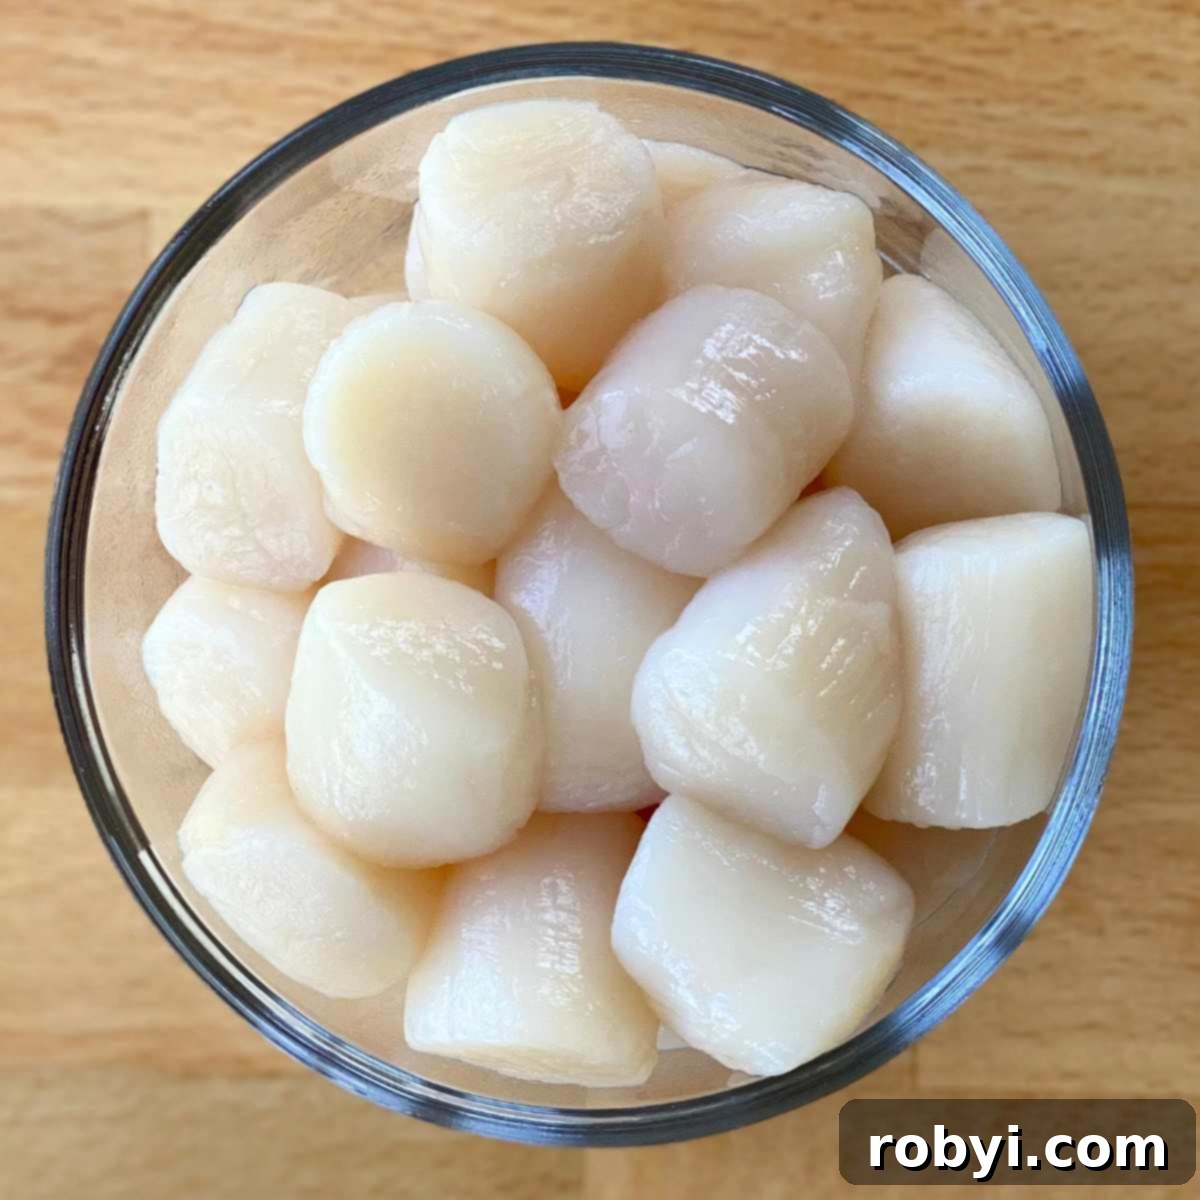
Always aim to buy dry scallops. Dry scallops are natural, have not been treated with chemicals, and boast a superior, more concentrated sweet flavor and firmer texture. Wet scallops, on the other hand, have been soaked in a preservative solution called sodium tripolyphosphate. This process causes them to absorb water, making them appear larger and heavier, but diluting their natural flavor and causing them to release excess moisture during cooking. This excess water makes it nearly impossible to achieve a good sear or crispy crust. If a package isn’t explicitly labeled, be wary of scallops swimming in a milky white liquid and appearing unnaturally bright white. Dry scallops typically range in color from ivory white to pale pink, orange, or even tan.
- Frozen vs. Fresh Scallops: Quality and Convenience
Both frozen and fresh scallops can be excellent choices, provided they are high quality. If opting for frozen, ensure they are labeled “dry” and “individually quick frozen” (IQF). IQF scallops freeze rapidly, preventing large ice crystal formation that can damage texture. When ready to use frozen scallops, defrost them slowly overnight in the refrigerator for best results. Avoid thawing at room temperature or using a microwave, as this can negatively impact their delicate texture.
- Size Matters: Finding the Perfect Scallop for Broiling
Scallops are often sold by count per pound. You’ll commonly find “jumbo” sizes (10-20 scallops per pound) or “large” sizes (20-30 scallops per pound). For broiling or baking in the oven, either of these sizes is perfect. Their thickness ensures they cook evenly and remain tender without drying out too quickly, making them ideal for developing that beautiful Parmesan crust.
Step-by-Step Guide: How to Broil Scallops with a Parmesan Crust
Achieving perfectly broiled scallops with a golden Parmesan crust is simpler than you might think. Follow these detailed steps to create a show-stopping seafood dish in your oven.
1. Preheat Your Oven and Prepare the Broiler
Begin by preheating your oven to 425°F (220°C). Position an oven rack approximately 8-10 inches from the top heating element (the broiler). This distance is crucial: too close, and the scallops might burn before cooking through; too far, and the crust won’t crisp properly. If your oven has only one broiler setting, it’s typically between 500°F to 550°F. If you have multiple options (low, medium, high), medium (around 450°F) or even low (around 400°F) might be safer to prevent charring, depending on your oven’s intensity. We suggest starting on the lower side to minimize any risk of burning and allow for even cooking and a beautiful golden crust.
2. Prepare the Scallops for Breading
Carefully rinse your sea scallops under cold water to remove any lingering debris or tiny ice particles. The most crucial step for a crispy crust is to pat them thoroughly dry with paper towels. Any excess moisture will steam the scallops instead of broiling them, leading to a soggy breading and a less desirable texture. Also, inspect each scallop for a small, tough crescent-shaped muscle on the side, known as the adductor muscle. If present, gently pinch and pull it off, as it can be chewy after cooking. Ensuring your scallops are dry and properly prepared is key to their success.
3. Create the Flavorful Breading and Butter Mixture
In a shallow bowl or plate, combine your dry breading ingredients: breadcrumbs (Italian seasoned or your chosen alternative), finely grated Parmesan cheese, chopped parsley, sweet paprika, and black pepper. Stir them well to ensure an even distribution of flavors.
Next, melt the butter either in a small saucepan on the stovetop or quickly in the microwave. Once melted, combine it with the olive oil in a separate shallow bowl. This butter and oil mixture will coat the scallops, providing the perfect base for the breading to adhere uniformly and contribute to the rich flavor of the crust.
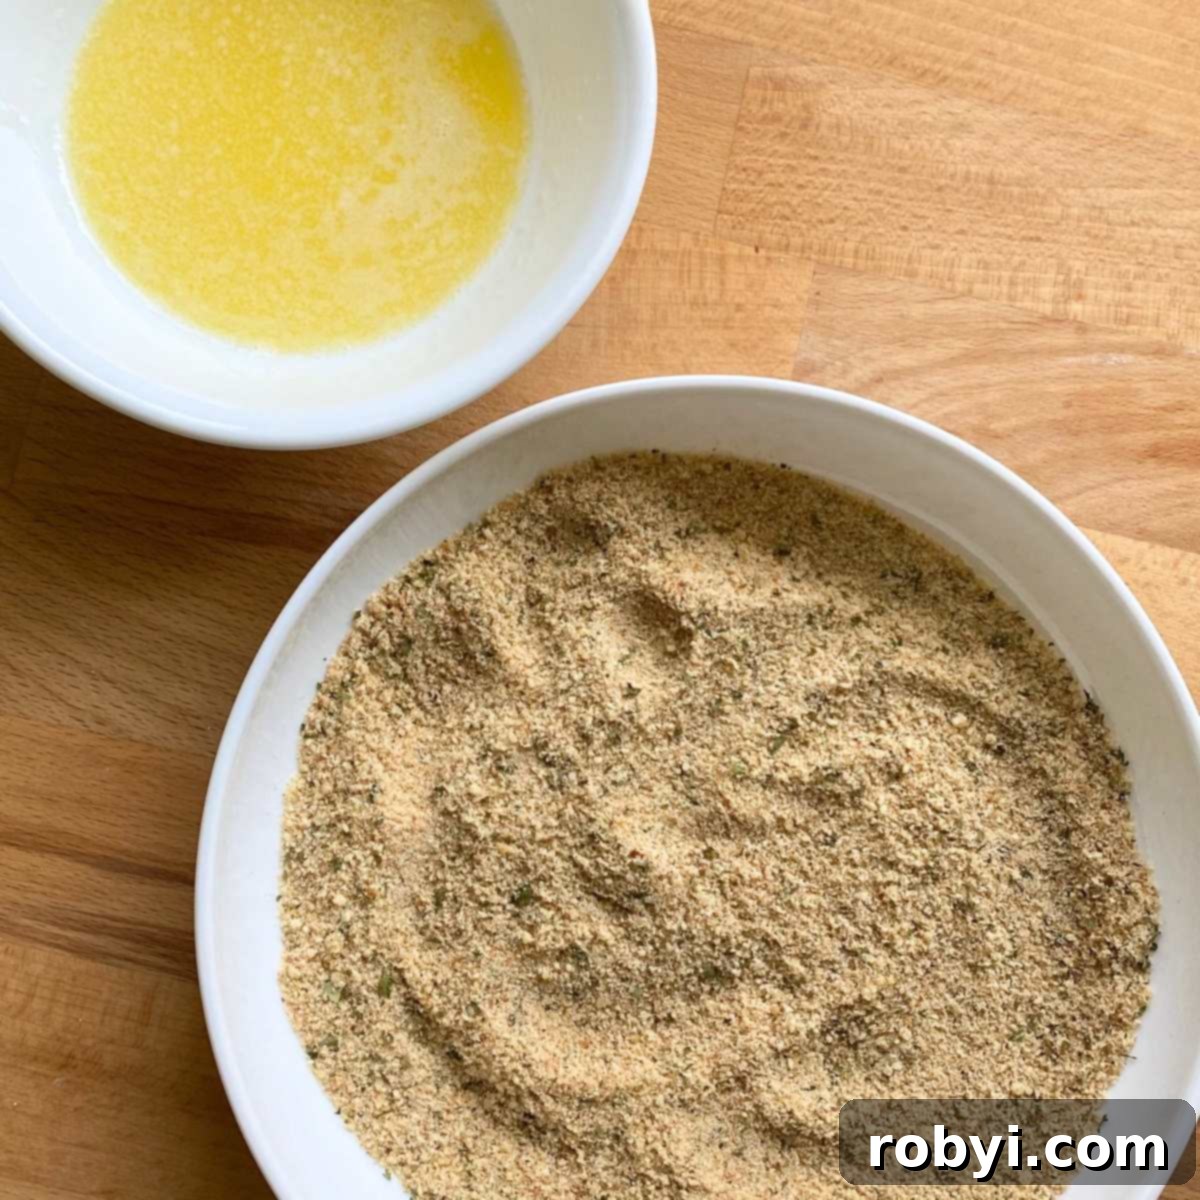
4. Expertly Bread Each Scallop
Working quickly, lightly coat each scallop with the melted butter and olive oil mixture. Allow any excess butter to drip off. Remember that butter tends to thicken upon contact with cold scallops, so move efficiently to the next step. A thin, even coating is ideal; too much butter can lead to a soggy crust rather than a crispy one.
Pro Tip: For a cleaner and more even application, use a silicone pastry brush to lightly brush the butter and oil onto each scallop. This technique helps you achieve a delicate, thin coat, which is crucial for a perfectly crispy, non-soggy breading.
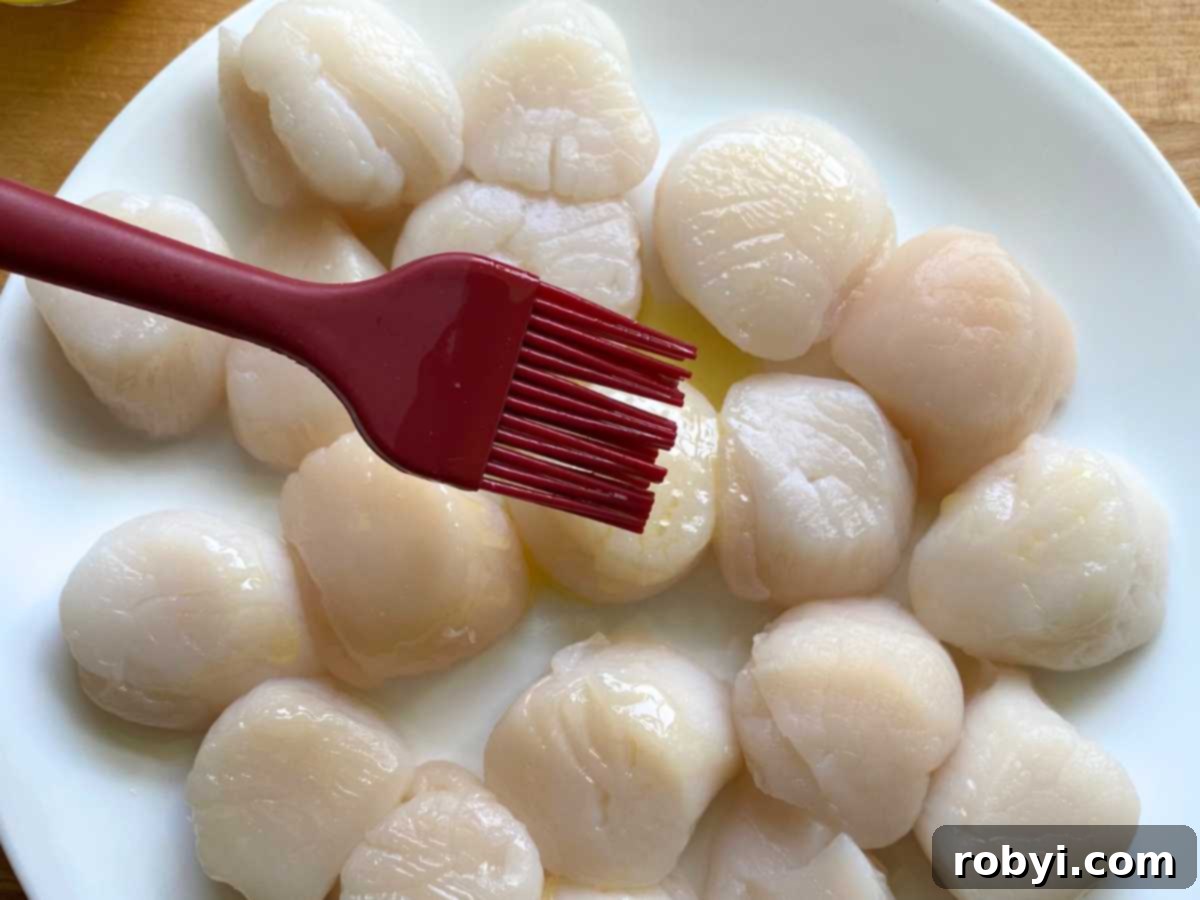
Immediately after coating, roll each scallop in the Parmesan breading mixture. Ensure it’s evenly coated on all sides you wish to bread. For the crispiest result, it’s often best to put little to no breading on the very bottom of the scallops. Gently shake off any excess breading to prevent a thick, doughy layer.
Alternative Breading Method: If you prefer a lighter crust or are concerned about the bottom getting soggy, simply skip breading the sides and bottom of the scallops entirely. Instead, once they’re placed on the baking pan, sprinkle the bread crumb mixture generously over the top of each scallop just before broiling. This method still delivers that fantastic Parmesan crunch on top with minimal fuss.
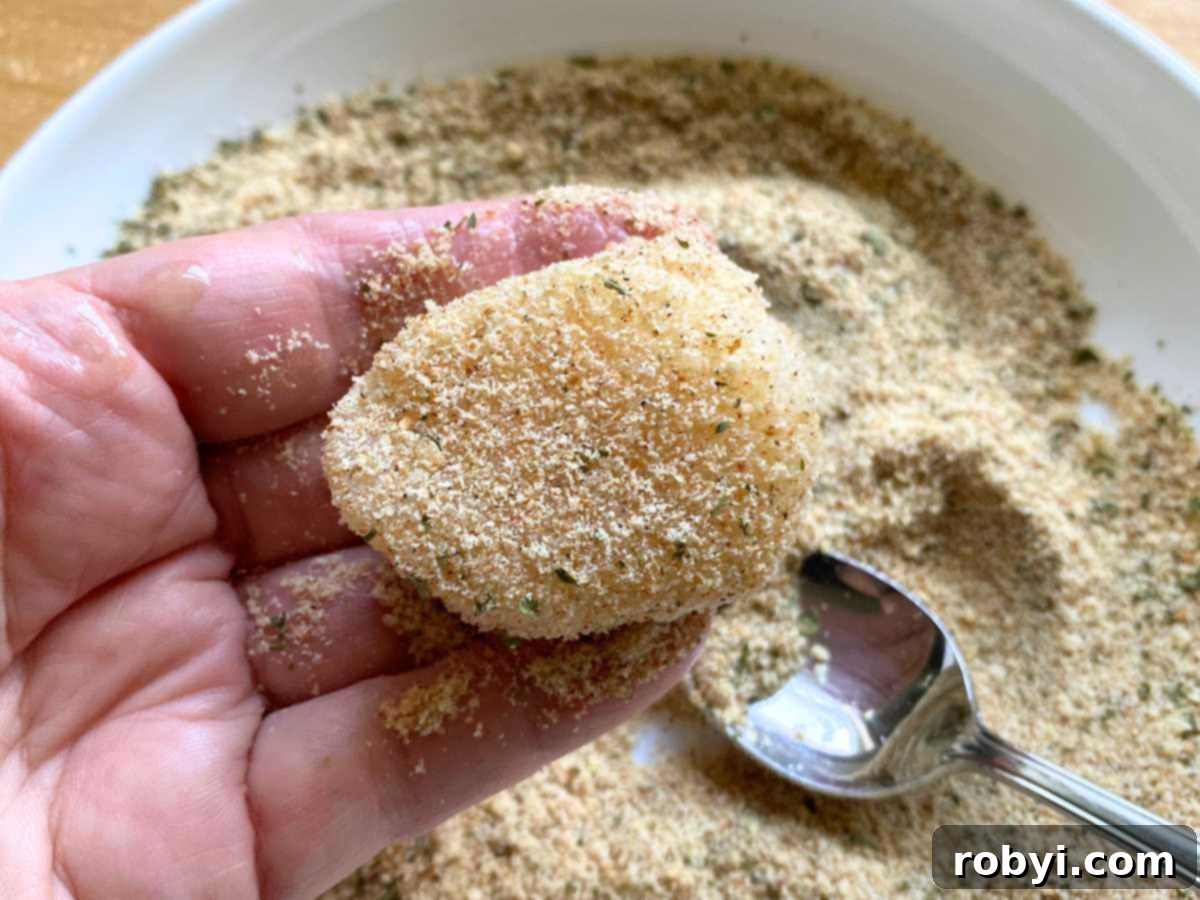
5. Broil to Golden Perfection
Arrange the breaded scallops in a single layer on a broiler pan that has been lightly coated with cooking spray. For even better crisping, especially on the bottoms, consider using a grill rack or a cookie cooling rack placed over a shallow baking pan. This setup elevates the scallops, allowing heat to circulate around them, preventing sogginess and promoting a uniform golden crust. Place the pan under your preheated broiler.
Broil the scallops for approximately 10 minutes. The exact timing can vary significantly based on your oven’s broiler strength, the size and thickness of your scallops, and how heavily they are breaded. It’s crucial to watch them closely throughout the broiling process, as scallops cook very quickly. You are aiming for a moist, opaque white center (when cut into) and a beautifully golden-brown, crispy top.
Do not be afraid to open the oven door periodically to check on their progress. Overcooked scallops can become tough and rubbery, losing their delicate sweetness. The moment they reach that perfect golden hue on top and are just cooked through, remove them from the oven. Serve immediately for the best flavor and texture.
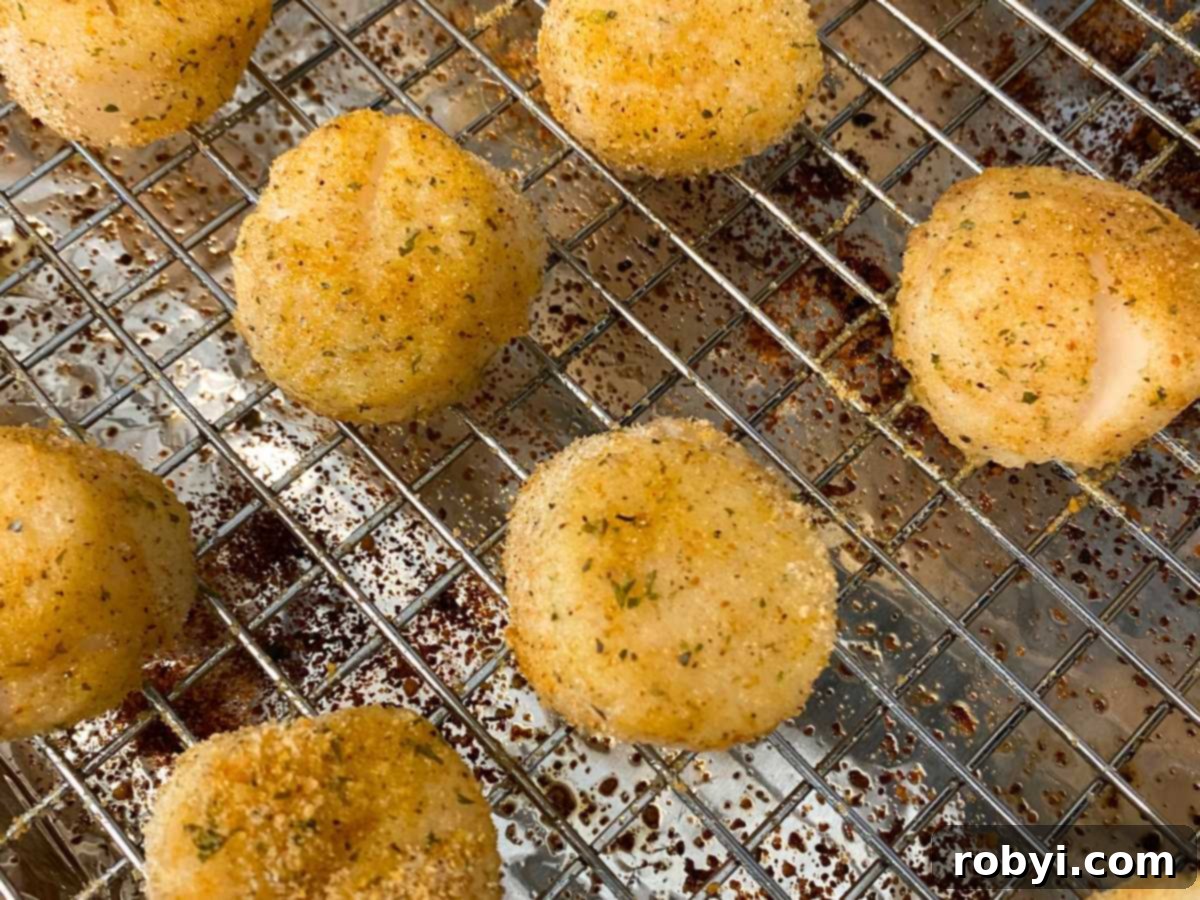
Top Tips for Perfectly Broiled Scallops Every Time
Broiling scallops with a Parmesan crust creates a delightful contrast between the naturally sweet, tender seafood and its savory, crispy exterior. To ensure your dish is nothing short of perfection, keep these expert tips in mind:
- Start with Quality Scallops: The foundation of this dish is excellent scallops. Always opt for high-quality, “dry” packed scallops that are free from added preservatives. Their natural sweetness and firm texture will shine through.
- Thoroughly Dry Your Scallops: Before applying any butter or breading, it is absolutely crucial to dab away any excess moisture from the scallops with paper towels. Dry scallops ensure a crispy crust; wet scallops will steam and result in a soggy coating.
- Remove the Adductor Muscle: If present, carefully pinch and pull off the small, tough crescent-shaped side muscle from each scallop. This ensures a uniformly tender bite.
- Light Breading is Key: Avoid heavily breading the scallops. A thin, even coat of butter and breading allows the delicate, natural flavor of the scallop to be the star, rather than being overshadowed by a thick, doughy crust.
- Utilize a Wire Rack: For optimal crispiness and even cooking, place the breaded scallops on a wire rack set over a shallow baking sheet. This setup allows air to circulate underneath the scallops, preventing the bottoms from becoming soggy and promoting an all-around golden crust.
- Don’t Overcrowd the Pan: Arrange the scallops in a single layer, ensuring there is ample space between each one. Overcrowding the pan can lead to steaming rather than broiling, inhibiting the formation of a crispy crust.
- Monitor Cooking Progress Closely: Broilers operate at high temperatures, and scallops cook incredibly fast. Stay near the oven and watch them like a hawk. You’re aiming for a beautiful golden-brown crust and a translucent-to-opaque white center. They can go from perfect to overcooked in a matter of seconds.
- Serve Immediately: Broiled scallops are best enjoyed straight from the oven when their crust is at its crispiest and their interior is at its most tender.
- Consider Pre-Seasoning: A light sprinkle of salt and pepper directly on the scallops before the butter and breading can enhance their natural flavor even further.
Storage, Meal Prep, and Reheating Instructions
This recipe is not only delicious but also offers great flexibility for meal planning. Here’s how to store leftovers, prepare ahead, and reheat for optimal enjoyment:
Storing Leftovers
If you happen to have any broiled scallops left, store them in an airtight container. They will keep well in the refrigerator for up to 3 days. For longer storage, you can freeze cooked scallops for up to 2 months. Be sure to label the container with the date.
Make-Ahead Meal Prep
This dish is fantastic for meal prepping! You can prepare the scallops through the breading step without cooking them. Arrange the breaded scallops in a single layer on a baking sheet lined with parchment paper, then flash freeze them until solid. Once frozen, transfer them to an airtight container or freezer-safe bag, separating layers with parchment paper to prevent sticking. They can be stored in the freezer for up to 2 months. When you’re ready to cook, allow them to defrost overnight in the refrigerator, then proceed with the broiling instructions as usual.
Reheating for Best Results
To revive the crispy crust and tender interior of your leftover scallops, avoid the microwave, which tends to make them rubbery. Reheat them in a preheated oven at 350°F (175°C) for about 5-8 minutes, or until just heated through and the crust is crisp. An air fryer is also an excellent option for reheating, delivering a wonderfully crisp texture in just a few minutes.
What to Serve With Broiled Scallops
The goal when pairing sides with broiled scallops is to choose dishes that complement their inherent sweetness and delicate texture without overpowering them. Here are some classic and delightful pairings that create a balanced and memorable meal:
- Roasted or Sautéed Vegetables: Lightly roasted asparagus, crisp green beans, or tender sautéed spinach with garlic make excellent choices. Their freshness and subtle flavors enhance the scallops without competing.
- Mixed Green Salad: A simple, vibrant mixed green salad with a light vinaigrette provides a refreshing contrast to the richness of the scallops and Parmesan crust.
- Creamy Mashed Potatoes or Cauliflower Mash: The smooth, comforting texture of mashed potatoes or a healthier mashed cauliflower offers a wonderful counterpoint to the scallops’ texture and flavor.
- Risotto or Polenta: A creamy mushroom risotto or a rich, cheesy polenta can create a more substantial and luxurious meal, perfectly soaking up any delicious juices.
- Light Pasta Dishes: Tossed simply in garlic and olive oil, or with a delicate lemony cream sauce, pasta provides a satisfying base that doesn’t overshadow the seafood.
- Couscous, Rice, or Roasted Cauliflower Rice: Fluffy couscous, plain white or brown rice, or a low-carb roasted cauliflower rice can act as a neutral canvas, allowing the scallops to shine.
- Crusty Bread: A good loaf of crusty bread is perfect for soaking up any buttery pan juices or accompanying a light salad.
Always remember to garnish your finished dish with fresh lemon wedges and a sprinkle of minced parsley for a bright, zesty finish!
Easy Optional Lemon-Butter Sauce for Broiled Scallops
While these scallops are magnificent on their own, a simple lemon-butter sauce can elevate them even further, adding a touch of bright acidity and richness. This sauce is also fantastic drizzled over your accompanying vegetables!
To make it, melt ¼ cup of butter in a small saucepan over low heat. If using unsalted butter, add a pinch of salt to taste (about ¼ teaspoon). Once the butter has fully melted, remove it from the heat and stir in 2 tablespoons of fresh lemon juice. For an added layer of flavor, you can also whisk in a tablespoon of finely chopped fresh herbs like parsley, chives, or dill. Serve immediately over your perfectly broiled scallops.
More Delicious Seafood Recipes to Explore
- Seared Scallops with Wilted Spinach Recipe
- Baked Crab Balls Recipe
- Stuffed Bacon-Wrapped Shrimp with Cream Cheese
Craving more easy, healthy, and carb-conscious recipes?
📋 Recipe Card
Perfect Broiled Scallops with a Parmesan Crust
Print
Pin
Rate
Ingredients
- 2 Pounds Sea Scallops
- 2 Tablespoons butter
- 2 Tablespoons olive oil
- ½ cup seasoned bread crumbs
- 2 Tablespoons Parmesan cheese
- 1 teaspoon parsley finely chopped
- ¼ teaspoon paprika
- ¼ teaspoon pepper
Instructions
- Preheat the oven to 425°F and place the oven rack about 10 inches from the top heating element.
- Rinse the sea scallops to remove any debris or ice particles and pat dry with a paper towel.
- Melt butter in the microwave (or on the stovetop) and combine it with olive oil.
- In a second shallow bowl combine breadcrumbs, grated parmesan cheese, chopped parsley, paprika, and black pepper.
- Lightly brush each scallop with the butter mixture, allowing excess butter to drip off.
- Roll each scallop in the parmesan breading, shaking off excess crumbs, and place it on a broiler pan coated with cooking spray.
Note: If you have a grill rack or cookie cooling rack that fits over a shallow baking pan, use it. This will help the bottoms of the scallops to crisp and not get soggy. Alternatively, you can skip breading the bottom of the scallops.
- Broil the scallops for 10 minutes or until they are moist and white in the center and the tops are golden brown.
The exact timing will vary depending on the oven, the size of the scallops, and how heavily they are breaded. They cook very quickly, so keep an eye on them, opening the oven door if you have to in order to get a good look at the progress.
Notes
Nutrition
Nutritional and Food Safety Disclaimer
This recipe was originally published on May 4, 2013, and has been updated to improve the reader experience and provide more comprehensive details.
