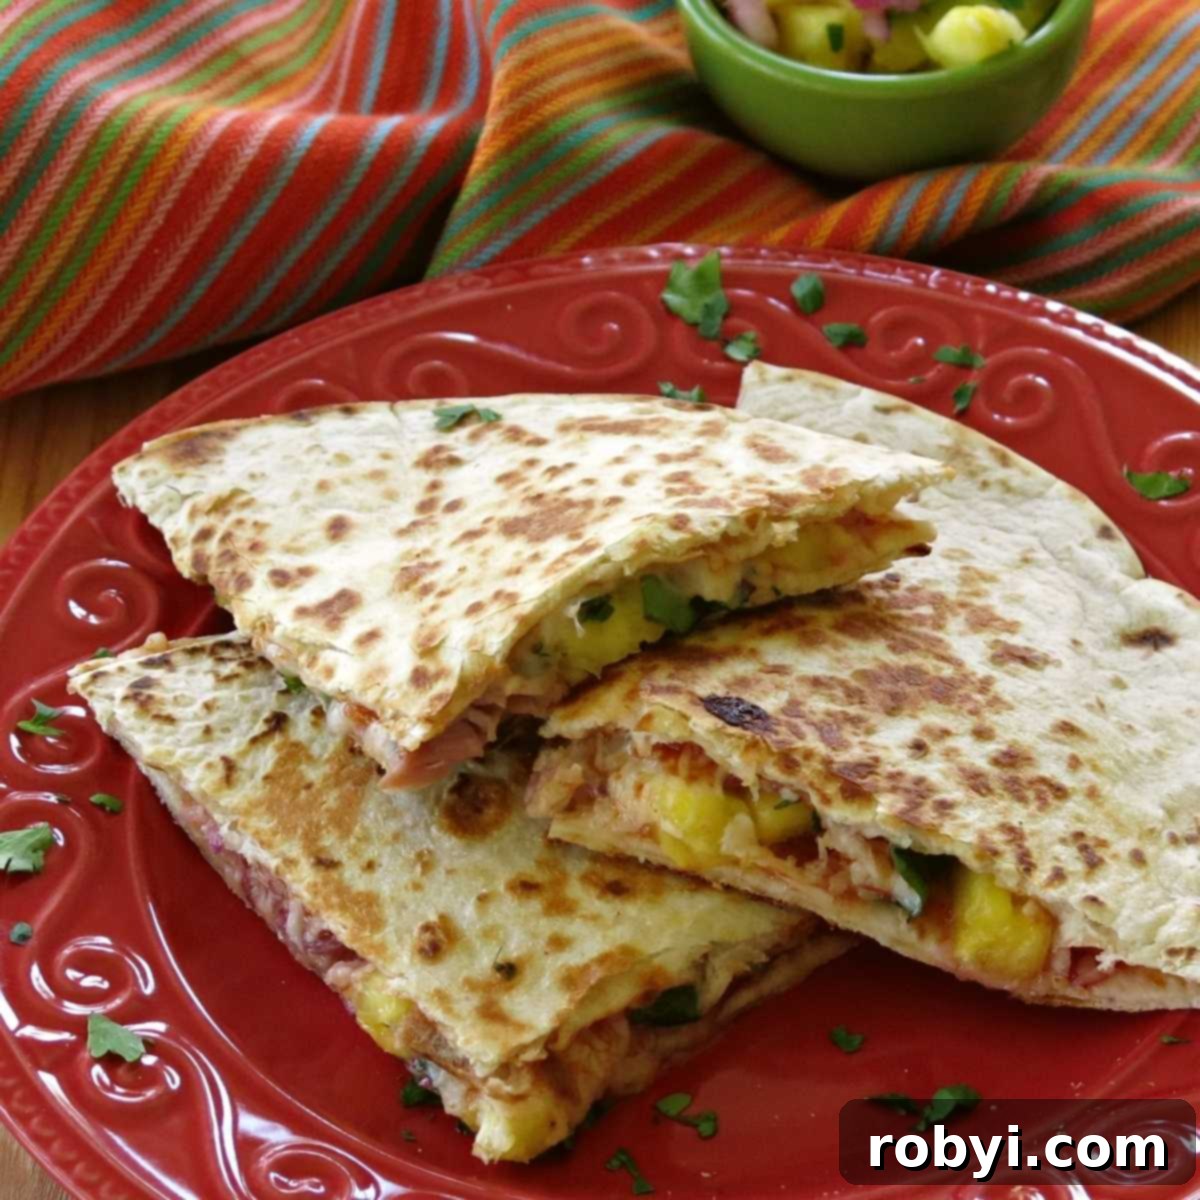
Ready for a culinary adventure that brings tropical flavors to your dinner table in a snap? These mouthwatering **Hawaiian Quesadillas** blend the classic appeal of ham and pineapple pizza with the irresistible comfort of a cheesy quesadilla. Affectionately known as “pizza-dillas,” they offer a unique and utterly delicious meal solution that’s both quick to prepare and incredibly satisfying.
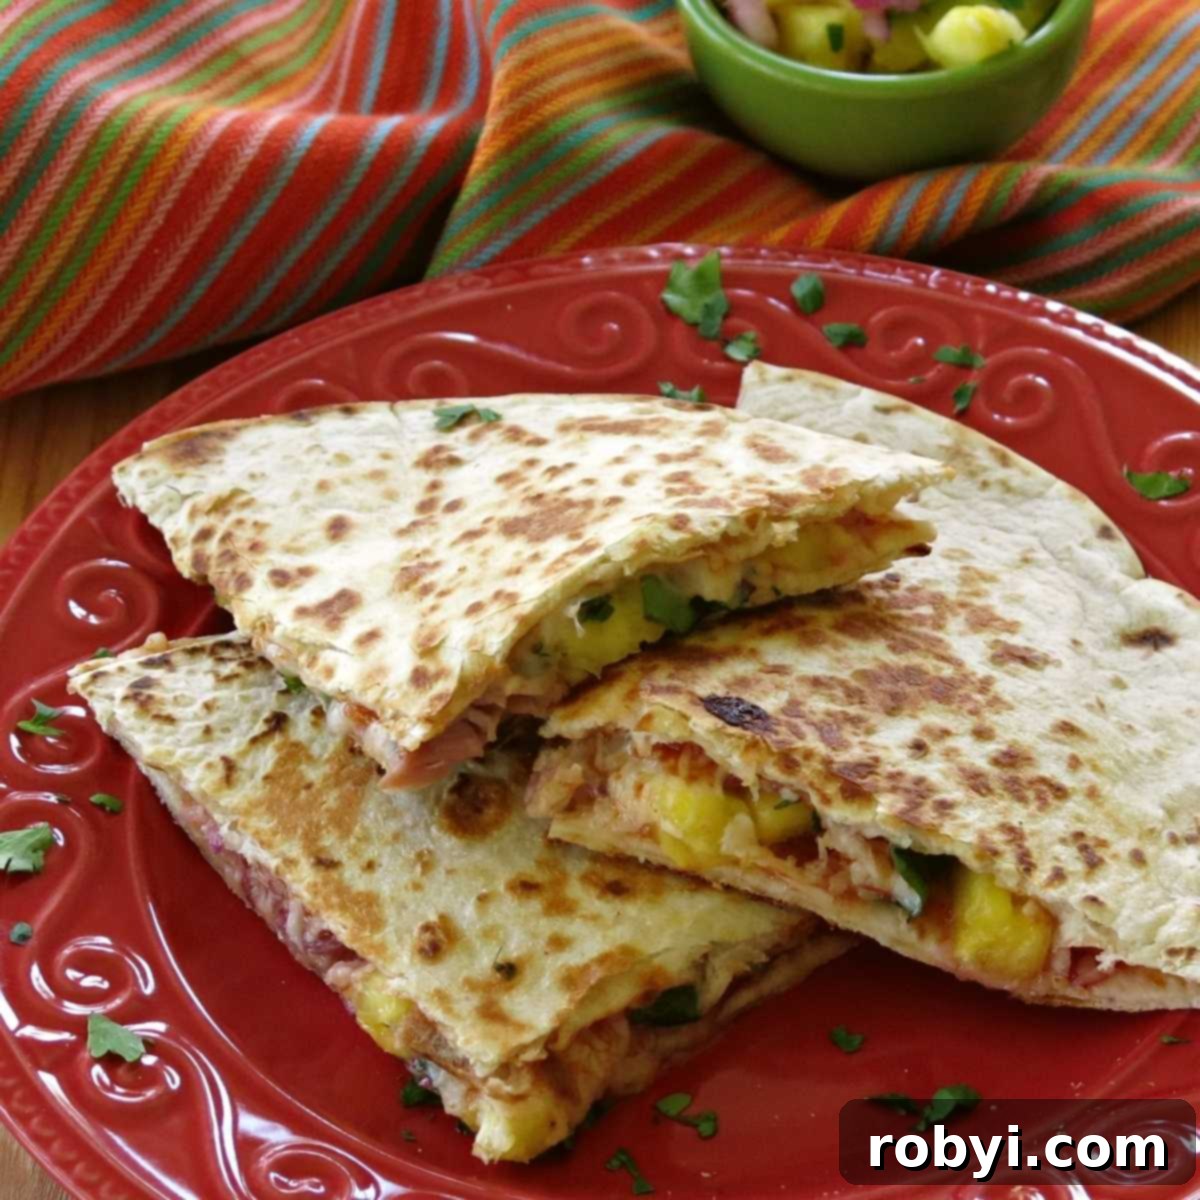
This recipe truly delivers the best of both worlds. Imagine the savory and sweet notes of your favorite Hawaiian pizza, but instead of waiting for oven baking, these culinary delights come together rapidly on your stovetop. You can have a hot, cheesy, and flavor-packed meal ready to enjoy in under 30 minutes, making them an ideal choice for any time of day – be it a speedy lunch, a fuss-free dinner, or even a fun, unexpected breakfast.
For me, these quesadillas are a go-to when I have leftover holiday ham and fresh pineapple. It’s an ingenious way to transform remnants into a vibrant, exciting dish. Often, I whip up a batch of homemade pineapple salsa too, as it uses many of the same ingredients and provides a bright, zesty contrast that perfectly complements the rich flavors of the quesadillas.
Why You’ll Fall in Love with This Hawaiian Quesadilla Recipe
There’s more to these quesadillas than just their unique flavor profile. Here’s why they’re destined to become a staple in your recipe collection:
- **Effortlessly Fast:** In a world where time is precious, having a recipe that’s ready in under half an hour is a game-changer. These quesadillas are perfect for those busy weeknights when you crave something delicious without the long prep.
- **Simple & Accessible Ingredients:** You likely have most of these ingredients already in your pantry or can easily find them at any grocery store. No exotic items needed, just fresh, wholesome components.
- **Endlessly Customizable:** The beauty of quesadillas lies in their flexibility. Want to add a little spice? Or try a different cheese? This recipe serves as a perfect canvas for your culinary creativity.
- **Kid and Adult Approved:** The familiar flavors of ham, pineapple, and cheese are universally loved, making this a surefire hit with picky eaters and adventurous palates alike. It’s a meal that brings everyone to the table.
- **Smart Leftover Solution:** Tired of the same old post-holiday ham sandwiches? This recipe offers an exciting and flavorful way to give leftover ham a whole new life.
- **Portable Perfection:** Whether packed for lunch or enjoyed on the go, these quesadillas are convenient, handheld, and mess-free.
Gather Your Tropical Filling: The Essential Ingredients
The magic of these Hawaiian quesadillas begins with fresh, high-quality ingredients. To ensure your cooking process is as smooth as possible, practice “mise en place” – gather and prepare all your components before you start cooking. This way, you won’t have to pause mid-way through assembly.
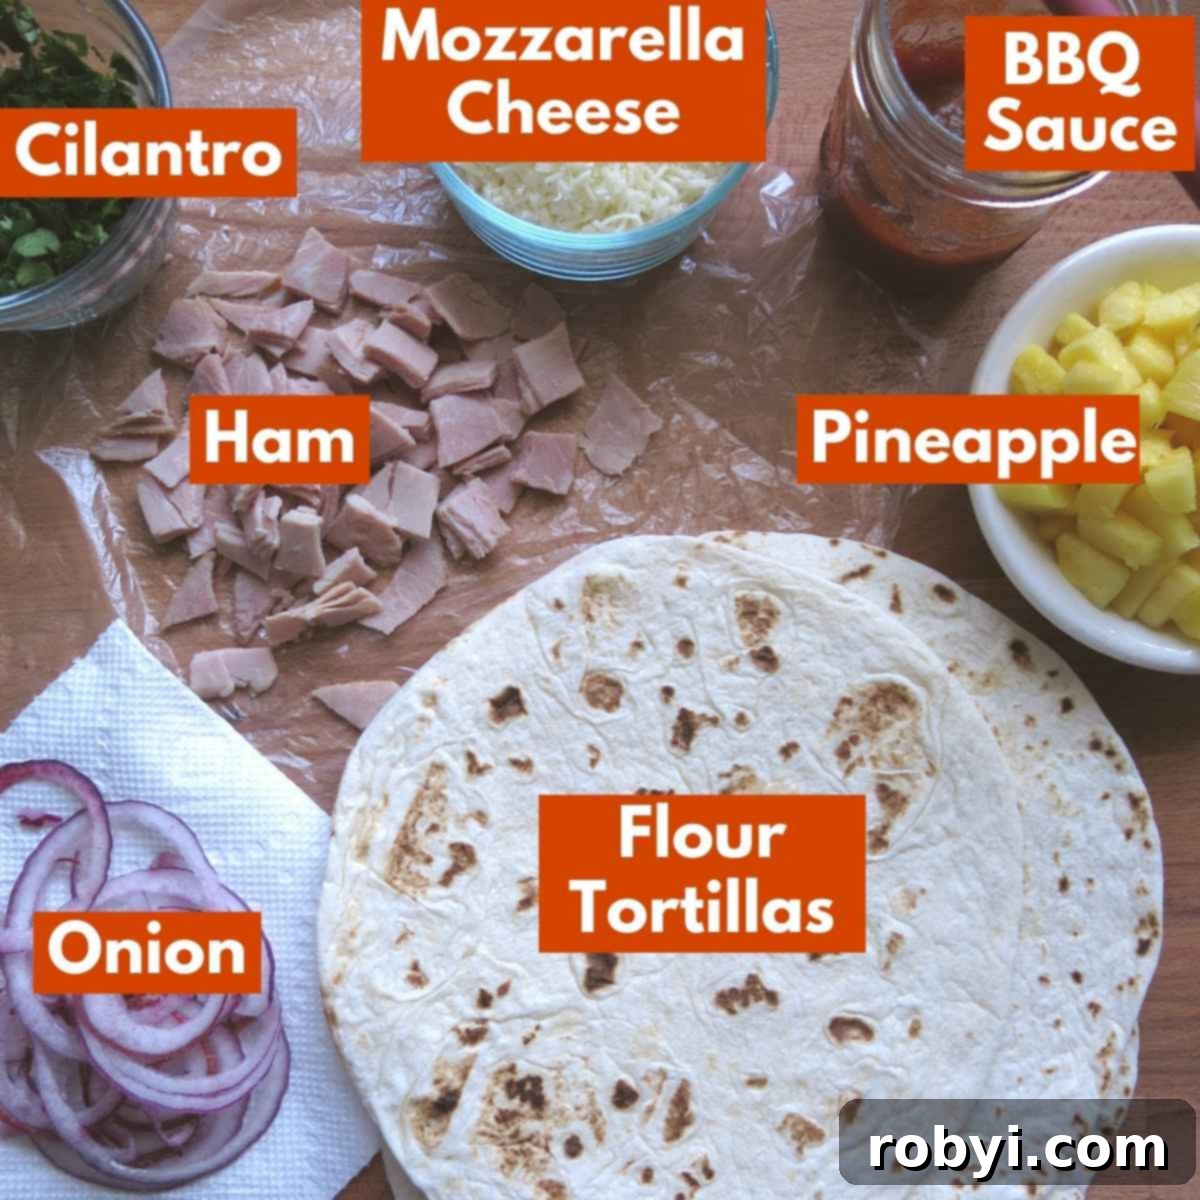
Here’s a detailed look at what you’ll need and some helpful tips:
- **Ham:** You can use freshly diced deli ham for convenience or, ideally, repurpose leftover baked ham. Finely dicing the ham is crucial; smaller pieces integrate better with the cheese and stay securely within the tortilla.
- **Pineapple:** Freshly diced pineapple offers a bright, tangy sweetness that truly stands out. If fresh isn’t available, well-drained canned pineapple tidbits are an excellent alternative. Ensure all excess liquid is removed to prevent your quesadillas from becoming soggy.
- **Red Onion:** A small amount of thinly sliced or finely diced red onion adds a delicate bite and a hint of sharpness. This subtle acidity beautifully cuts through the richness of the ham and cheese, and the sweetness of the pineapple.
- **Mozzarella Cheese:** Shredded mozzarella is the star here, prized for its superior melting qualities and mild flavor profile. It creates that irresistible gooey texture that holds all the fillings together. For a flavor twist, consider a mix of mozzarella with a touch of Monterey Jack or a mild cheddar.
- **Flour Tortillas:** These form the crispy exterior of your quesadillas. Medium-sized tortillas (typically 8-9 inches) are perfect for individual servings, but feel free to use larger, burrito-sized ones if preferred. For a carb-conscious option, “carb balance” tortillas work wonderfully and are often a staple in many households, including mine!
- **Barbecue or Pizza Sauce (Optional):** A light spread of your favorite barbecue sauce or marinara on the inside of the tortilla can add another layer of flavor. However, if you’re aiming for a lower-carb version or simply prefer the pure taste of ham and pineapple, you can omit the sauce or serve it on the side as a dipping accompaniment.
- **Fresh Cilantro (Optional, but Highly Recommended):** Chopped fresh cilantro introduces a burst of herbaceous freshness that brightens the entire dish. While listed as optional, it’s a non-negotiable ingredient in our kitchen for its vibrant impact.
- **Cooking Fat:** A combination of olive oil and/or butter is essential for cooking the tortillas to a perfect golden crispness on the stovetop. Butter contributes to a rich flavor, while olive oil helps achieve that beautiful browning.
Chef’s Secret: The key to a perfect quesadilla is finely chopping all your ingredients. Small pieces of ham, pineapple, and onion not only heat up and melt into the cheese more rapidly but also significantly reduce the chance of fillings falling out when you flip the quesadilla. This ensures every bite is packed with flavor.
For exact measurements of each ingredient and a printable recipe format, please refer to the detailed recipe card located further down the page.
Effortless Execution: Crafting Your Hawaiian Quesadillas
Making these Hawaiian quesadillas is wonderfully simple, whether you’re preparing a quick bite for yourself or a feast for the whole family. They can be cooked entirely on a single stovetop skillet, or if you’re catering to a crowd, a griddle offers a fantastic way to create an efficient assembly line.
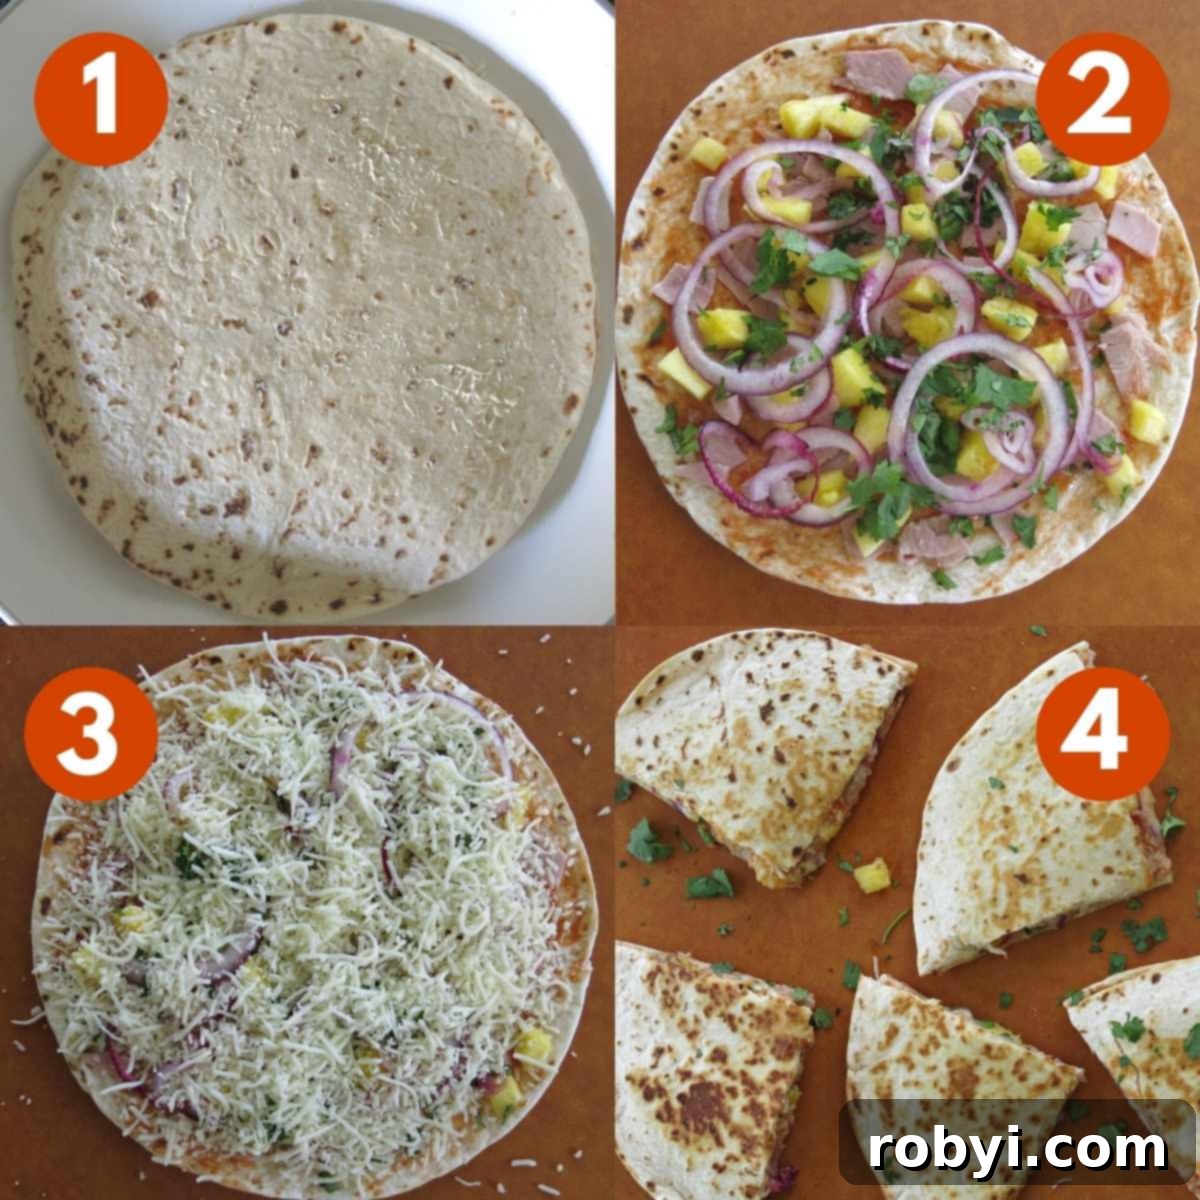
Follow these easy steps to create your perfect pizza-dillas:
- **Prepare the Tortillas for Crispiness:** Begin by lightly coating one side of each flour tortilla with a thin layer of butter. While not strictly mandatory, this step is highly recommended as it imparts a beautiful golden-brown color and an irresistibly crispy, buttery texture to the exterior of your quesadillas.
- **Layer the Flavor Base:** On the unbuttered side of a tortilla, spread a thin, even layer of your chosen barbecue or marinara sauce, if you’re using one. This adds a fantastic depth of flavor.
- **Build the Tropical Filling:** Next, artfully arrange your diced ham, pineapple tidbits, and thinly sliced red onion over the sauce. Be mindful not to overfill the tortilla, as this can make folding and flipping challenging.
- **Add the Cheesy “Glue”:** Generously sprinkle your shredded mozzarella cheese over the entire surface of the layered ingredients. The cheese will melt down, binding all the delicious components together into a cohesive, flavorful whole.
- **Top It Off:** Place a second tortilla directly on top of the cheese and fillings. Ensure that the buttered side of this top tortilla is facing upwards; this prepares it for achieving that perfect crisp when it’s time to flip.
- **Initiate Cooking:** Heat a large frying pan or skillet over medium-high heat. Lightly coat the pan with a spray of olive oil or a small pat of butter. Once heated, carefully place one assembled quesadilla into the hot skillet. Cook for approximately 3 minutes. During this time, the bottom tortilla should begin to crisp and turn golden, and you’ll notice the cheese starting to melt and bubble.
- **Flip and Finish:** With the help of a large, sturdy spatula, carefully flip the quesadilla over to cook the second side. Continue cooking for another 2-3 minutes, or until the second side is equally golden brown and crispy, and the cheese is fully melted and delightfully gooey.
- **Slice and Serve Immediately:** Once cooked, remove the quesadilla from the pan. For effortless serving, use a pizza cutter to slice it into neat triangles. Serve hot to enjoy the peak of its cheesy, crispy perfection.
Repeat this delightful process for any remaining quesadillas, keeping the cooked ones warm on a plate covered with foil until you’re ready to serve the entire batch. Fresh off the skillet is always best!
Streamlined Method for Larger Tortillas
When working with generously sized, burrito-style tortillas, an alternative folding technique can simplify the cooking process and prevent any filling mishaps:
- Instead of using two tortillas, simply lay out one large tortilla. Distribute all your desired ingredients – sauce, ham, pineapple, onion, and cheese – evenly over **one half** of the tortilla.
- Carefully fold the empty half of the tortilla over the side with the ingredients, creating a half-moon or crescent shape.
- Cook this folded quesadilla on each side using the exact same method as described above, until both sides are golden brown and perfectly crispy, and the cheese within is wonderfully melted. This single-tortilla method is particularly effective for larger sizes, making them much easier to manage and flip in the pan.
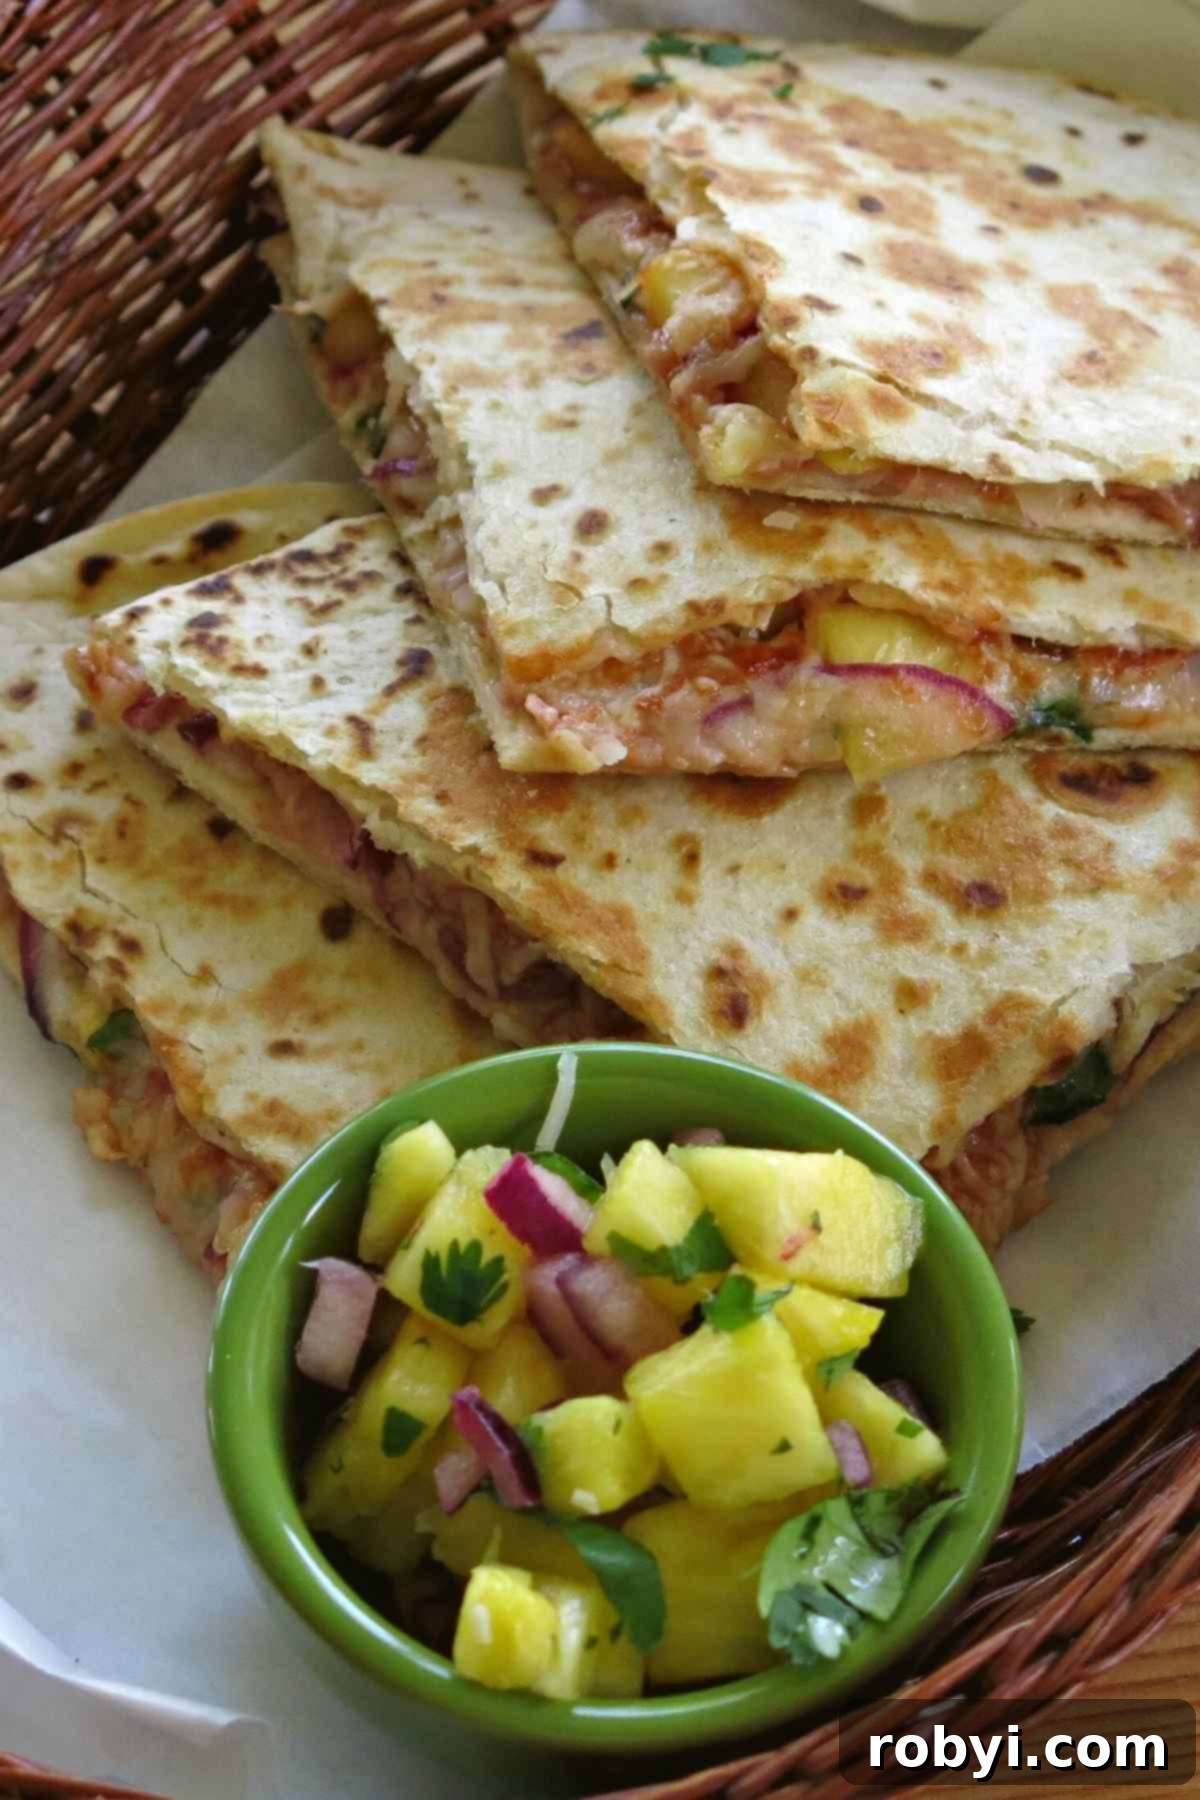
To further enhance your meal, consider whipping up a quick and refreshing pineapple salsa. Simply combine any extra diced pineapple with finely chopped red onion and cilantro, then add a squeeze of fresh lime juice to taste. This zesty, bright salsa provides a fantastic counterpoint to the rich and savory Hawaiian cheese quesadillas.
Perfect Pairings: What to Serve with Hawaiian Quesadillas
While these quesadillas are undeniably satisfying on their own, pairing them with the right sides can elevate your meal into a complete and unforgettable experience. Here are some suggestions:
- **Fresh & Fruity Salsas:** Beyond the pineapple salsa mentioned, a classic tomato salsa, mango salsa, or even a spicy corn salsa can add a burst of freshness and zest.
- **Cool & Creamy Toppings:** A dollop of sour cream, plain Greek yogurt, or a drizzle of avocado cream sauce provides a delightful cool and tangy contrast to the warm, savory quesadillas.
- **Avocado Goodness:** Sliced fresh avocado or homemade guacamole offers a rich, creamy texture and healthy fats that complement the tropical flavors beautifully.
- **Light Green Salad:** A simple side salad with mixed greens, a light vinaigrette, and perhaps some cherry tomatoes or cucumber can add a refreshing crunch and balance the meal.
- **Black Beans or Rice:** For a heartier meal, serve alongside a small portion of seasoned black beans, cilantro-lime rice, or even a quick quinoa salad.
Elevate Your Dish: Variations & Customization Ideas
The beauty of quesadillas lies in their incredible adaptability. This Hawaiian version is a fantastic starting point, but don’t hesitate to experiment and tailor it to your unique preferences. Here are some inspiring ideas for customizing your tropical quesadillas:
- **Introduce a Spicy Kick:** For those who love a bit of heat, finely diced jalapeños (fresh or pickled), a pinch of red pepper flakes, or a dash of hot sauce in the filling can add a welcome zing.
- **Explore Different Cheeses:** While mozzarella is excellent, feel free to swap it out or combine it with other cheeses. Monterey Jack, a Mexican blend, or even sharp cheddar can add a different dimension of flavor and melt beautifully.
- **Boost with More Veggies:** Increase the nutritional value and texture by incorporating other finely chopped vegetables. Bell peppers (especially red or yellow for sweetness), corn kernels, or a handful of fresh spinach can be wonderful additions.
- **Alternative Proteins:** Not a fan of ham, or simply out of it? Cooked and shredded chicken (perhaps rotisserie chicken for speed) or seasoned ground turkey can be fantastic substitutes. For a delicious vegetarian option, omit the ham and add black beans, extra vegetables, or even grilled halloumi cheese.
- **Sweetness Amplifier:** For an even richer sweet-and-savory experience, consider brushing the pineapple with a tiny bit of brown sugar or honey before adding it to the quesadilla. A sprinkle of cinnamon can also add a subtle warmth.
- **Gourmet Ham Options:** Experiment with different types of ham beyond deli slices, such as smoky pancetta, crispy bacon bits, or even a thinly sliced prosciutto for a more sophisticated flavor.
Preparing Ahead, Storing, and Reheating Your Quesadillas
These Hawaiian quesadillas are not only delicious fresh but also make fantastic leftovers. They’re perfect for meal prepping or having a quick snack ready to go.
- **Advance Preparation:** You can chop all your ham, pineapple, and red onion a day or two beforehand. Store each ingredient in separate airtight containers in the refrigerator. This minimizes prep time on cooking day, making the process even faster.
- **Storage of Cooked Quesadillas:** Once your quesadillas are cooked, allow them to cool completely to room temperature. Then, store them in an airtight container in the refrigerator for up to 3-4 days. For optimal freshness and to prevent them from sticking together, place a piece of parchment paper between individual quesadilla triangles.
- **Reheating for Best Results:**
- **Stovetop/Panini Press (Recommended):** To regain that desirable crispiness, reheat your quesadillas in a lightly oiled skillet over medium heat. Cook for 2-3 minutes per side, or until thoroughly heated and crispy. A panini press also does an excellent job of achieving a perfectly crisp exterior.
- **Oven/Toaster Oven:** Preheat your oven or toaster oven to 350°F (175°C). Place the quesadillas on a baking sheet and bake for 5-10 minutes, or until they are warmed through and the tortillas have re-crisped slightly.
- **Microwave (Quick but Softer):** While the microwave is the fastest reheating method (30-60 seconds), it tends to make the tortillas soft rather than crispy. If you opt for the microwave, consider a quick finish in a hot pan afterward to crisp up the edges if desired.
Your Questions Answered: Hawaiian Quesadilla FAQs
Here are some frequently asked questions to help you master this delicious Hawaiian Quesadilla recipe:
Can I make the filling ahead of time?
Absolutely! Preparing your filling ingredients in advance is a great time-saver. Dice the ham, pineapple, and red onion up to 24-48 hours ahead and store them separately in airtight containers in the refrigerator. This makes assembling your quesadillas a breeze when you’re ready to cook.
What’s the secret to extra crispy quesadillas?
Achieving a perfectly crispy quesadilla involves a few key steps. First, ensure you generously butter the outer surface of your tortillas. Second, cook them in a preheated skillet over medium-high heat with a little olive oil or butter. Avoid overcrowding the pan; cook one or two at a time to maintain consistent heat and allow each side to brown evenly to a beautiful golden crisp.
My cheese isn’t melting properly. What should I do?
If your cheese isn’t melting as desired, double-check that your skillet is hot enough (medium-high heat is key). Using pre-shredded cheese generally helps, as it melts more quickly and uniformly than freshly grated block cheese. For an extra boost, you can place a lid on the skillet for the first minute or so of cooking; this traps heat and helps the cheese melt faster.
Can I freeze cooked Hawaiian quesadillas?
Yes, you can! Cook the quesadillas as directed, then allow them to cool completely. Wrap each individual quesadilla tightly in plastic wrap, then an additional layer of aluminum foil, before placing them in a freezer-safe bag or container. They can be frozen for up to 1-2 months. When ready to enjoy, reheat them directly from frozen in a preheated oven or toaster oven until warm and crispy.
Are these quesadillas suitable for a low-carb diet?
This recipe can be adapted for a lower-carb diet. The primary carbohydrates come from the tortillas and the pineapple. To make them more carb-conscious, opt for “carb balance” or low-carb tortillas, and consider reducing the amount of pineapple. Additionally, omit the barbecue sauce or choose a sugar-free, low-carb alternative.
Discover More Effortless Dinner Recipes
If you loved the simplicity and flavor of these Hawaiian Quesadillas, you’re in for a treat! Explore more easy and delicious dinner ideas from our collection that are perfect for any night of the week.
- Monte Cristo Grilled Cheese Sandwich Recipe (with Jam!)
- Butternut Squash Quesadillas Recipe
- Gourmet Sloppy Joes (without ketchup!)
Seeking more easy, healthy, and carb-conscious recipes?
📋 Hawaiian Quesadillas with Ham, Pineapple, and Cheese Recipe Card
Hawaiian Quesadillas with Ham, Pineapple, and Cheese
These Hawaiian Quesadillas, featuring a delightful mix of savory ham, sweet pineapple, and gooey cheese, put a delicious twist on the classic pizza combination. An easy “pizza-dilla” recipe, it’s perfect for using up leftover ham and makes for a quick, satisfying meal any time of day.
Rating: 5 out of 5 stars (based on 2 votes)
Prep Time: 10 minutes
Cook Time: 20 minutes
Total Time: 30 minutes
Servings: 4 servings
Author: Marjory Pilley
Ingredients
- 1 Tablespoon butter
- 8 flour tortillas (8-9 inch, carb balance tortillas work great for a lower-carb option)
- ½ cup barbecue sauce (optional; use a low-carb version or marinara sauce, or omit for a simpler taste)
- 16 ounces ham, diced (any type, including deli-style; roughly 1 cup)
- 1 cup diced pineapple (fresh diced or canned tidbits, thoroughly drained)
- ½ cup red onion, thinly sliced or finely diced
- 2 cups mozzarella cheese, shredded
- ¼ cup chopped cilantro (optional, but adds a refreshing touch)
- Olive Oil spray
Instructions
- Lightly coat one side of each flour tortilla with a thin layer of butter. This step is optional but highly recommended for a crispy, flavorful exterior.
- On the unbuttered side of a tortilla, lightly spread barbecue sauce or marinara (if desired). Evenly layer with diced ham, pineapple, red onion, and cilantro.
- Generously sprinkle shredded mozzarella cheese over the toppings, ensuring good coverage for melting.
- Place a second tortilla on top, with its buttered side facing upwards.
- Heat a large frying pan or skillet over medium-high heat and lightly coat it with olive oil spray.
- Carefully place an assembled quesadilla in the hot skillet. Cook for about 3 minutes, or until the bottom is golden brown and crispy, and the cheese has visibly started to melt.
- Using a large, sturdy spatula, carefully flip the quesadilla. Cook the second side for another 2-3 minutes, until it’s also golden brown and the cheese is fully melted and bubbly.
- Remove from the pan. Keep warm and repeat the process for any remaining quesadillas until all are cooked.
- Cut the quesadillas into triangles using a pizza cutter for easy serving, and enjoy them hot!
Notes
For more detailed expert tips and step-by-step pictures, refer to the full article above.
Alternative method for cooking larger or burrito-sized tortillas:
- Place all ingredients (sauce, ham, pineapple, onion, cheese) on one half of a single large tortilla.
- Fold the empty side of the tortilla over the ingredients, creating a half-moon shape.
- Cook on each side using the same skillet method described above until golden brown and the cheese is melted. This approach is ideal for larger tortillas as it makes them easier to handle and flip.
Nutrition Information (Per Serving, Approximate)
Calories: 503kcal | Carbohydrates: 9g | Protein: 38g | Fat: 35g | Saturated Fat: 16g | Polyunsaturated Fat: 3g | Monounsaturated Fat: 13g | Trans Fat: 1g | Cholesterol: 122mg | Sodium: 1735mg | Potassium: 447mg | Fiber: 2g | Sugar: 5g | Vitamin A: 558IU | Vitamin C: 21mg | Calcium: 305mg | Iron: 1mg
Please note: These nutritional values are estimates and can vary based on the specific brands, quantities, and preparation methods of ingredients used.
Nutritional and Food Safety Disclaimer
This recipe was originally published on May 27, 2015, and has been thoughtfully updated and expanded to provide an even richer and more engaging reader experience.
