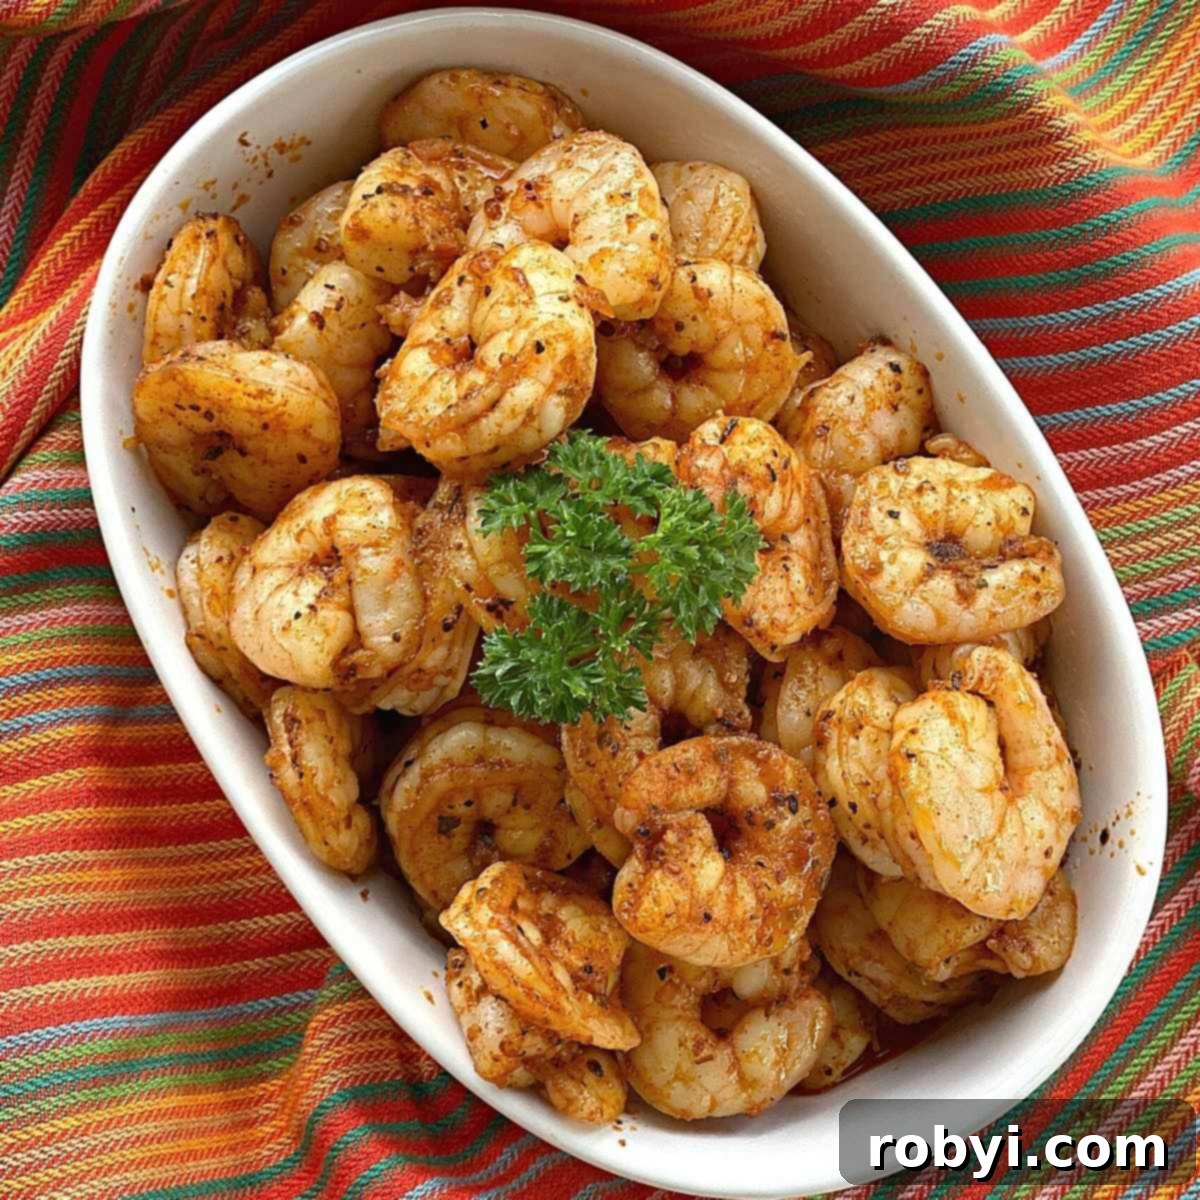
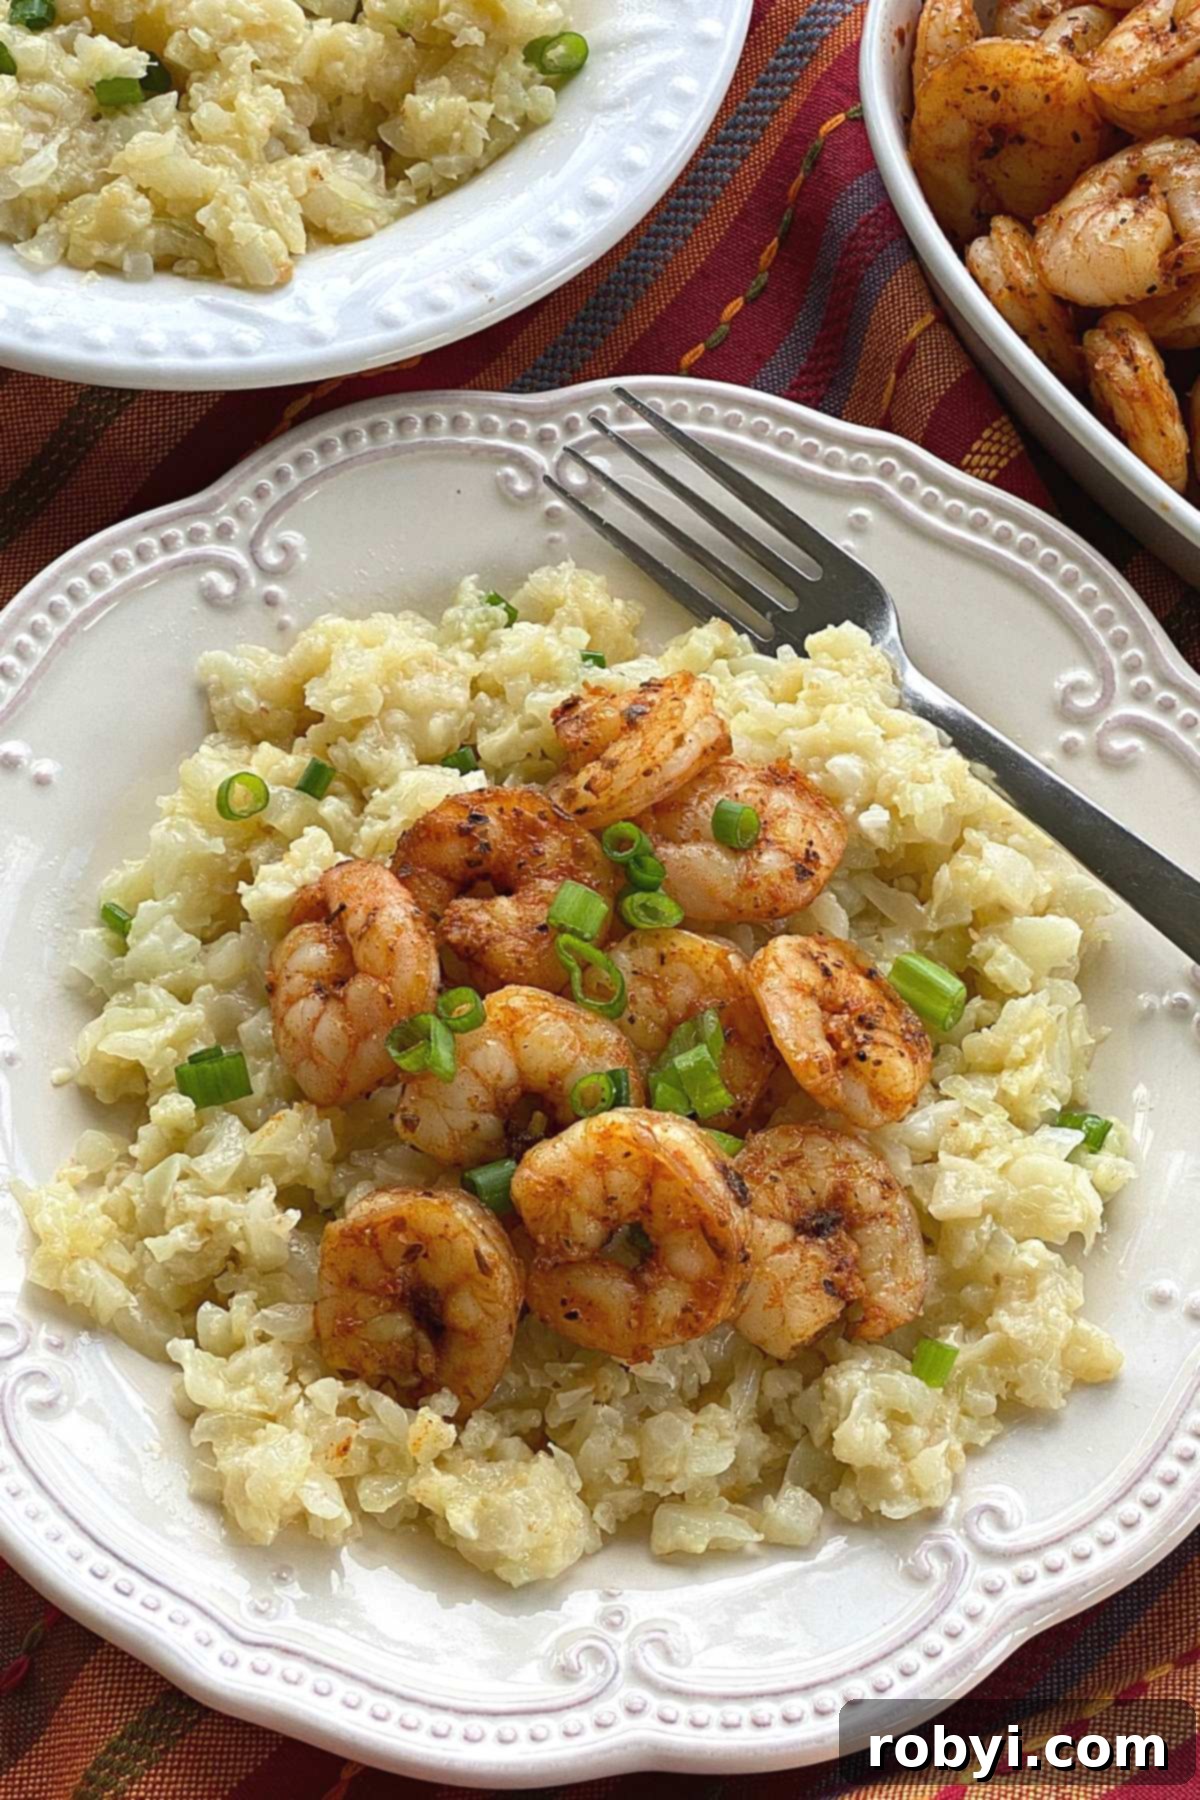
This easy blackened shrimp recipe will add bold flavor to your dinner in just 10 minutes! Perfect for a busy weeknight or a special occasion, pan-frying shrimp with our homemade blackened seasoning blend transforms a simple ingredient into a quick, satisfying, and memorable meal.
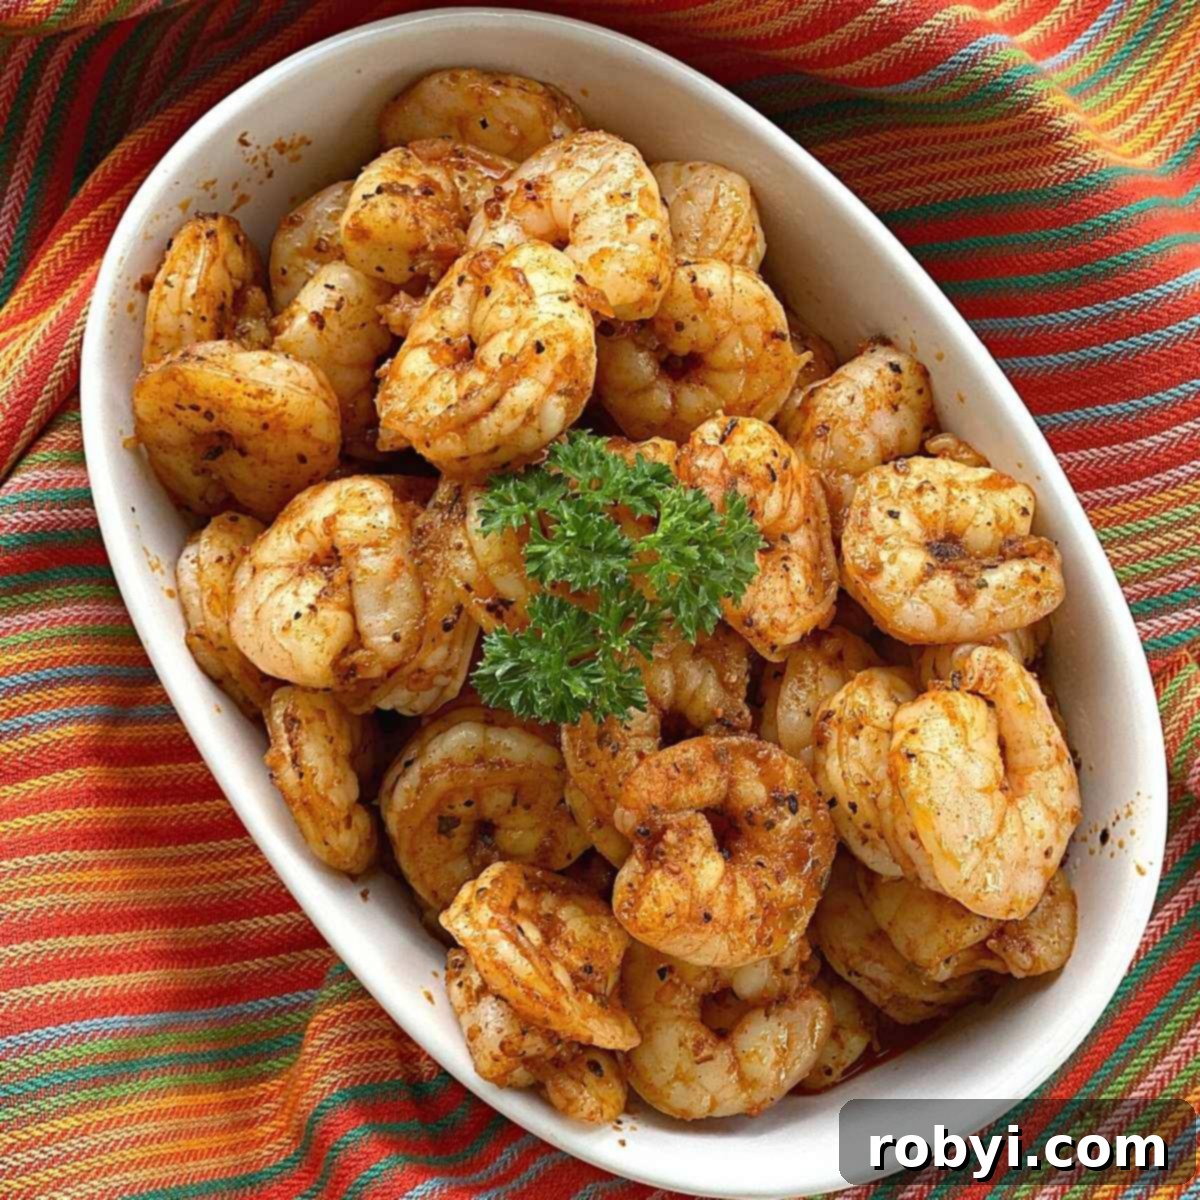
Blackening shrimp on your stovetop is a phenomenal way to infuse vibrant, spicy flavor into any dish, making it instantly memorable. Its incredible versatility means it pairs beautifully with an array of meals. We absolutely love serving it with creamy cauliflower grits, tossed into pasta dishes, or piled high in soft tacos. But that’s just the tip of the iceberg for how this zesty protein can elevate your culinary creations.
Beyond its fantastic taste, this cooking technique offers a remarkably healthy and keto-friendly approach to preparing succulent shrimp, adding minimal extra calories or carbohydrates. It’s a wonderful way to enjoy a zestful, high-protein meal without compromise, fitting seamlessly into various modern dietary preferences.
Originating from vibrant Cajun cuisine, the “blackening” technique doesn’t involve burning the food, nor does it necessarily require grilling. Instead, it refers to coating a protein, like shrimp, with a robust blend of spices – often including a fiery kick from cayenne pepper – and then searing it quickly over very high heat in a hot skillet. This rapid cooking process creates a dark, flavorful, and slightly crusty exterior, sealing in the shrimp’s natural sweetness and moisture. The result is a bold, complex flavor profile that’s simply irresistible, characterized by a savory depth and a delightful texture contrast.
Whether you opt for our easy-to-make homemade blackening seasoning or a convenient store-bought jar, you’ll find yourself reaching for this recipe again and again. It’s a testament to how simple ingredients, combined with a smart cooking method, can create extraordinary flavors in a flash, making it a staple in your meal rotation.
The Allure of Blackened Shrimp: A Culinary Gem
Blackened shrimp isn’t just another shrimp dish; it’s a flavor experience that stands out. The magic lies in the distinctive cooking method that creates a unique blend of textures and tastes. Imagine succulent, tender shrimp enveloped in a deeply spiced, slightly smoky crust that delivers a satisfying crunch with every bite. The high heat caramelizes the spice blend, forming that signature dark exterior, while the inside remains juicy and perfectly cooked. This remarkable contrast between the crispy, flavorful crust and the tender, sweet interior is what makes blackened shrimp so utterly captivating and addictive.
Its widespread appeal also stems from its sheer speed and convenience. In a world where time is a precious commodity, a gourmet-quality meal ready in under 15 minutes is a culinary dream come true, perfect for hectic weeknights or impromptu gatherings. Furthermore, shrimp itself is a lean protein powerhouse, rich in essential nutrients like selenium, vitamin B12, and phosphorus, while being remarkably low in calories and saturated fat. When prepared with minimal oil and a dry spice rub, blackened shrimp becomes an exceptionally healthy option that fits seamlessly into various dietary plans, including keto, paleo, and low-carb lifestyles. It’s a testament to the fact that healthy eating never has to sacrifice flavor or excitement.
Essential Ingredients for Bold Flavor
To craft the most delectable blackened shrimp, you’ll need just a few key components. Quality ingredients are paramount to achieving that authentic, robust flavor and perfect texture that defines this dish.
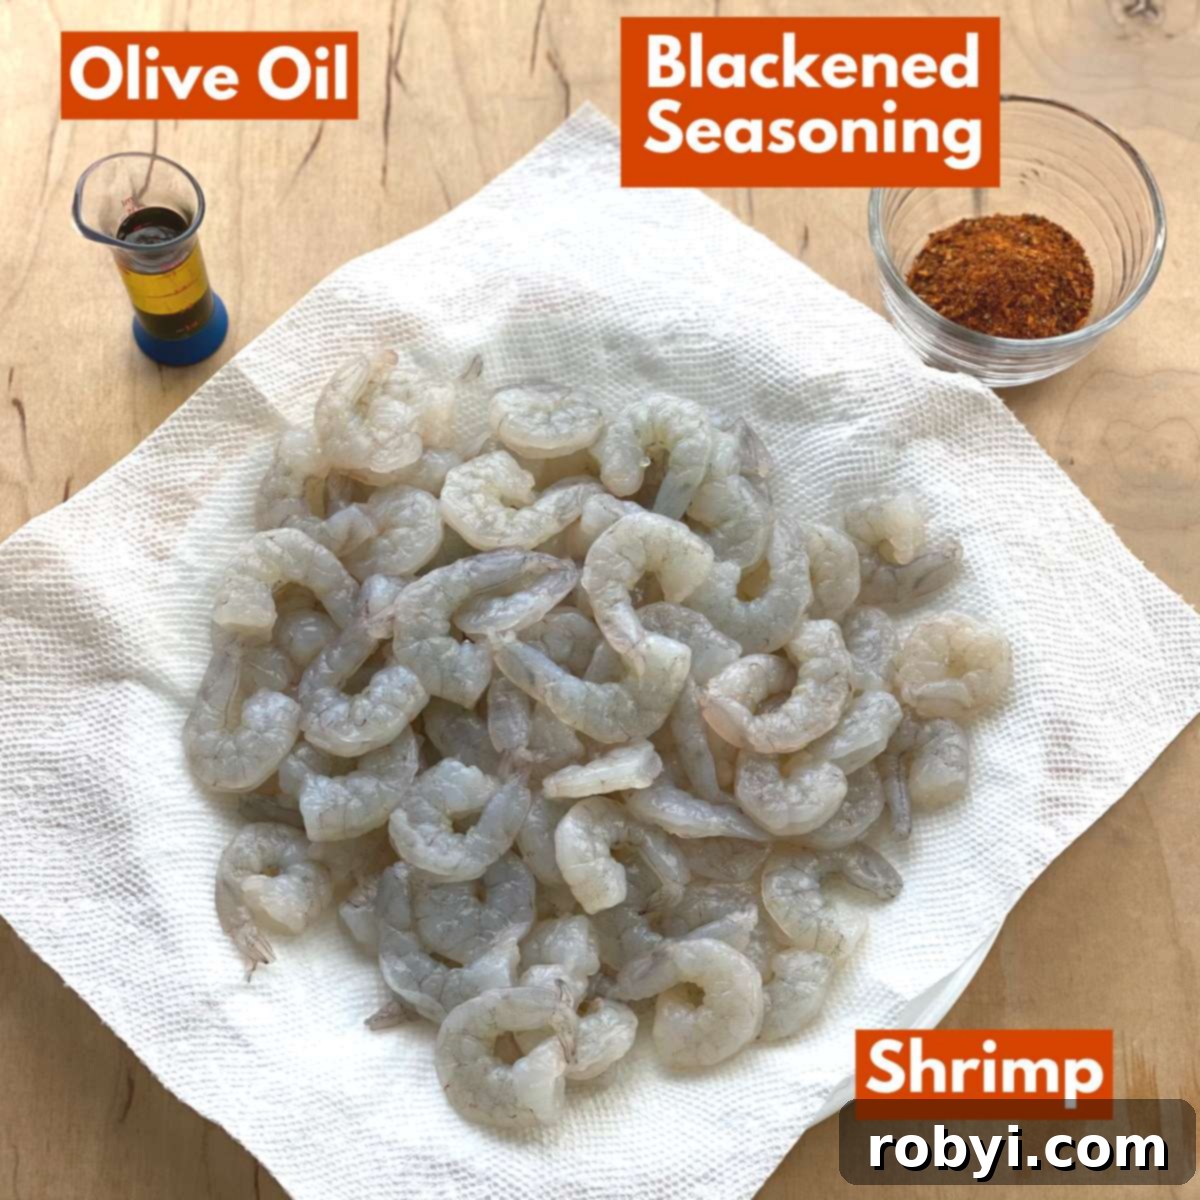
- Shrimp, peeled and deveined: The undisputed star of our dish! For the best results, choose medium to large shrimp, as they are generally easier to handle in a hot pan and tend to retain moisture better, preventing them from becoming rubbery when cooked quickly. You can opt for fresh shrimp, which often offers a slightly sweeter flavor, or high-quality frozen shrimp that has been properly defrosted. When buying frozen, look for individually quick-frozen (IQF) shrimp, as this helps prevent freezer burn and makes it easy to grab just what you need. Whether you leave the tails on or remove them is entirely a matter of preference; tails-on can make for a more elegant presentation and provide a convenient “handle,” while tails-off are more practical for mixing into pasta or salads. Always ensure your shrimp are thoroughly peeled and deveined for the best and cleanest eating experience.
- Blackened Seasoning: This vibrant spice blend is where the magic happens and the distinct flavor profile emerges! You have two excellent options: purchase a pre-made Cajun or Creole seasoning blend from your local grocery store, or create your own custom mix. Store-bought blends offer incredible convenience and a consistent flavor profile, often featuring a robust combination of paprika, garlic powder, onion powder, dried thyme, oregano, and, crucially, cayenne pepper for heat. When selecting a commercial blend, consider your preferred spice level, as the cayenne content can vary significantly. Alternatively, making your own seasoning at home, as detailed below, allows for complete control over the flavor balance and heat intensity, ensuring it perfectly matches your palate and any dietary needs.
- Olive Oil: A good quality olive oil is essential for coating the shrimp evenly and facilitating the blackening process. The oil serves multiple purposes: it helps the seasoning adhere beautifully to the shrimp, distributes the heat efficiently, and contributes to that desirable crispy, dark crust when cooked over high heat. For those looking for alternatives, avocado oil is an excellent substitute due to its exceptionally high smoke point and neutral flavor, which won’t overpower the spices. Clarified butter (ghee) or even regular unsalted butter can also be used, especially if you desire a richer, nuttier flavor, though butter tends to brown faster, so you’ll need to watch the heat carefully to prevent scorching.
For the complete list of ingredients with precise measurements and detailed cooking instructions, please refer to the comprehensive recipe card further down on this page.
Crafting Your Own Blackened Seasoning Blend
Creating your own blackened seasoning is not only incredibly simple but also allows for unparalleled customization and freshness. This versatile Cajun-inspired seasoning blend is the very same one we adore for preparing our savory Cajun catfish and our delicious baked blackened chicken, proving its universal appeal and adaptability across various proteins.
The true beauty of a homemade blend lies in your ability to tailor it precisely to your taste preferences. If you prefer a milder flavor profile, simply reduce the amount of cayenne pepper. Conversely, if you crave an extra fiery kick that awakens the palate, feel free to add a bit more. Each spice in this blend plays a vital role in creating a complex and harmonious flavor symphony:
- Paprika: Provides a rich, appealing color and a mild, slightly sweet and peppery base, crucial for visual appeal and foundational flavor.
- Salt: An absolutely essential component, it enhances all the other flavors in the blend and seasons the shrimp directly.
- Cayenne Pepper: The primary source of heat and the characteristic “kick” of blackened dishes. Adjust this to achieve your desired spice level.
- Ground Cumin: Adds a warm, earthy, and slightly smoky depth that beautifully complements the other spices.
- Dried Thyme Leaves: Contributes a classic herbaceous, aromatic, and slightly minty note, which is characteristic of traditional Cajun and Creole profiles.
- White Pepper: Offers a sharper, more subtle heat than black pepper, providing a sophisticated layer of warmth that works wonderfully with cayenne.
- Onion Powder: Delivers a foundational savory sweetness and aromatic depth, rounding out the spice blend.
To prepare your homemade blend, simply combine the following ingredients in a small bowl, mixing thoroughly until evenly distributed. Ensure there are no clumps to guarantee even seasoning on your shrimp:
- 2 teaspoons paprika
- ¼ teaspoon salt
- 1 teaspoon cayenne pepper
- 1 teaspoon ground cumin
- 1 teaspoon dried thyme leaves
- ½ teaspoon white pepper
- ½ teaspoon onion powder
Once mixed, any leftover seasoning can be stored in an airtight container in a cool, dark place for future use, ensuring you always have a vibrant spice blend ready for your next culinary adventure. This homemade blend will quickly become a pantry staple!
Step-by-Step Blackening Mastery
Achieving perfectly blackened shrimp is simpler than you might think, especially when you understand a few key techniques and the importance of high heat. While we’ve had fantastic results using a high-quality non-stick pan, for truly authentic blackening and an unparalleled crispy crust, a well-seasoned cast iron skillet is highly recommended. Cast iron holds heat exceptionally well, which is absolutely crucial for the rapid searing process required for blackening.
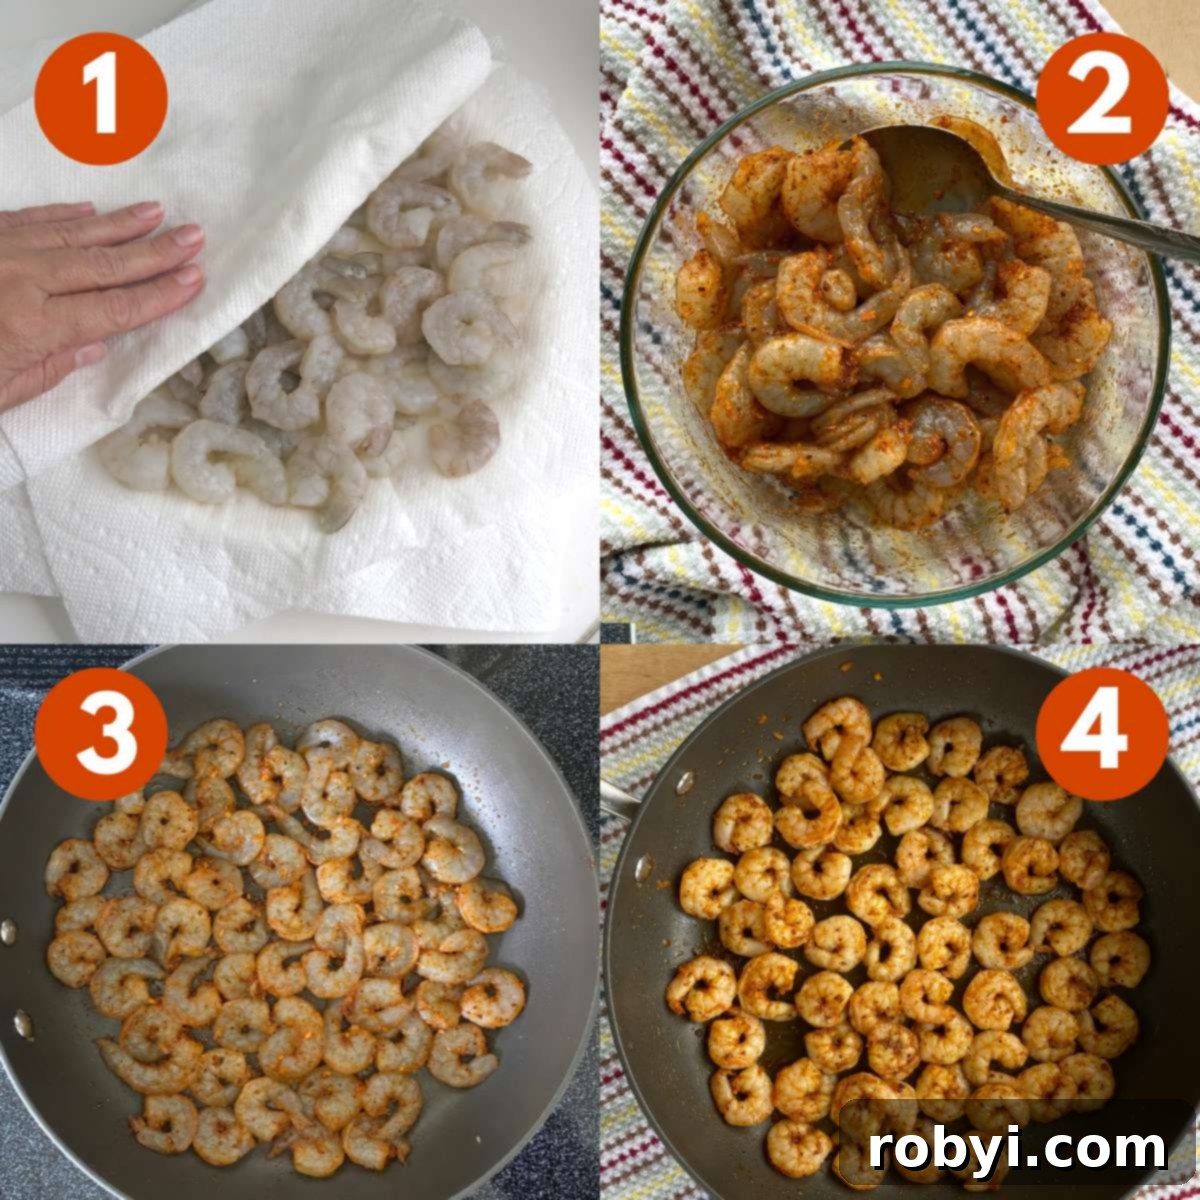
- Prepare the Shrimp: Begin by patting your peeled and deveined shrimp thoroughly dry with paper towels. This crucial step removes excess moisture from the surface of the shrimp. This not only allows the seasoning to adhere better but also promotes a superior sear and crisp crust, preventing the shrimp from steaming in the pan rather than searing.
- Season the Shrimp: In a medium bowl, toss the thoroughly dried shrimp with olive oil until each piece is lightly and evenly coated. Then, generously sprinkle your chosen blackened seasoning blend over the shrimp. Use your hands or a spoon to gently mix and ensure every piece is fully and evenly coated with the spices. If you have a few extra minutes, letting the seasoned shrimp rest for 5-10 minutes can help the flavors penetrate deeper into the shrimp, though this is optional for a quick meal.
- Sear the First Side: Heat a large skillet (preferably cast iron) over medium-high heat until it’s very hot – you might even see a wisp of smoke. If your shrimp are already well-coated with oil, you might not need to add more to the pan. However, if the pan appears dry, swirl in an additional teaspoon or two of olive oil. Carefully arrange the seasoned shrimp in a single layer in the hot skillet, ensuring not to overcrowd the pan. Overcrowding can drastically lower the pan’s temperature and lead to the shrimp steaming rather than achieving that coveted blackened sear. Cook, undisturbed, for approximately three minutes.
- Flip and Finish: After three minutes, use tongs to flip each shrimp to the other side. Continue to cook for about three minutes more, or until the shrimp are fully cooked through. The exact timing can vary slightly depending on the size of your shrimp and the intensity of your pan’s heat. Shrimp cooks very quickly, so it’s essential to keep a close eye on them. You’ll know they’re perfectly done when they turn a vibrant pink color and their centers are opaque white. Avoid overcooking at all costs, as this will result in tough, rubbery shrimp.
Expert Tip: For an even more intense, flavorful crust, ensure your skillet is smoking hot before adding the shrimp. This allows for a rapid sear that locks in moisture and maximizes the blackened effect. Don’t be afraid of a little smoke – it’s part of the authentic blackening process! Just ensure you have good ventilation in your kitchen.
Creative Variations to Elevate Your Dish
While classic blackened shrimp is fantastic on its own, a few simple additions can transform its flavor profile, catering to different palates and moods. If you’re someone who appreciates a delightful balance of sweet and spicy, consider incorporating a touch of honey into your blackening process. This trick beautifully offsets the heat from the cayenne pepper, adding a subtle caramel note that is utterly delicious. We often use this method when making our savory blackened cod, and it’s equally superb with shrimp.
- Sweet & Spicy Enhancement: Mix one full teaspoon of honey directly into the olive oil and Cajun seasoning blend before tossing with the shrimp. The natural sugars in the honey will lightly caramelize during cooking, creating a wonderfully complex sweet-and-spicy flavor that’s hard to resist.
- Garlic Butter Boost: For an extra layer of richness and aromatic flavor, after flipping the shrimp for the second side, drop in a tablespoon of unsalted butter and a clove of freshly minced garlic (or half a teaspoon of garlic powder). Let the butter melt and the garlic become fragrant (about 30 seconds), then spoon the luscious garlic butter over the shrimp as they finish cooking. This creates an incredibly indulgent finish.
- Bright Citrus Burst: A squeeze of fresh lemon or lime juice over the shrimp right after they come off the heat can instantly brighten the entire dish. The acidity cuts through the richness and heat of the spices, adding a refreshing zing that awakens the palate. You can also add a sprinkle of fresh lemon zest for an even more intense citrus aroma.
- Herbaceous Freshness: Garnish your finished blackened shrimp with a generous sprinkle of fresh chopped herbs like parsley, cilantro, or chives. These fresh elements not only add an extra layer of vibrant flavor but also provide a beautiful pop of color to the plate.
Frequently Asked Questions About Blackened Shrimp
Can you blacken cooked shrimp?
Absolutely! Blackening pre-cooked shrimp is a fantastic way to quickly infuse them with bold, savory flavor without overcooking. The process is very similar to cooking raw shrimp: first, pat the cooked shrimp thoroughly dry, then coat them with olive oil and your preferred blackened seasoning blend. When cooking, reduce the time significantly to just 1-2 minutes per side, or until they are heated through and the seasoning forms a light crust. Since the shrimp are already cooked, your primary goal is flavor development and achieving that characteristic crispy exterior, rather than cooking them from their raw state.
How do you get seasoning to stick to shrimp?
For the best adhesion of your seasoning, start by patting the shrimp completely dry with paper towels. Excess moisture on the shrimp’s surface is the enemy of a good crust and will prevent the spices from sticking properly. Next, lightly coat the dry shrimp with a small amount of olive oil (or your preferred cooking oil). The oil acts as a crucial binder, creating a tacky surface that allows the seasoning rub to adhere effectively. Once the rub has been applied, toss the shrimp thoroughly to ensure even coverage. If you have time, allowing the seasoned shrimp to sit for a few minutes (5-10) before cooking can help the spices “set” and adhere even better to the protein.
What is the difference between Cajun and Blackened seasoning?
While often used interchangeably and sharing many common ingredients, there’s a subtle but important distinction between Cajun and blackened seasoning. Cajun seasoning is a general spice blend originating from Louisiana, typically featuring a blend of paprika, cayenne pepper, garlic powder, onion powder, oregano, and thyme. It’s designed to season a wide variety of dishes, from stews to meats. Blackened seasoning, on the other hand, is a specific type of Cajun or Creole blend formulated with the explicit purpose of creating the distinctive dark crust when food is cooked over very high heat. It usually contains a higher proportion of dry herbs and spices (and often more cayenne) to achieve that signature “blackened” effect without burning the underlying protein. Our homemade blend, with its robust spice profile, leans towards a true blackened seasoning.
What kind of pan is best for blackening shrimp?
A heavy-bottomed cast iron skillet is undeniably the best choice for blackening shrimp. Cast iron retains and distributes heat incredibly well, allowing it to get intensely hot and maintain that heat consistently even when cold shrimp are added. This high, consistent heat is absolutely essential for creating the dark, crispy, and flavorful crust characteristic of authentic blackened dishes. While a good quality stainless steel or non-stick pan can certainly work in a pinch, they typically do not achieve the same depth of crust or maintain heat as effectively as cast iron, potentially leading to less successful results.
Irresistible Serving Suggestions
Blackened shrimp serves as an incredibly versatile base for countless delicious meals, making it a fantastic protein option for any day of the week, from quick lunches to elegant dinners. The spicy kick and savory crust of these shrimp pair beautifully with an array of complementary flavors and textures. Here are some of our favorite ways to enjoy them:
- With Pasta Dishes: Toss the spicy shrimp into a creamy pasta dish like a rich alfredo, a low-carb zucchini noodle alfredo, or a bright creamy lemon pasta. The richness of the pasta sauce beautifully mellows the spice while highlighting the shrimp’s bold flavor, creating a harmonious and satisfying meal.
- Tacos and Wraps: Create dynamic and flavorful shrimp tacos or lettuce wraps by combining blackened shrimp with crunchy slaw, a cooling creamy sauce (like a zesty lime crema, a simple Greek yogurt dip, or an avocado ranch), and fresh salsa or pico de gallo. The delightful contrast of warm, spicy shrimp with cool, crisp toppings is simply irresistible.
- Healthy Salads and Grain Bowls: For a light yet satisfying lunch or dinner, add blackened shrimp to a vibrant salad with mixed greens, cherry tomatoes, corn, black beans, and a zesty vinaigrette. Alternatively, build a hearty grain bowl with fluffy quinoa or brown rice, roasted vegetables, and a generous topping of spicy shrimp for a complete and nutritious meal.
- Southern Comfort Classics: Pair it with classic Southern sides like creamy grits (especially our flavorful cauliflower grits for a low-carb option) or a side of savory dirty rice for a truly authentic and comforting meal with a kick.
- Quick Appetizer: Serve the blackened shrimp with toothpicks as a stand-alone appetizer at your next gathering, perhaps alongside a cool dipping sauce like a homemade remoulade, a creamy ranch, or a simple sour cream and chive dip.
Want more creative and healthy ways to enjoy shrimp and discover perfect pairings? Check out our ultimate collection of the 25+ Best Side Dishes for Shrimp!
Storing and Reheating Blackened Shrimp
Blackened shrimp is not only delicious fresh, but it also makes for excellent leftovers, offering a versatile protein for future meals. Incorporating it into your weekly meal planning is a smart move, ensuring you have flavorful protein on hand for quick lunches or dinners. Here’s how to best store and reheat it to maintain its quality and taste:
- Refrigerator: To keep your cooked blackened shrimp fresh and safe, store it in an airtight container in the refrigerator for 3-4 days. Ensure the shrimp cools completely before sealing the container to prevent excess condensation, which can make the shrimp soggy and affect its texture.
- Freezer: For longer storage, blackened shrimp freezes remarkably well for up to 2 months. To prevent the shrimp from sticking together, we recommend first spreading them in a single layer on a baking sheet and freezing until they are firm. Then, transfer the frozen shrimp to a freezer-safe bag or an airtight container, pressing out as much air as possible before sealing. Freezing in a single layer also allows for quicker thawing when you’re ready to use them. Always defrost the shrimp overnight in the refrigerator before reheating.
- Reheat: The best way to reheat blackened shrimp to preserve its delicate texture and vibrant flavor is gently. Add a small amount of olive oil or butter to a skillet and heat it over medium-low heat. Add the shrimp and sauté for just a few minutes, stirring occasionally, until they are heated through. Avoid high heat or prolonged reheating, as this can cause the shrimp to become tough, rubbery, and dry. Alternatively, for a very quick reheat, you can use a microwave on a low setting, but be extra mindful not to overcook.
Explore More Easy Shrimp Recipes
If you’ve thoroughly enjoyed the bold flavors and quick preparation of our blackened shrimp, you’ll love exploring these other fantastic and simple shrimp recipes. Shrimp is an incredibly versatile ingredient that lends itself beautifully to a wide variety of delicious meals, perfect for any occasion, from casual family dinners to more celebratory gatherings:
- Argentine Shrimp Scampi RecipeIndulge in this classic, garlicky shrimp scampi, elevated with premium Argentine shrimp and a vibrant lemon-butter sauce. Perfect for a quick, elegant meal ready in minutes.
- Margarita Shrimp Recipe (Grill or Oven)Transport your taste buds to the tropics with these zesty margarita-marinated shrimp, fantastic whether grilled to smoky perfection or baked conveniently in the oven.
- Stuffed Bacon-Wrapped Shrimp with Cream CheeseA decadent appetizer or impressive main course, featuring plump shrimp generously stuffed with creamy cheese, wrapped in crispy bacon, and cooked to golden perfection.
Would you like more easy, healthy, carb-conscious recipes delivered straight to your inbox every week?
📋 Easy Blackened Shrimp Recipe
Easy Blackened Shrimp Recipe
This easy blackened shrimp recipe will add bold flavor to your dinner in 10 minutes! Pan-fry shrimp using our homemade blackened seasoning for a quick and satisfying meal!
Rating: 5 out of 5 stars (from 1 vote)
Print Recipe
Pin Recipe
Rate This Recipe
Prep Time: 2 minutes |
Cook Time: 8 minutes |
Total Time: 10 minutes
Servings: 4 servings |
Author: Marjory Pilley
Save this recipe for later!
Enter your email to get this recipe sent straight to your inbox, plus receive new healthy recipes each week!
Get Recipe to Inbox!
Ingredients
Main Ingredients
- 1 pound shrimp, peeled and deveined
- 2 Tablespoons olive oil
- 1 Tablespoon Cajun or blackened spice blend (see homemade below)
Homemade Blackened Seasoning
- 2 teaspoons paprika
- 1 teaspoon cayenne pepper (adjust to taste for spice level)
- 1 teaspoon ground cumin
- 1 teaspoon dried thyme leaves
- ½ teaspoon white pepper
- ½ teaspoon onion powder
- ¼ teaspoon salt
Instructions
For the Blackened Shrimp:
- Pat shrimp thoroughly dry with paper towels. This crucial step ensures a crispy crust and better seasoning adhesion.
- In a bowl, toss the dried shrimp with olive oil until lightly coated. Then, sprinkle generously with the blackened seasoning blend, using your hands to ensure every piece is fully coated with spices.
- Heat a large skillet (preferably cast iron) over medium-high heat until very hot. If needed, swirl a teaspoon or two of additional olive oil in the pan. Arrange shrimp in a single layer in the hot skillet, ensuring not to overcrowd the pan. Cook, undisturbed, for about three minutes.
- Flip the shrimp to the other side and cook for approximately three minutes more, or until they are vibrantly pink and opaque in the center. Avoid overcooking to keep them tender and juicy.
For the Homemade Blackened Seasoning:
- Combine all listed seasoning ingredients in a small bowl and mix well until evenly distributed. Store any unused blend in an airtight container in a cool, dark place.
Last Step: Your Feedback Matters!
Please leave a rating and comment below to let us know how you enjoyed this recipe. Your valuable feedback helps our community thrive and enables us to continue sharing more free, delicious recipes!
Notes
You’ll find more expert tips, variations, and step-by-step pictures in the sections above!
Storage and Reheating
- Refrigerator: Store cooked shrimp in an airtight container for 3-4 days.
- Freezer: Freeze in a single layer in a freezer bag or airtight container for up to 2 months. Defrost in the refrigerator overnight before reheating.
- Reheat: Sauté gently in a skillet with a little olive oil or butter over medium-low heat until warmed through. Avoid high heat to prevent drying out.
Grab 5 Essential Low-Carb Sauces!
Enhance your meals and get even more easy, healthy recipes delivered to your inbox! JOIN HERE
Nutrition Information (per serving)
Calories: 159 kcal | Carbohydrates: 0.1g | Protein: 23g | Fat: 8g | Saturated Fat: 1g | Polyunsaturated Fat: 1g | Monounsaturated Fat: 5g | Trans Fat: 0.01g
Cholesterol: 183mg | Sodium: 280mg | Potassium: 303mg | Fiber: 0.1g | Vitamin A: 24IU | Vitamin C: 1mg | Calcium: 75mg | Iron: 1mg
Nutritional and Food Safety Disclaimer
