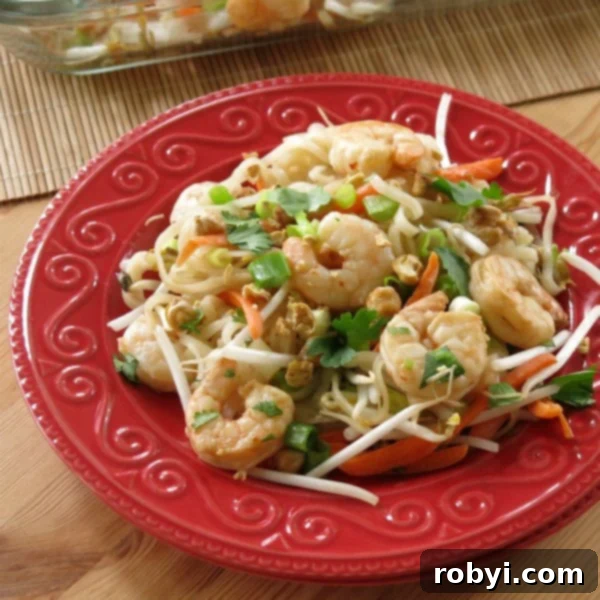
Savor the Flavor: Easy & Allergy-Friendly Shrimp Pad Thai in Under 30 Minutes
Craving the vibrant, complex flavors of authentic Pad Thai but want to skip the takeout? This easy shrimp Pad Thai recipe is your ultimate answer. In less than 30 minutes, you can whip up a truly delicious dish featuring tender rice noodles coated in a perfectly balanced sweet, salty, and spicy sauce, generously topped with fresh, crunchy garnishes. It’s a meal that promises a culinary adventure right in your own kitchen, designed for both convenience and incredible taste.
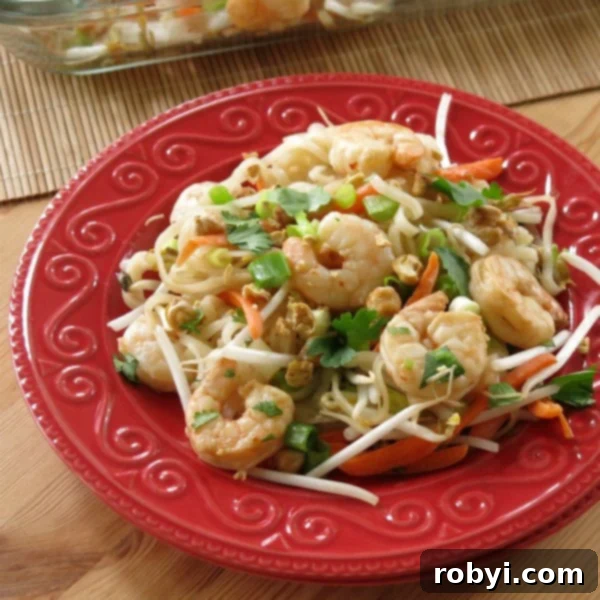
For many families, enjoying a variety of international cuisines can be a delightful experience. However, dining out often presents challenges, especially when dealing with severe food allergies. Our family understands this complexity firsthand. With a daughter who has severe allergies to peanuts, soy, and egg (and previously dairy), venturing out to new restaurants can be incredibly stressful and risky. This often means we stick to thoroughly vetted, familiar eateries, limiting our opportunities to explore diverse flavors.
But that doesn’t mean we compromise on enjoying fantastic, globally inspired meals. Instead, we embrace the joy of “dining in” and getting creative in the kitchen! This approach has led us to develop delicious and safe alternatives to our favorite dishes, like vibrant Shrimp Sushi Bowls and savory Shrimp Egg Rolls in a Bowl. Our homemade Shrimp Pad Thai is another triumph, proving that with a little ingenuity, you can enjoy rich flavors and textures without worry.
This recipe is not just about making Pad Thai; it’s about reclaiming the joy of diverse dining for everyone, especially those with dietary restrictions. It’s a testament to how creative cooking can open up a world of possibilities, making once-daunting dishes accessible and incredibly satisfying for the whole family.
Why Homemade Pad Thai is a Game Changer
Choosing to make Pad Thai at home offers numerous benefits beyond just the incredible flavor. Firstly, you gain complete control over the ingredients, which is invaluable for managing allergies or specific dietary preferences like gluten-free or low-sodium diets. You can select the freshest produce, high-quality proteins, and tailor the spice level to your family’s liking. This eliminates concerns about cross-contamination that can arise in restaurant settings, providing peace of mind, particularly for severe allergies.
Secondly, homemade Pad Thai is often more cost-effective than ordering takeout, allowing you to enjoy this beloved dish more frequently without breaking the bank. Furthermore, the satisfaction of creating such an iconic dish from scratch is immensely rewarding. This recipe, specifically designed for ease and speed, ensures you don’t need to be an expert chef to achieve authentic and delicious results. It’s a culinary win-win: healthier, safer, more economical, and incredibly tasty.
The Quintessential Pad Thai Flavor Profile
What makes Pad Thai so universally loved is its intricate balance of four fundamental tastes: sweet, sour, salty, and spicy. Achieving this harmony is key to an authentic-tasting dish, and it all starts with the sauce. Our recipe meticulously crafts a sauce that hits all these notes, ensuring every bite is a complex symphony of flavors.
- Sweetness: Primarily from brown sugar, which also contributes a subtle molasses depth.
- Saltiness: Derived from soy sauce (or coconut aminos) and fish sauce, essential for that deep umami richness.
- Sourness: Fresh lime juice is paramount here, cutting through the richness and brightening the entire dish.
- Spiciness: Customizable with red pepper flakes, allowing you to adjust the heat from mild to fiery.
Beyond the sauce, the interplay of textures is equally important. Soft, chewy rice noodles, crunchy bean sprouts and carrots, savory shrimp, and fresh herbs all contribute to a dynamic eating experience that makes Pad Thai utterly irresistible.
Navigating Dietary Needs: An Allergy-Friendly Approach
The beauty of this Shrimp Pad Thai recipe lies in its adaptability, especially for those with food allergies. Traditional Pad Thai often contains peanuts, soy, and sometimes egg, making it off-limits for many. Our recipe thoughtfully addresses these common allergens, offering simple substitutions that don’t sacrifice flavor.
- Peanut/Tree Nut-Free: Instead of chopped peanuts or cashews, we suggest using roasted chickpeas. They provide a wonderful crunch and nutty flavor without any actual nuts, making this recipe safe for those with peanut and tree nut allergies.
- Soy-Free: Coconut aminos are an excellent, readily available substitute for soy sauce. They offer a similar savory depth with a touch of sweetness, ensuring the sauce maintains its delicious complexity.
- Egg-Free: This particular recipe naturally omits eggs, which are sometimes scrambled into Pad Thai.
- Dairy-Free: The core ingredients of this Pad Thai are naturally dairy-free, making it a safe option for dairy sensitivities.
- Gluten-Free: By using tamari (gluten-free soy sauce) or coconut aminos, and ensuring your fish sauce is gluten-free, this dish is easily made suitable for a gluten-free diet. Rice noodles are naturally gluten-free.
By offering these straightforward modifications, we empower you to enjoy a classic dish that caters to your family’s specific needs, transforming a potentially restrictive meal into an inclusive and delightful dining experience.
The Essential Ingredients for Your Easy Shrimp Pad Thai
Crafting a truly memorable Pad Thai begins with a careful selection of fresh ingredients and pantry staples. Here’s a detailed breakdown of what you’ll need and how each component contributes to the final masterpiece:
The Flavorful Sauce
This is the heart of your Pad Thai, delivering that characteristic sweet, salty, sour, and spicy kick. Mixing these five ingredients creates a sauce so authentic, you’ll forget it came from your kitchen!
- Soy Sauce: We recommend using a low-sodium variety to better control the overall saltiness of the dish. For those managing a soy allergy or seeking a gluten-free alternative, coconut aminos is a fantastic, flavorful substitute that provides a similar umami depth with a hint of sweetness.
- Fish Sauce: This ingredient is non-negotiable for achieving the signature savory, fermented flavor of authentic Pad Thai. It provides a unique umami that can’t be replicated. If you absolutely must substitute due to an anchovy allergy (fish sauce is typically made from fermented anchovies), Worcestershire sauce can be a distant alternative, but be aware it also often contains anchovies. Some specialty brands offer anchovy-free Worcestershire. If using Worcestershire, reduce the amount of soy sauce (or coconut aminos) to 2 tablespoons to avoid over-salting, as Worcestershire can be quite pungent.
- Lime Juice: Freshly squeezed lime juice is crucial for the bright, zesty sour notes that balance the sauce. Do not use bottled lime juice; fresh makes a significant difference.
- Brown Sugar: Provides the essential sweetness and a slight caramel undertone that rounds out the flavor profile. You can adjust the amount to your preferred level of sweetness.
- Red Pepper Flakes: These allow you to customize the heat level of your Pad Thai. Add more for a spicier kick, or less for a milder version. You can always add extra at the table for individual preferences.
The Star Protein: Succulent Shrimp
Shrimp is an ideal protein for Pad Thai due to its quick cooking time and delicate flavor that beautifully absorbs the sauce.
- Shrimp: Use peeled and deveined shrimp for convenience. We also recommend removing the tails before cooking, as this makes the dish much easier and more enjoyable to eat, especially when mixed with noodles. Ensure your shrimp are fresh for the best taste and texture.
Fresh Toppings and Textures
The remaining ingredients add vital textures, colors, and fresh flavors, elevating the dish from simply delicious to truly extraordinary.
- Rice Noodles: The foundation of any good Pad Thai. Use flat, thin rice noodles. If available, opt for brown rice noodles for a slightly nuttier flavor and added nutritional benefits. Follow package instructions carefully to ensure they are cooked al dente, providing that perfect chewy texture.
- Bean Sprouts: These add a wonderful crispness and freshness, a hallmark of traditional Pad Thai. Stir them in at the very end or use them as a garnish to maintain their crunch.
- Carrots: Julienne them into thin matchsticks for a vibrant color and a pleasant, subtle crunch. They also add a touch of natural sweetness.
- Green Onions: Chopped green onions provide a mild oniony bite and a fresh, herbaceous aroma. Use both the white and green parts.
- Cilantro: Fresh cilantro is a classic garnish for Pad Thai, offering a bright, herbaceous, and slightly citrusy note that complements the other flavors.
- Chopped Nuts (or Nut-Free Alternative): Traditionally, Pad Thai is garnished with chopped peanuts. For those without nut allergies, cashews are also a popular choice. However, for a safe and equally delicious nut-free option, we highly recommend roasted chickpeas. Roughly chop them after roasting to achieve a similar textural crunch and earthy flavor profile, ensuring everyone can enjoy this dish safely.
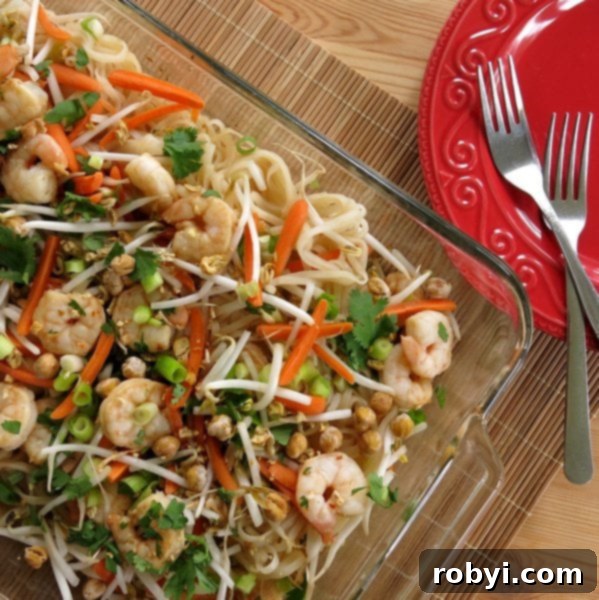
Step-by-Step: Crafting Your Perfect Shrimp Pad Thai
One of the best features of this recipe is its straightforward preparation. We’ve streamlined the cooking process to be as efficient as possible without compromising on flavor, making it perfect for busy weeknights.
Preparing the Sauce and Shrimp
The first step is to combine all the sauce ingredients in a small bowl. Whisk them together until the brown sugar is fully dissolved, creating a cohesive and flavorful mixture. Place your peeled, deveined, and de-tailed shrimp in a large glass baking dish. Pour the prepared sauce over the shrimp, tossing gently to ensure each piece is evenly coated. While an optional 15-minute marinade can enhance the flavor, don’t worry if you’re short on time; the robust sauce will still perfectly season the shrimp during cooking.
Distribute the shrimp in a single layer in the baking dish and bake in a preheated oven for approximately 10 minutes, or until the shrimp are just cooked through and turn opaque. Be careful not to overcook them, as shrimp can become rubbery quickly. The beauty of this method is its simplicity – once the shrimp is in the oven, you can move on to the next step, allowing for hands-free cooking.
Cooking the Noodles
While your shrimp bakes, prepare the rice noodles according to the package directions. It’s crucial not to overcook them; they should be al dente, still firm with a slight bite. Once cooked, drain the noodles thoroughly and, if recommended by the package, rinse them with cold water to prevent sticking and stop the cooking process. Set them aside briefly.
Bringing It All Together
Once the shrimp is cooked, remove the baking dish from the oven. Immediately add the cooked rice noodles directly to the dish with the shrimp and any leftover sauce. Use tongs or a large spoon to gently toss the noodles and shrimp together, ensuring the noodles are thoroughly coated with the delicious Pad Thai sauce. They will absorb any remaining liquid, intensifying the flavors.
Finally, it’s time to add the fresh elements that complete the dish. Generously sprinkle the bean sprouts, julienned carrots, chopped green onions, and fresh cilantro over the top. If using, add the chopped nuts or roasted chickpeas. Give everything one last gentle toss or serve it with the garnishes on top for a beautiful presentation. This all-in-one approach minimizes cleanup and maximizes flavor.
Alternative Method: For a stovetop approach, you can cook the shrimp using our Skillet Shrimp in 10 Minutes or Less process. Once the shrimp are cooked, add the prepared rice noodles to the skillet with the shrimp and sauce, stirring to combine. Then, sprinkle on the fresh toppings as described above. Both methods yield fantastic results; choose the one that best suits your cooking preference.
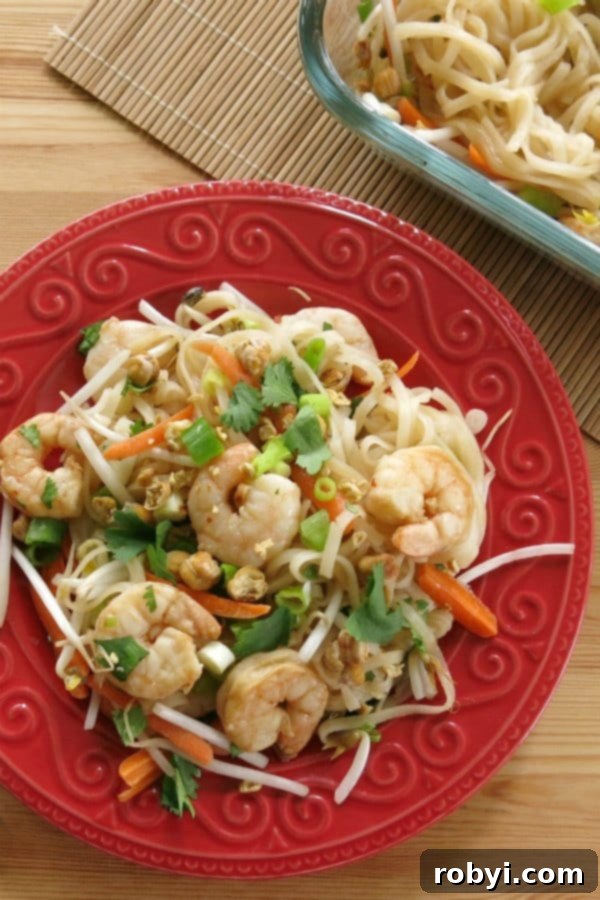
Pro Tips for Pad Thai Perfection
- Don’t Overcook Shrimp or Noodles: Both shrimp and rice noodles cook quickly. Overcooked shrimp become tough, and overcooked noodles turn mushy. Keep a close eye on them for optimal texture.
- Taste and Adjust: Before combining everything, taste your sauce. Is it balanced? Adjust the brown sugar for sweetness, lime juice for sourness, and red pepper flakes for heat to suit your preference.
- Prep Ahead: Chop all your vegetables and make the sauce ahead of time. This will make the final assembly even quicker, truly achieving that “under 30 minutes” goal.
- Fresh Garnishes are Key: Don’t skip the fresh bean sprouts, cilantro, and green onions. They provide essential crunch and aromatic freshness that elevate the dish.
- Serve Immediately: Pad Thai is best enjoyed fresh off the stove while the noodles are perfectly tender and the garnishes are crisp.
Variations and Customizations for Every Palate
While this Easy Shrimp Pad Thai recipe is delicious as is, it’s also incredibly versatile, allowing for numerous variations to suit different tastes or ingredients you have on hand.
- Protein Swaps: Not a fan of shrimp, or simply want to try something different? This recipe works wonderfully with other proteins. Try thinly sliced chicken breast or thighs, pan-fried tofu (for a vegetarian option), or even a mix of seafood. Ensure any protein you choose is cooked through before combining with the noodles.
- Add More Vegetables: Boost the nutritional content and add more texture by incorporating extra vegetables. Bell peppers (red, yellow, or orange) sliced thinly, snap peas, thinly sliced cabbage, or even broccoli florets would be excellent additions. Add harder vegetables like broccoli or bell peppers to the baking dish with the shrimp (or pan) during the last few minutes of cooking to ensure they are tender-crisp.
- Spice Level: If you love heat, feel free to increase the red pepper flakes in the sauce. For an even more intense kick, you can add a dash of Sriracha or a pinch of finely minced bird’s eye chilies to the finished dish.
- Nut-Free Crunch: As highlighted, roasted chickpeas are a fantastic nut-free alternative. You can even experiment with crispy fried shallots for another layer of flavor and texture.
These simple adjustments allow you to make this Easy Shrimp Pad Thai truly your own, ensuring it’s a dish you’ll want to make again and again.
This Easy Shrimp Pad Thai recipe is a fantastic choice for a quick, healthy, and incredibly flavorful meal. It’s meticulously crafted to be free of common allergens like peanuts, tree nuts, dairy, and is easily made gluten-free, ensuring it’s not only delicious but also safe for many with dietary restrictions. It truly embodies the idea that healthy eating can be absolutely delicious and accessible for everyone.
So, why not make tonight a special “dine in” experience with this amazing homemade Pad Thai? We love seeing your culinary creations! Please take a moment to rate this recipe and don’t forget to tag @DinnerMom or #DinnerMom on social media to share what you’re cooking up!
📋 Recipe: Easy Shrimp Pad Thai
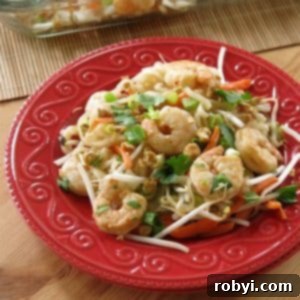
Easy Shrimp Pad Thai Recipe
This easy Shrimp Pad Thai Recipe has all the trimmings from rice noodles to bean sprouts and is ready in under 30 minutes.
Print | Pin | Rate
Save this recipe? Enter your email & get this recipe sent to your inbox! Plus receive new recipes each week!
Ingredients
- 1 pound shrimp peeled, deveined, tail off
- 3 Tablespoons soy sauce or coconut aminos
- ¼ cup lime juice
- 2 Tablespoons brown sugar
- 1 Tablespoon fish sauce
- ¼ teaspoon red pepper flakes more or less to taste
- 8 ounces rice noodles
- 1 cup bean sprouts
- 1 cup carrots sliced thin
- 1 bunch of green onion chopped
- ½ cup cilantro chopped
- ½ cup chopped nuts cashews or peanuts or roasted chickpeas
Instructions
- Preheat oven to 375 degrees F.
- Place shrimp in a large glass baking dish.
- Combine the next 5 ingredients (soy sauce, lime juice, brown sugar, fish sauce, red pepper flakes) in a small bowl.
- Pour sauce over shrimp, toss to coat and distribute shrimp so they are in a single layer.
- Bake shrimp for about 10 minutes or until cooked through.
- While shrimp is baking, cook rice noodles according to the directions on the package.
- When shrimp is done, add rice noodles to the baking dish with the shrimp.
- Toss noodles to coat with the excess sauce.
- Sprinkle bean sprouts, carrots, green onion, cilantro and chopped nuts over the top.
Notes
Nutrition
Nutritional and Food Safety Disclaimer
