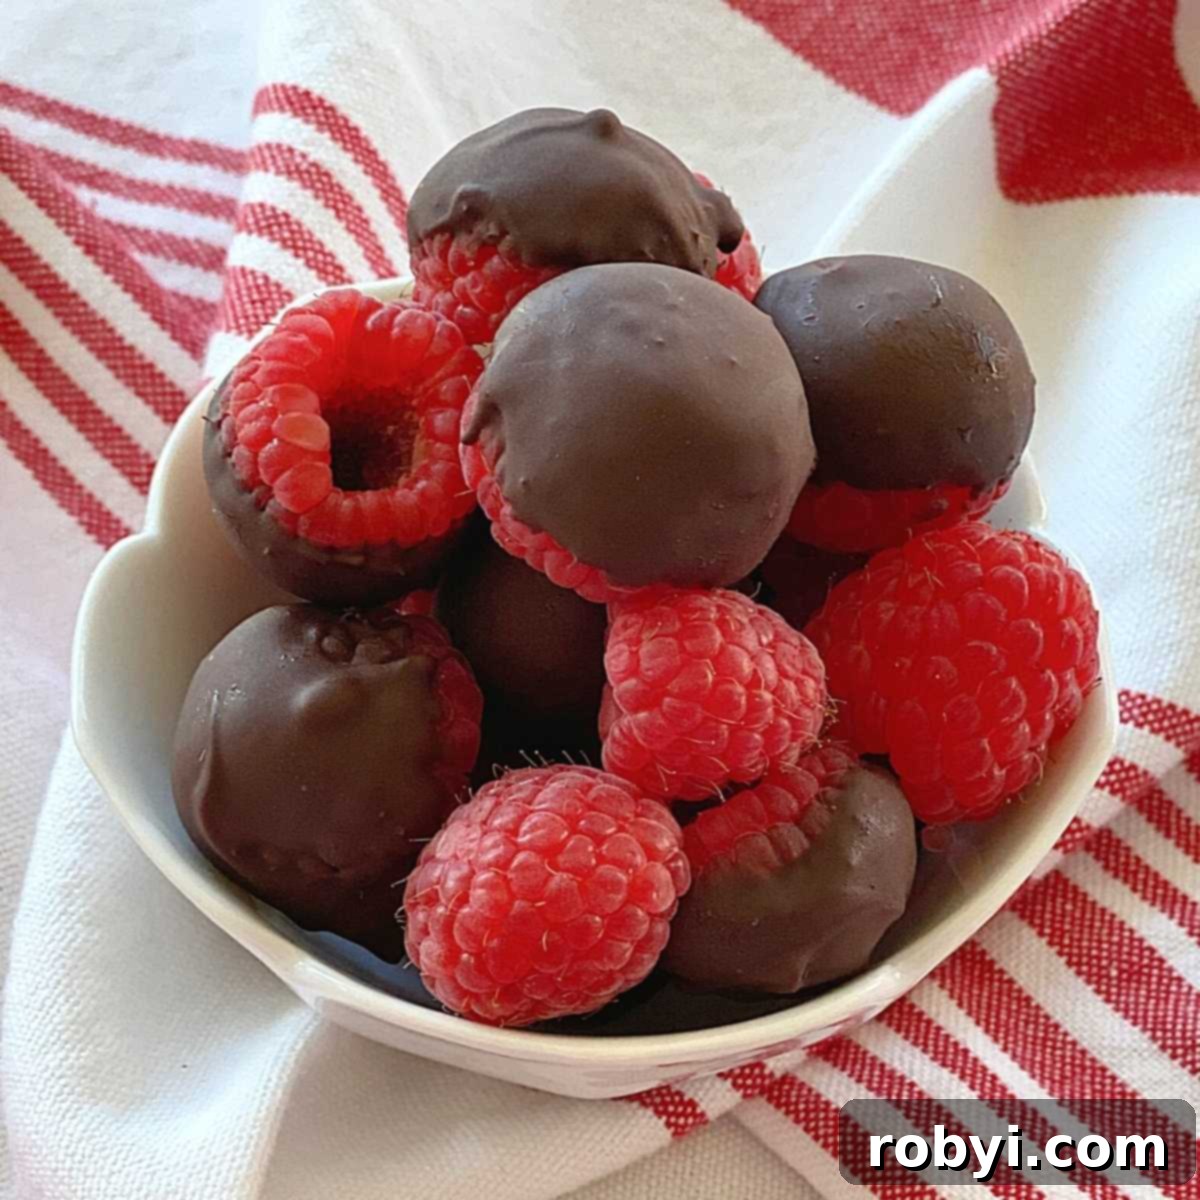
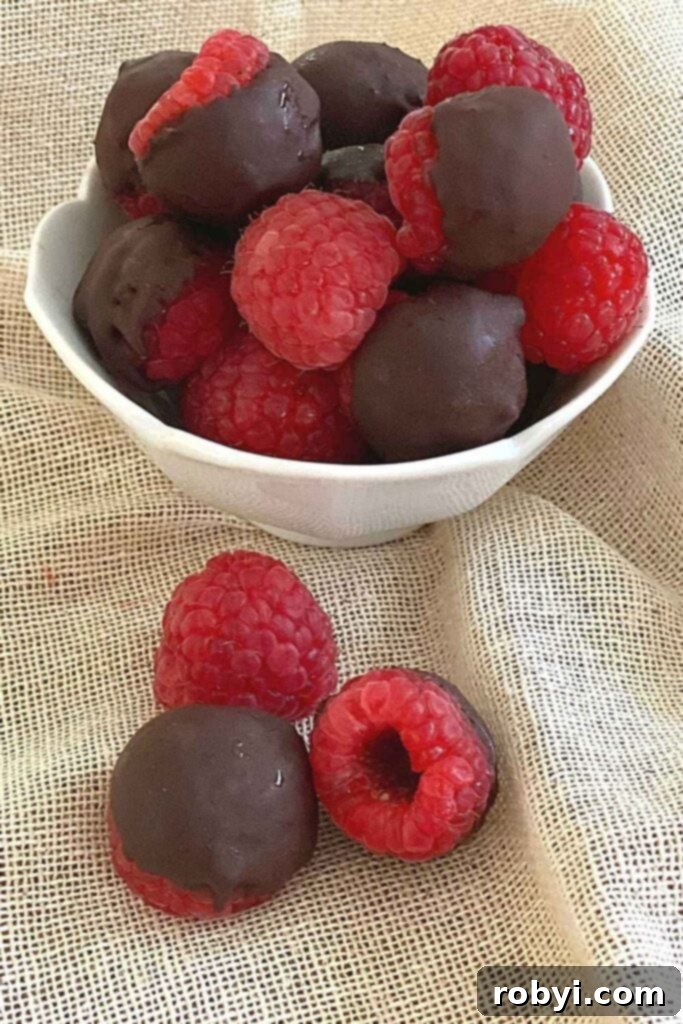
Transform your freezer into a source of instant delight with these incredible Frozen Chocolate Covered Raspberries. In mere minutes, you can craft a healthy, low-carb, and wonderfully satisfying dessert or snack that’s always on hand. Forget store-bought cravings; this homemade treat delivers on both flavor and nutrition, making it an ideal choice for anyone seeking a guilt-free indulgence.
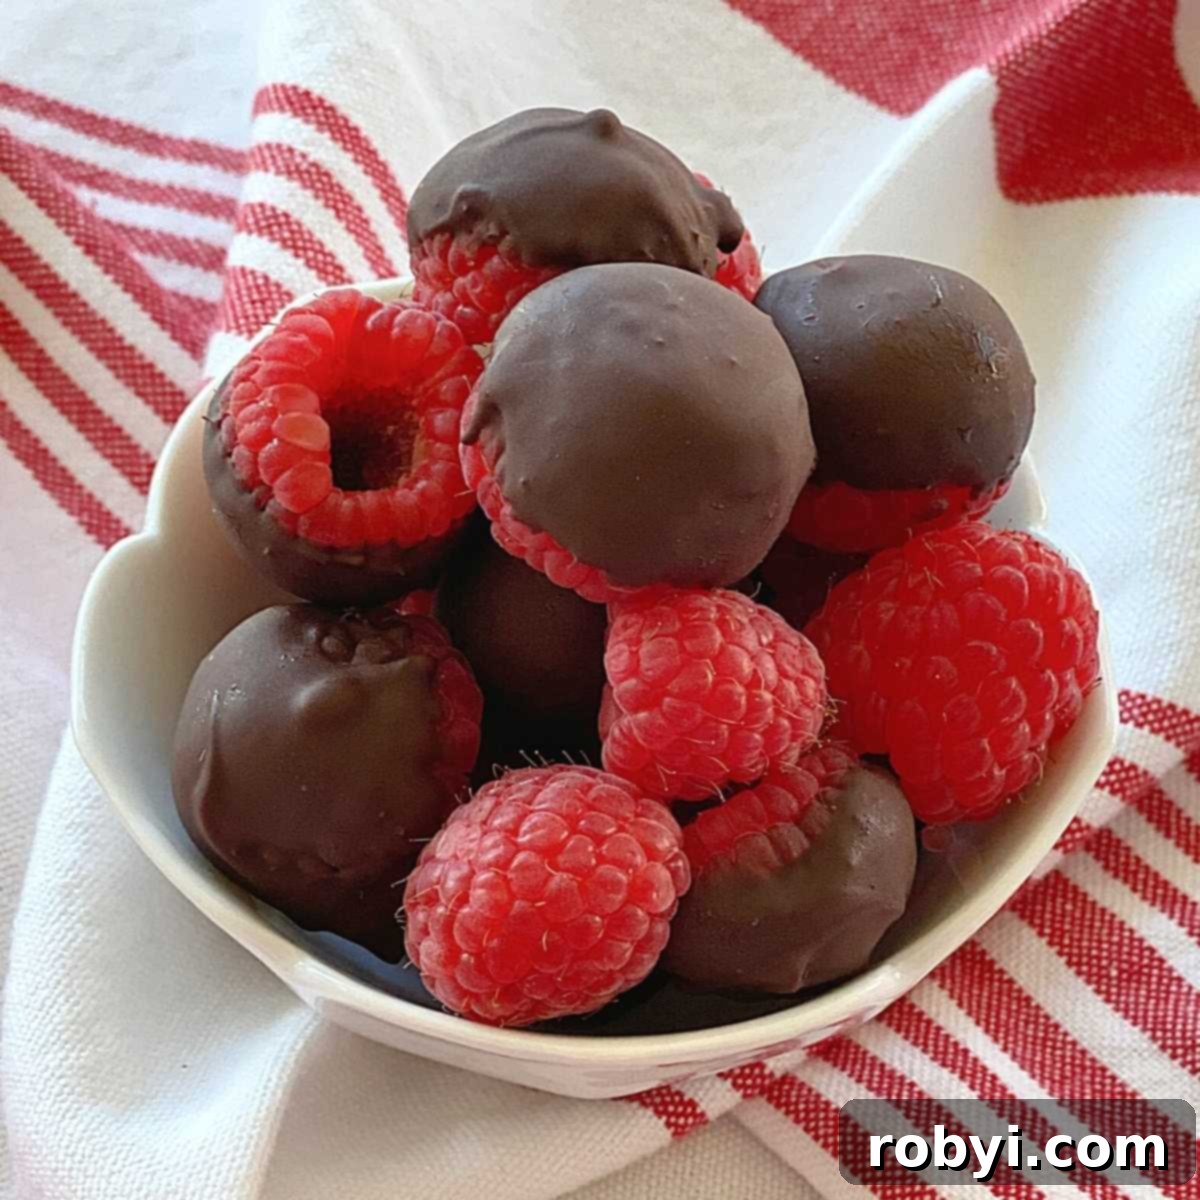
Much like our popular chocolate-covered blueberry clusters, these chocolate-dipped raspberries offer an effortless way to enjoy fruit enrobed in your favorite chocolate. They are remarkably easy to prepare and can be stored in either the freezer or refrigerator, ensuring a delightful treat is never far away. This recipe empowers you to create a delicious and wholesome snack that aligns perfectly with a health-conscious lifestyle.
One of the best aspects of this recipe is its adaptability. We’ll guide you through various chocolate coating options, including our top pick: sugar-free dark chocolate chips. Opting for these makes this recipe a truly keto-friendly dessert, boasting an impressive only 1 gram of sugar per serving. This means you can indulge in the rich, sweet-tart combination without derailing your dietary goals.
While our featured recipe focuses on a single chocolate layer, the possibilities are endless. Many enjoy the luxurious experience of a double-dipped berry, reminiscent of the popular Tru-Fru packages found in grocery stores. Imagine a crisp layer of white chocolate followed by a decadent dark chocolate shell. We’ll show you exactly how to achieve this gourmet touch right in your own kitchen, turning a simple berry into a truly extraordinary confection.
Why Make Your Own Frozen Chocolate Covered Raspberries?
Beyond the sheer enjoyment, there are compelling reasons to make your own frozen chocolate-covered raspberries instead of buying them. Crafting these delightful treats at home offers unparalleled control and numerous benefits, from cost savings to ingredient customization.
- Ingredient Control: When you make them yourself, you know exactly what goes into your snack. You can choose high-quality, organic raspberries and select chocolates free from artificial additives, excessive sugars, or unwanted preservatives. This is especially important if you’re managing allergies, sensitivities, or specific dietary plans like keto.
- Cost-Effective: Store-bought chocolate-covered fruit can be surprisingly expensive, especially for premium or specialty varieties. Making them at home often costs a fraction of the price, allowing you to enjoy this luxurious treat more frequently without breaking the bank.
- Freshness and Quality: You get to select the freshest, firmest raspberries available, ensuring optimal flavor and texture. The chocolate coating is applied fresh, resulting in a superior taste experience compared to products that might have been sitting on a shelf for some time.
- Dietary Flexibility: This recipe is incredibly versatile. Whether you’re following a keto diet, watching your sugar intake, or prefer plant-based options, you can easily adapt the ingredients to suit your needs. From sugar-free dark chocolate to vegan-friendly options, the choice is yours.
- Simple and Satisfying: The process itself is therapeutic and rewarding. It’s a quick, easy project that yields a gourmet-quality treat with minimal effort, perfect for a busy lifestyle.
Ingredients: Simple Yet Perfect
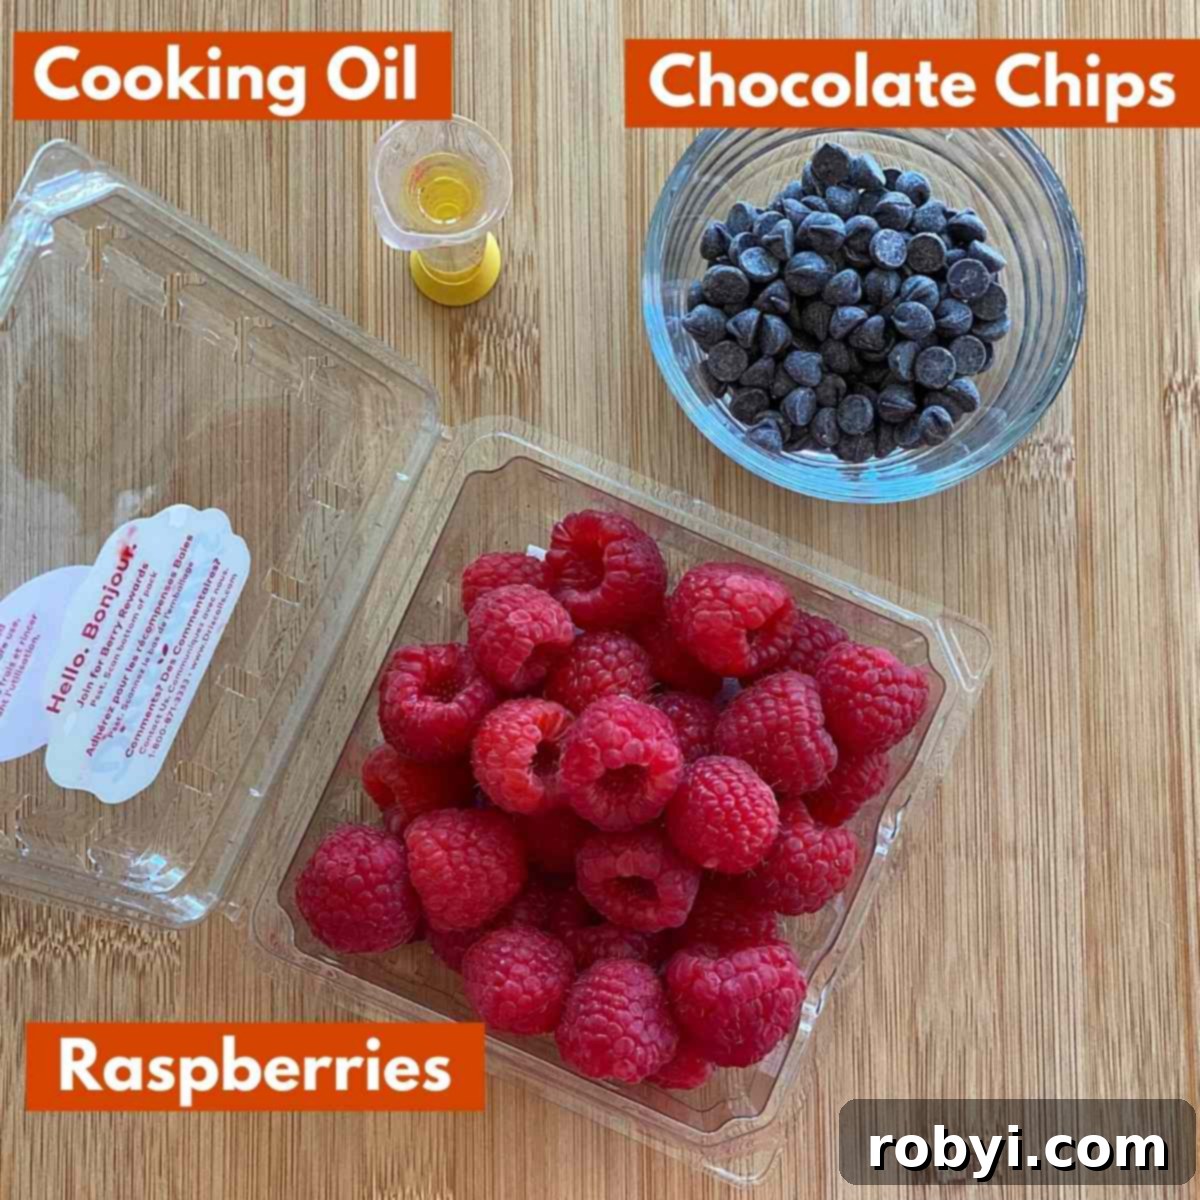
Creating these delightful chocolate-covered raspberries requires just a handful of simple ingredients. The magic lies in the quality of each component and the balance they bring together to form a perfect bite-sized treat. You’ll need:
- Fresh, Firm Raspberries: The foundation of this recipe is fresh, ripe raspberries. Look for berries that are vibrant in color, plump, and firm to the touch. Avoid any that are bruised, overly soft, or moldy. Quality raspberries are crucial for both taste and texture once coated and frozen. Their natural tartness beautifully complements the sweetness of the chocolate.
- Your Choice of Chocolate: This is where you can truly personalize your dessert. We’ll delve into the various chocolate options below, discussing how each choice impacts the flavor profile and consistency of your coating. From intensely dark to creamy white, the right chocolate can elevate your raspberries to new heights.
- Cooking Oil (Optional, but Recommended): A small amount of cooking oil can be a game-changer, especially when working with certain types of chocolate. It helps to thin out the melted chocolate, making it smoother and easier to dip your raspberries evenly. More importantly, it aids in creating a firm, quick-setting shell.
- Coconut Oil: This is an excellent choice for its ability to help the chocolate set firmly and quickly, thanks to its higher saturated fat content. If you appreciate a subtle coconut flavor, opt for unrefined coconut oil. For a completely neutral taste that won’t interfere with the chocolate or raspberry flavors, be sure to use refined coconut oil.
- Avocado Oil or Canola Oil: If coconut oil is not available or preferred, any neutral-flavored cooking oil like avocado oil or canola oil will work effectively. These oils provide the necessary fluidity without imparting a distinct flavor, allowing the natural tastes of the raspberry and chocolate to shine. We personally used avocado oil for the beautifully pictured berries you see in this guide.
Choosing Your Perfect Chocolate Coating
The type of chocolate you select will significantly influence the flavor, texture, and nutritional profile of your frozen raspberries. Each variety offers a unique experience, and some may require a little oil to achieve the ideal spoonable consistency when melted. Keep in mind that calorie, carb count, and overall nutritional information will vary based on your chocolate choice.
- Dark Chocolate: A favorite for its rich, intense flavor and high cocoa content. Dark chocolate is also praised for its antioxidant properties, making it a healthy choice when consumed in moderation. It tends to be firmer than milk chocolate, so we highly recommend adding a small amount of oil to achieve a silky-smooth, creamy texture for easy dipping. Look for varieties with 70% cocoa or higher for the most pronounced flavor and benefits.
- Sugar-Free Dark Chocolate: This is the go-to option if you’re mindful of your sugar intake or adhering to a low-carb or keto diet. For the raspberries featured in our photos, we used Lily’s dark chocolate baking chips, which are delightfully sweetened with stevia and erythritol. Many sugar-free options are also plant-based, catering to vegan preferences. As with regular dark chocolate, adding oil is essential to ensure it melts into a smooth, dippable consistency.
- Melting Wafers (Candy Melts): For a professional, glossy finish that sets quickly and firmly even without refrigeration, melting wafers are an excellent choice. These wafers are pre-tempered, meaning they already have the stable crystal structure needed for a smooth, shiny coating. They’re particularly convenient if you plan to serve the raspberries immediately or want to gift them. With melting wafers, you generally won’t need to add any oil. Brands like Ghirardelli offer high-quality dark chocolate wafers that work beautifully.
- Milk Chocolate: Known for its creamy texture and sweeter taste, milk chocolate is a crowd-pleaser. The addition of milk fats in its composition naturally makes it very smooth when melted. Therefore, you typically won’t need to add any oil when using milk chocolate chips or bars for dipping. It provides a classic, comforting flavor contrast to the tart raspberries.
- White Chocolate: Offering a distinct creamy, vanilla-like flavor, white chocolate can be used as the sole coating or as part of a stunning double-dipped creation. Just like dark chocolate, there are now excellent sugar-free white chocolate baking chips available (Lily’s, for example, makes a fantastic one!). Depending on the brand and formulation of white chocolate chips or bars you choose, you may need to add a touch of oil to achieve optimal dipping consistency.
Pro Tip: Whether you opt for chocolate chips or squares from a bar, ensure they are broken into smaller, uniform pieces before melting. This promotes even melting and prevents scorching, leading to a smoother, more consistent coating for your delicious raspberries.
Mastering the Technique: Step-by-Step Guide to Perfection
Crafting these frozen chocolate-covered raspberries is surprisingly straightforward, yet a few key techniques will ensure a flawless and delicious result every time. Follow these steps for perfect berries:
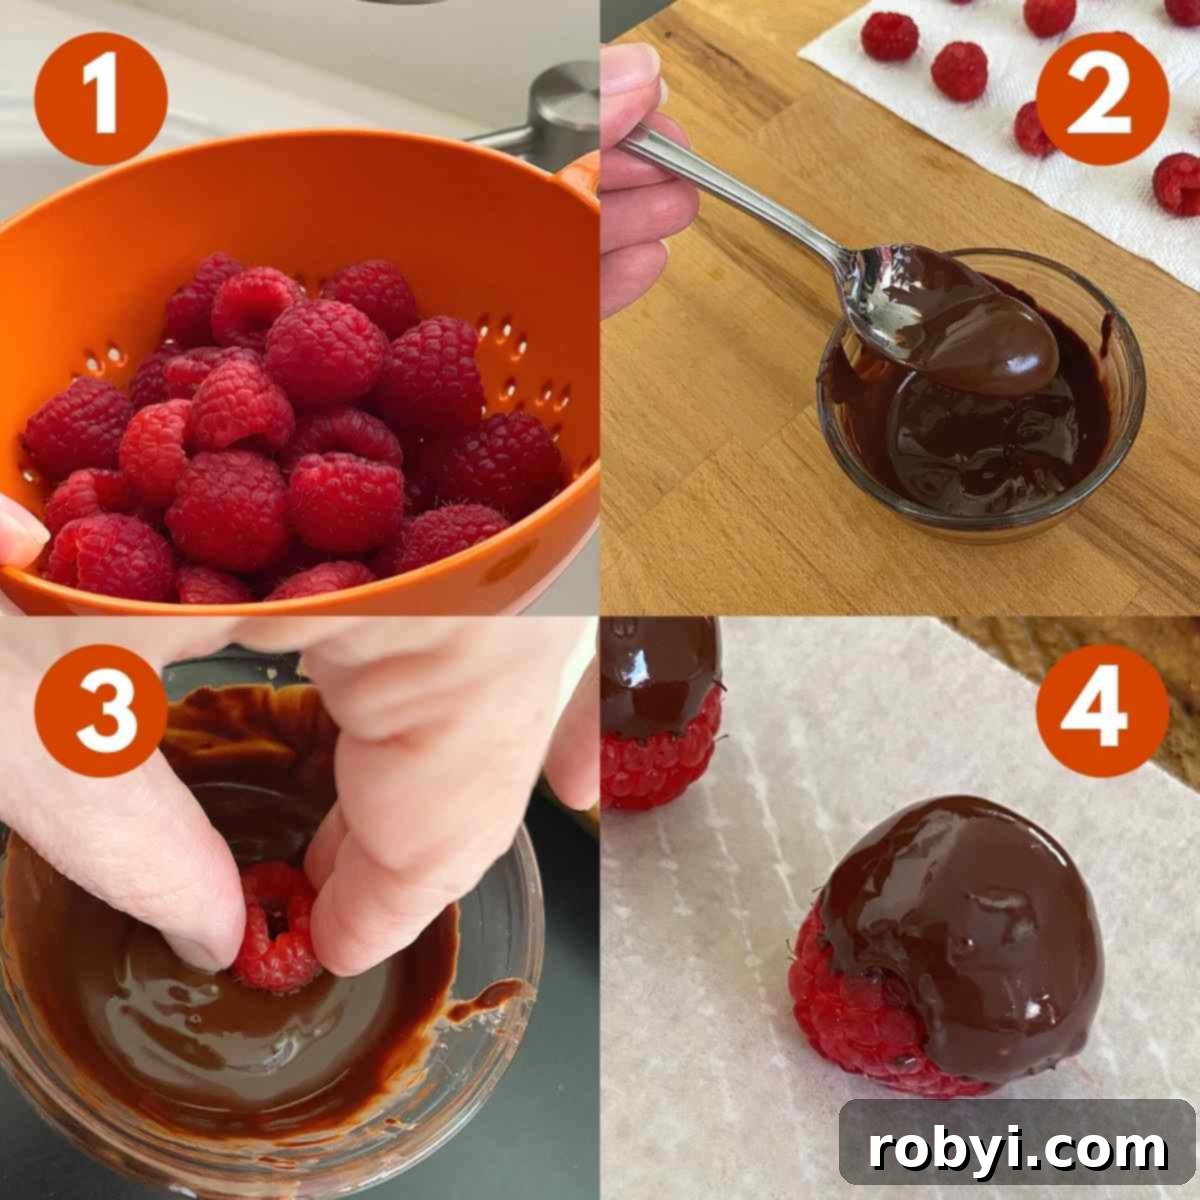
- Preparation is Key: Rinse and Thoroughly Dry Raspberries.
Begin by gently rinsing your fresh raspberries. The best way to do this is to place them in a colander and briefly submerge them in a bowl of water for a few seconds, then lift and allow excess water to drain. Once rinsed, it’s crucial to gently pat away any residual water and then allow them to thoroughly air dry. Moisture is the enemy of melted chocolate, as it can cause the chocolate to seize or prevent it from adhering properly.
Tip: Spread the rinsed raspberries in a single layer on a clean dishcloth or paper towel and let them air dry completely while you prepare your chocolate and workspace. This passive drying time ensures they are perfectly ready for dipping. Be very gentle during this process, as raspberries are delicate! - Melting Your Chocolate to Perfection.
Combine your chosen chocolate chips (or small pieces of a chocolate bar) with the cooking oil (if using) in a small, microwave-safe bowl. Heat on high for 30-second intervals, stirring thoroughly after each interval. Continue this process until the chocolate is smooth, glossy, and easily spoons from the bowl. This typically takes about 1 minute in total, but microwave wattages vary, so adjust accordingly.
Tip: Using a small, deep bowl is ideal for dipping, as it allows for easier submersion of the berries.
Note: If you prefer not to use a microwave, you can melt the chocolate using a double boiler method on the stovetop. Once melted, transfer it to a small bowl for dipping to maintain consistency and ease of use. - The Dipping Process: Creating Your Chocolate Shell.
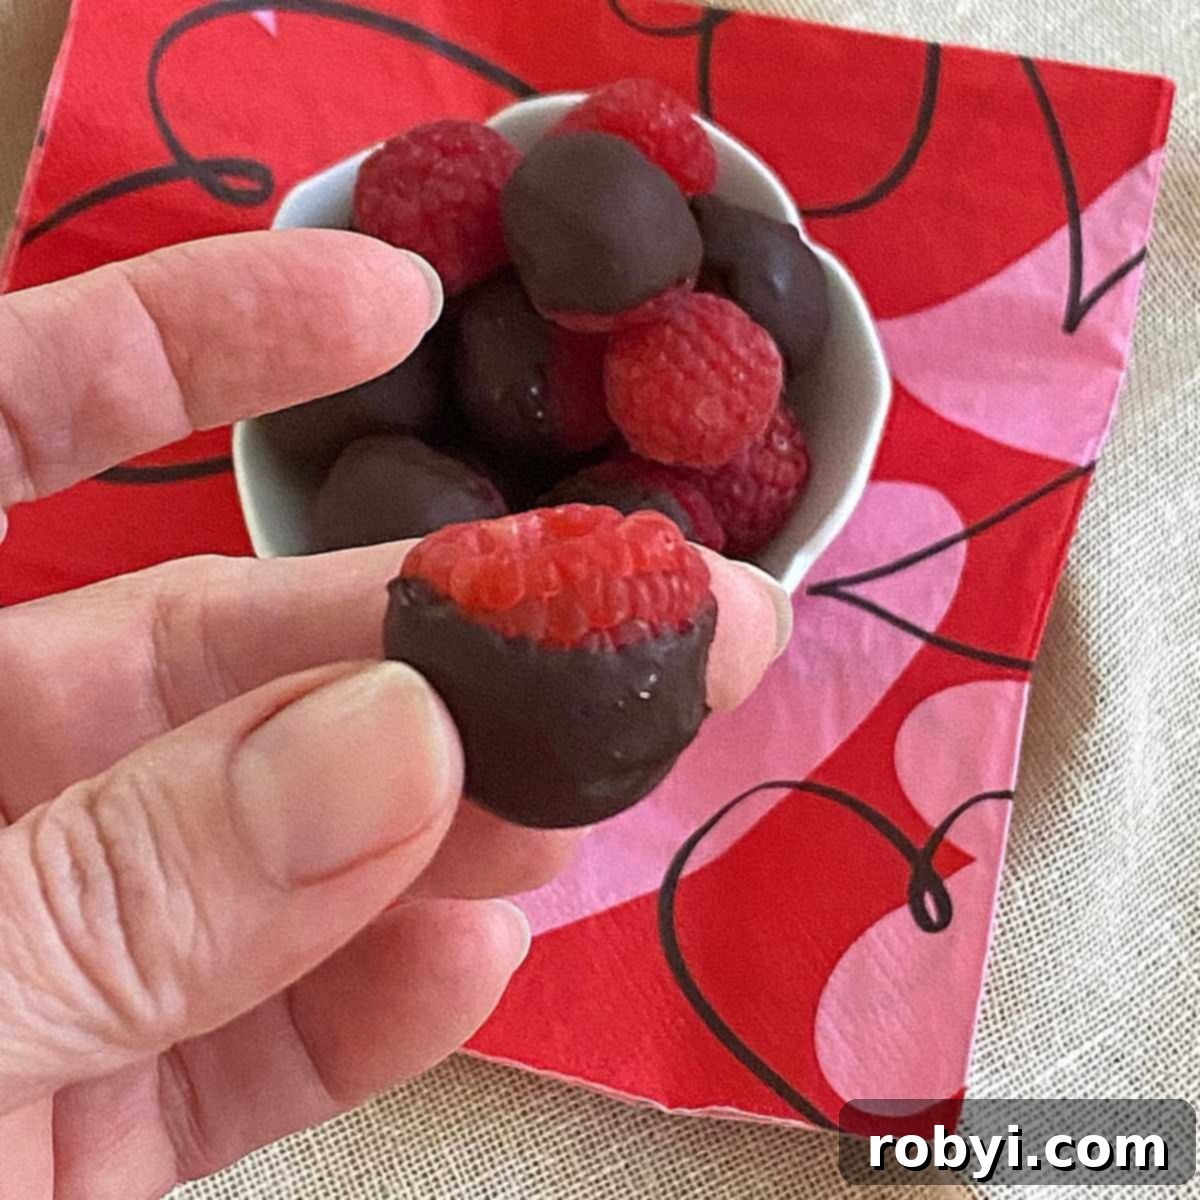
Line a baking sheet with wax paper or parchment paper. This will prevent the chocolate-covered raspberries from sticking to the tray as they set. To dip each raspberry, hold it gently between your fingers, open-side up. Submerge approximately two-thirds of the raspberry into the melted chocolate. Allow any excess chocolate to drip back into the bowl for a cleaner finish. Carefully turn the raspberry over and place it on the prepared baking sheet.
Note: The first few might be a bit messy, but you’ll quickly get the hang of it! Some prefer to place the raspberries open-side down on the parchment, while others lay them on their sides. Experiment to find what works best for you to achieve a beautiful coating. - The Quick Freeze: Setting Your Treats.
Once all your raspberries are dipped and arranged on the baking sheet, place the sheet in the freezer. The chocolate coating will set remarkably quickly, usually within 10-15 minutes, especially if the layer of chocolate isn’t too thick. The goal is for the chocolate to be firm to the touch. Once set, your chocolate-covered raspberries are ready to be served immediately or transferred to a permanent storage container.
When you’re ready to savor one of these frozen delights, we recommend allowing it to defrost for about 10-15 minutes at room temperature first. This brief period softens the raspberry slightly, enhancing its juicy burst and allowing the chocolate to mellow, creating the perfect melt-in-your-mouth experience.
Creative Variations and Delicious Toppings
While delicious on their own, frozen chocolate-covered raspberries are also a fantastic canvas for culinary creativity. Here are some ideas to elevate your homemade treats:
- The Double-Dipped Delight: For an extra layer of luxury and visual appeal, try double-dipping! First, coat your raspberries in white chocolate and let them set in the freezer for about 5-7 minutes. Once the white chocolate is firm, dip them a second time into dark chocolate (or milk chocolate) and allow them to set again. This creates a beautiful contrasting layer, much like the popular gourmet versions.
- A Sprinkle of Sea Salt: A tiny pinch of flaky sea salt sprinkled over the wet chocolate immediately after dipping can enhance the chocolate’s flavor and add a sophisticated touch. The sweet-salty contrast is absolutely divine.
- Spicy Kick with Chili Powder: For an adventurous palate, a whisper of chili powder or cayenne pepper mixed into the dark chocolate before dipping, or lightly dusted on top, can create an exciting sweet and spicy experience.
- Nutty Crunch: Finely chopped nuts like almonds, pistachios, or pecans can be sprinkled onto the wet chocolate for added texture and flavor. Almond dust works wonderfully with dark chocolate for a rich, earthy note.
- Tropical Twist with Shredded Coconut: Toasted shredded coconut adds a lovely crunch and tropical flavor that pairs beautifully with both dark and white chocolate.
- Citrus Zest Brightness: A very fine dusting of orange or lemon zest can add a refreshing, aromatic brightness to your chocolate-covered raspberries, especially when using dark chocolate.
Frequently Asked Questions (FAQ)
Do you need to temper the chocolate first?
For frozen chocolate-covered raspberries, tempering the chocolate is generally not necessary. Since the berries are kept frozen or refrigerated, the chocolate coating will naturally remain firm. However, if you desire an exceptionally shiny, snap-like finish that holds up well at room temperature, you could use melting wafers (which are pre-tempered) or explore techniques for tempering chocolate without a thermometer for a truly professional result.
Can you layer white and dark chocolate?
Absolutely, layering white and dark chocolate is a fantastic way to create a visually appealing and extra delicious treat! The process is simple: first, dip your raspberries in melted white chocolate and place them on a parchment-lined baking sheet to set in the freezer for about 5-7 minutes. Once the white chocolate layer is firm, proceed to dip them in melted dark chocolate (or milk chocolate) and allow them to set again in the freezer until both layers are firm.
Can you eat chocolate covered raspberries from frozen?
While technically edible straight from the freezer, chocolate-covered raspberries are typically quite hard and intensely cold when fully frozen, which can diminish their delicate flavor and enjoyable texture. For the best experience, we highly recommend removing them from the freezer and allowing them to defrost for 10 to 15 minutes before eating. This brief thaw softens the raspberry to a juicy perfection and brings out the full flavor of the chocolate, resulting in a much more pleasurable bite.
What’s the best way to store chocolate-covered raspberries?
To maintain their quality and prevent them from sticking together, store your chocolate-covered raspberries in an airtight container. If you stack them, place a layer of parchment paper between each layer of berries. They will keep fresh in the refrigerator for about 2 days, depending on the initial freshness of the raspberries. For longer storage, the freezer is your best friend, where they can last for up to 2 months (if they manage to stay around that long!).
Storage Recommendations for Lasting Freshness
Proper storage is essential to keep your homemade chocolate-dipped raspberries fresh and delicious for as long as possible. The goal is to prevent them from sticking together and to preserve the integrity of both the fruit and the chocolate coating.
Store your chocolate-covered raspberries in an airtight container. This protects them from freezer burn and from absorbing any unwanted odors from other foods. When placing them in the container, try to arrange them in a single layer if space allows. If you need to stack them, always place a piece of wax paper or parchment paper between layers. This simple step is crucial to prevent the chocolate coatings from melding together, making them easy to separate when you’re ready for a snack.
In the refrigerator, these delectable treats will generally maintain their quality for about 2 days, assuming the raspberries were very fresh to begin with. For extended enjoyment, the freezer is the ideal choice. When stored correctly in an airtight container, frozen chocolate-covered raspberries can last for up to 2 months. However, we have a feeling they won’t last that long once you discover how incredibly satisfying they are!
Health Benefits of This Irresistible Treat
Beyond being incredibly delicious, these frozen chocolate-covered raspberries offer a delightful way to enjoy significant health benefits, especially when made with sugar-free dark chocolate.
- Raspberry Powerhouse: Raspberries are nutritional superstars! They are packed with antioxidants, which help combat oxidative stress and inflammation in the body. They’re also an excellent source of dietary fiber, promoting digestive health and helping you feel full longer. Additionally, raspberries provide a good dose of Vitamin C (for immune support), Vitamin K, and manganese.
- Dark Chocolate Goodness: High-quality dark chocolate (especially 70% cocoa or higher) is rich in flavonoids, powerful antioxidants that can support heart health by improving blood flow and lowering blood pressure. It also contains minerals like iron, magnesium, and copper. Some studies even suggest dark chocolate can boost mood and brain function!
- Keto-Friendly & Low-Carb: By using sugar-free dark chocolate chips, this dessert becomes an ideal option for those following a ketogenic or low-carb lifestyle. It provides a satisfying sweet treat without the high sugar content that can spike blood glucose levels, making it a guilt-free indulgence. The combination of healthy fats from the chocolate and fiber from the raspberries contributes to sustained energy and satiety.
More Fruit-Inspired Dessert Ideas You’ll Love
If you’ve enjoyed the simplicity and deliciousness of these chocolate-covered raspberries, you’re sure to appreciate our other easy fruit-based dessert recipes:
- Decadent Chocolate Covered Blueberry Clusters with Almond Dust
- Creamy No-Bake Cheesecake Stuffed Strawberries
Would you like more easy, healthy, carb-conscious recipes delivered straight to your inbox?
Frozen Chocolate Covered Raspberries Recipe
Keep a batch of these Frozen Chocolate Covered Raspberries in your freezer, and you’ll always be just minutes away from a truly healthy, low-carb, and keto-friendly dessert or satisfying snack.
Prep Time: 20 minutes
Total Time: 20 minutes
Servings: 6 servings
Author: Marjory Pilley
Ingredients
- 6 ounces fresh raspberries (to yield about 30 firm berries)
- ½ cup sugar-free dark chocolate baking chips (or 80 grams of your preferred chocolate)
- 2 teaspoons avocado oil or refined coconut oil (Refined coconut oil helps the coating set nicely. Any neutral cooking oil like canola will also work.)
Instructions
- Gently rinse the fresh raspberries under cool water, then pat them dry with a clean cloth or paper towel. Spread them out on a dishcloth and allow them to air dry completely while you gather your other ingredients. Discard any berries that are not firm or appear bruised, as they won’t hold up well to dipping. A typical 6-ounce container yields approximately 37 usable berries.
- Place your chosen chocolate chips into a small, microwave-safe bowl along with the cooking oil (if using). Microwave on high for 30-second intervals, stirring thoroughly after each interval. Continue heating and stirring until the chocolate is completely melted, smooth, and easily spoons from the bowl. This usually takes about 1 minute in total, but microwave times may vary based on wattage.
- Prepare a baking sheet by lining it with wax paper or parchment paper. To dip each raspberry, hold it gently by the stem end (if present) or open-side up between your fingers. Submerge about two-thirds of the raspberry into the melted chocolate. Allow any excess chocolate to drip off back into the bowl before carefully placing the dipped raspberry onto the prepared baking sheet. Refer to the technique section above for a visual guide.
- Once all raspberries are dipped, transfer the baking sheet to the freezer. Allow them to freeze for approximately 10-15 minutes. The chocolate coating sets quite rapidly, especially if it’s not excessively thick. Once the chocolate is firm to the touch, your chocolate-covered raspberries are ready to be served immediately or moved to a permanent airtight storage container.
- For the best eating experience, remove the frozen chocolate-covered raspberries from the freezer and let them defrost at room temperature for 10-15 minutes before enjoying. This allows the raspberry to soften slightly and enhances both the fruit and chocolate flavors.
Notes
Expert Tips: For more detailed guidance, visual aids, and troubleshooting advice, please refer to the comprehensive sections and images provided earlier in the article.
Chocolate Options: The choice of chocolate significantly impacts this recipe. When using dark or sugar-free dark chocolate, adding a neutral cooking oil like coconut or avocado oil is essential for a smooth, dippable consistency. Milk chocolate and tempered melting wafers typically do not require added oil. Melting wafers are excellent for a quick-setting, shiny finish that holds up well at room temperature, though not strictly necessary for frozen treats. Nutritional values will vary based on your chocolate selection.
Variation: Double Dipped Raspberries: For an extra special treat, dip raspberries in white chocolate first, let them set in the freezer until firm, then dip them again in dark chocolate. Freeze until the second layer is set.
Storage: Store the chocolate-covered raspberries in an airtight container in the refrigerator for up to 2 days, or in the freezer for up to 2 months. Ensure layers are separated by parchment paper to prevent sticking.
Nutrition
Calories: 98kcal | Carbohydrates: 12g | Protein: 1g | Fat: 6g | Saturated Fat: 3g | Sodium: 1mg | Potassium: 43mg | Fiber: 3g | Sugar: 1g | Vitamin A: 9IU | Vitamin C: 7mg | Calcium: 7mg | Iron: 1mg
Nutritional and Food Safety Disclaimer
Last Step: We’d love to hear from you! Please leave a rating and comment letting us know how you liked this recipe. Your feedback helps our business thrive so we can continue to provide more free recipes!
Grab 5 Low-Carb Sauces and get more easy, healthy recipes! JOIN HERE
