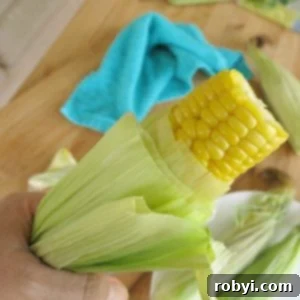
The Ultimate Guide: Freeze Corn on the Cob in the Husk Without Blanching (Easy & Flavorful!)
Imagine the delightful crunch of sweet, succulent corn on the cob, even in the heart of winter. What if we told you it’s not just possible, but incredibly simple to achieve? This comprehensive guide unveils the easiest, most mess-free method to preserve that peak-season corn: by freezing corn on the cob directly in its husk, completely bypassing the traditional blanching step. Get ready to lock in summer’s vibrant flavors and enjoy fresh-tasting corn any time of year!
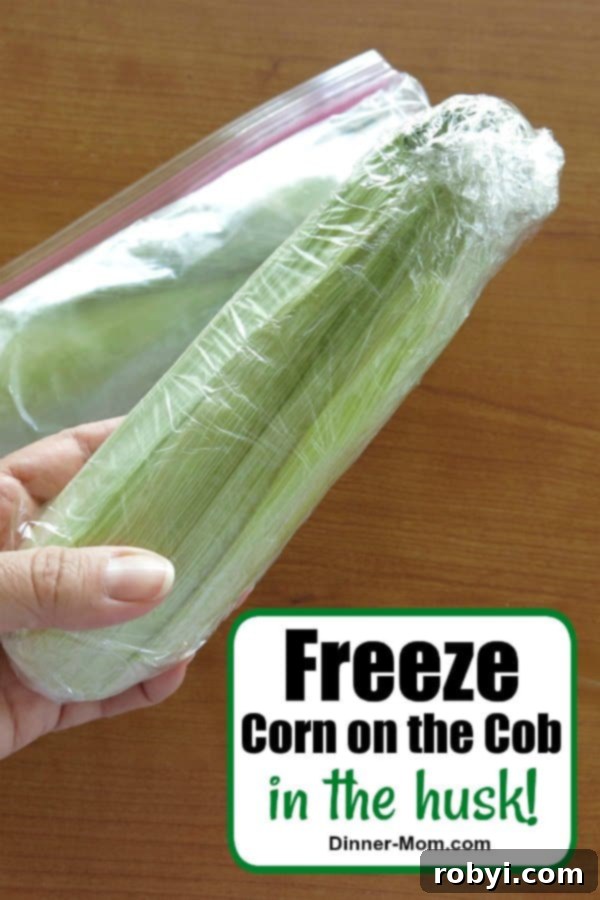
The inspiration for this groundbreaking freezing technique originated from a simple yet profound observation: many people already successfully microwave corn on the cob in the husk. This sparked the question: if corn can be cooked directly from its raw, husked state in a microwave, why couldn’t it be frozen the same way? The answer, as countless enthusiasts have discovered, is a resounding yes! This method dramatically streamlines the preservation process, allowing you to capture the essence of fresh corn with minimal fuss and maximum flavor.
To Blanch or Not to Blanch Before Freezing Corn: Deciphering the Tradition vs. Innovation
For generations, the golden rule of freezing vegetables has been blanching. This process, involving a brief dip in boiling water followed by an immediate plunge into an ice bath, is designed to inactivate enzymes. These natural enzymes, present in all vegetables, are responsible for their growth, ripening, and eventual decay. Even in the freezing temperatures of a freezer, these enzymes don’t fully stop; they merely slow down. Over time, their continued activity can lead to undesirable changes in the vegetable’s color, texture, and flavor, a phenomenon commonly known as “freezer burn” or a general decline in quality.
The University of Minnesota Extension’s article on the Science of Freezing Food provides an excellent, in-depth explanation of these enzymatic processes and why blanching is traditionally recommended. It highlights how blanching sets the stage for longer, higher-quality frozen storage by halting these enzymatic reactions at their source.
However, an exciting and highly effective exception exists for corn on the cob. Many home cooks have found immense satisfaction freezing corn directly in its husk, without the blanching step. This unconventional approach defies traditional guidance but delivers fantastic results for specific needs. The key benefits are undeniable: it’s incredibly fast, eliminates the need for boiling water and ice baths, and creates absolutely no mess. Furthermore, the corn’s natural husk acts as a built-in protective layer, offering an additional barrier against moisture loss and freezer burn, keeping the kernels plump and juicy.
It’s important to set expectations for this no-blanch method. While exceptional for convenience and quality, it’s generally best suited for shorter storage durations, typically up to 3-4 months. Beyond this timeframe, you might begin to notice a subtle softening of the corn’s texture. For many culinary applications, such as incorporating corn into chili, soups, casseroles, or simply enjoying it as a side, this slight change is often unnoticeable or perfectly acceptable. This method is truly a game-changer for those spontaneous purchases at the farmer’s market or when fresh corn goes on sale, allowing you to quickly preserve its peak freshness without extensive preparation.
Selecting the Perfect Corn for Optimal Freezing Results
The foundation of successful corn preservation, regardless of the method, lies in the quality and freshness of the corn you start with. Freezing preserves the current state of the vegetable, it doesn’t improve it. Therefore, selecting the best ears is paramount:
- Look for Vibrant Husks: Choose corn with bright green, tightly wrapped husks. Avoid any ears with dry, yellowing, or loose husks, as this indicates older corn.
- Check the Silk: The silk emerging from the top of the cob should be moist, slightly sticky, and light brown or golden. Dry, brittle, or black silk often signifies an older or overripe ear.
- Feel for Plump Kernels: Gently squeeze the cob through the husk. You should feel firm, plump kernels all the way to the tip. Gaps or soft spots suggest underdeveloped or damaged kernels.
- Prioritize Freshness: The ideal time to freeze corn is within a few hours of purchasing or picking it. The longer corn sits at room temperature, the faster its natural sugars convert to starch, diminishing its sweetness and desirable texture. Think “farm to freezer” for the best possible outcome.
Starting with peak-fresh corn ensures that the delicious flavor you love will be locked in and ready for you to enjoy months down the line.
Exploring Diverse Methods for Freezing Fresh Corn
While our focus remains on the incredibly easy no-blanch method, it’s beneficial to understand the spectrum of options available for freezing fresh corn. Each method caters to different preferences and storage objectives:
- Freezing Whole Cobs (Blanched & Shucked): This classic method involves removing the husks and silk, blanching the cobs for several minutes (7-11 minutes depending on size), rapidly cooling them in an ice bath, then bagging and freezing. It’s excellent for long-term storage (up to 12 months) and maintaining a firmer texture.
- Freezing Kernels (Blanched & Cut): For those who primarily use corn kernels in recipes, this is a popular choice. After shucking and blanching the cobs, the kernels are cut off and then frozen in bags. This saves significant freezer space and offers convenience for cooking.
- Freezing Cooked Corn (Cobs or Kernels): Some prefer to cook their corn fully (e.g., boil, grill, roast), let it cool completely, and then freeze either the whole cobs or the cut kernels. This provides ready-to-eat corn, though the texture upon reheating might be softer than corn frozen raw.
- Freezing Uncooked Corn on the Cob in the Husk (Our Easy Method): This is the star of our guide – the simplest way to preserve corn. No blanching, no shucking, just wrap and freeze. Perfect for quick preservation and enjoying delicious corn within a few months.
For those interested in the precise blanching times for the traditional method (husks removed), here are the general guidelines:
- Small ears of corn: Blanch for 7 minutes
- Medium ears of corn: Blanch for 9 minutes
- Large ears of corn: Blanch for 11 minutes
Always remember to immediately transfer blanched corn to an ice water bath for the same amount of time to effectively stop the cooking process and preserve its crispness.
Step-by-Step Guide: How to Freeze Corn on the Cob in the Husk Without Blanching
This method is truly as simple as it sounds, requiring minimal effort and delivering maximum deliciousness. Follow these clear steps to extend your corn harvest:
- Start with Superior Freshness: Your frozen corn will only be as good as the fresh corn you begin with. Select ears that meet the criteria discussed above – bright green, snug husks, moist silk, and plump kernels. Freeze them as soon as possible after harvesting or purchasing to lock in peak sweetness.
- No Peeling or Shucking Necessary: This is the beauty of this method! Leave the husks and silk completely intact. The husk acts as a natural, protective wrapper, shielding the kernels from freezer burn and helping to retain their moisture and flavor throughout the freezing process. Do not pull back the husks or remove any silk.
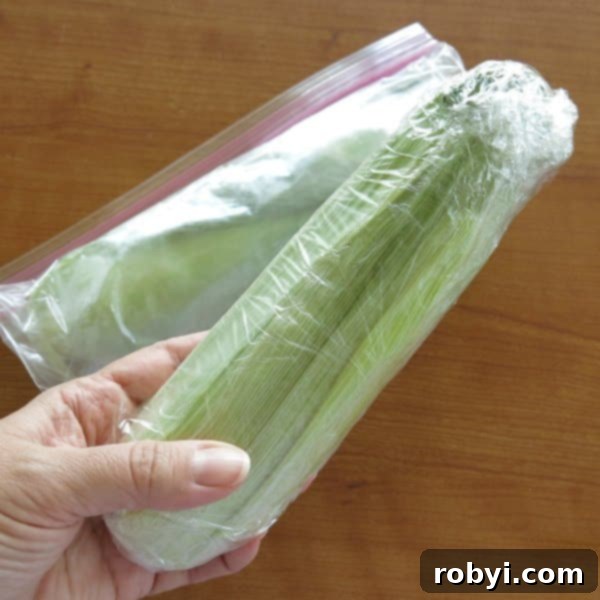
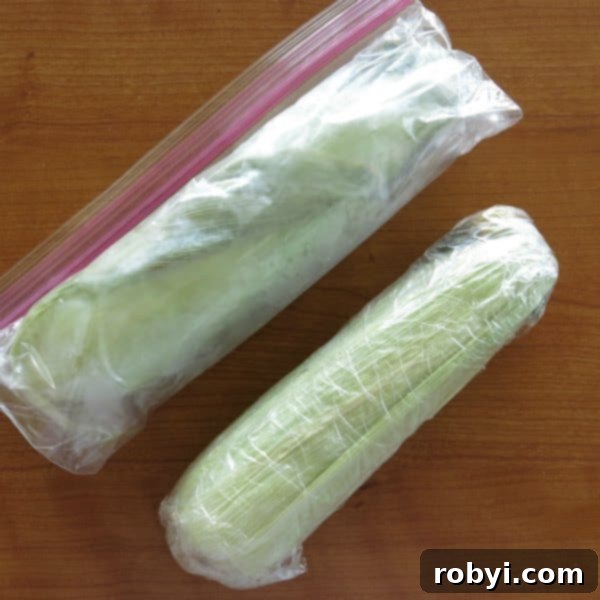
- Wrap Each Ear Individually: For optimal protection, tightly wrap each individual ear of corn in a layer of plastic wrap. Ensure the wrap is snug against the husk, minimizing any air pockets. This initial wrapping forms a crucial barrier against freezer burn.
- Place in Freezer-Safe Bag: After wrapping, place the individually wrapped cobs into a heavy-duty freezer bag. For even better protection, you can double-bag them. Press out as much air as possible from the bag before sealing it. If you have a vacuum sealer (e.g., FoodSaver), now is the perfect time to use it! Vacuum-sealing provides an airtight environment, which is the ultimate defense against freezer burn and preserves quality for the longest duration possible with this method.
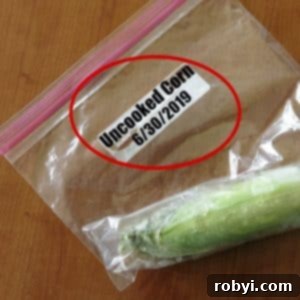
- Label Clearly: Before placing your corn in the freezer, use a permanent marker to clearly label each bag with the contents (e.g., “Corn on Cob – In Husk”) and the date it was frozen. This simple step is vital for proper inventory management and ensuring you use your corn within its optimal timeframe.
- Store in Freezer: Transfer the packaged corn to your freezer. Arrange the bags so they freeze quickly and can be easily accessed. For best quality, try to store them in a consistent temperature zone of your freezer, away from the door where temperatures fluctuate more frequently.
By following these steps, you can confidently enjoy fresh-tasting corn on the cob for approximately 3 to 4 months. This is an ideal timeframe to savor your seasonal bounty well into the cooler months.
Bringing Summer to Your Plate: How to Cook Frozen Corn on the Cob in the Husk
The magic of this method continues when it’s time to cook! You don’t need to thaw the corn completely beforehand, and the husk plays a crucial role in steaming the corn to tender perfection. Here are three popular and effective ways to cook your frozen corn on the cob:
Microwave Method (Speedy & Simple)
This is by far the quickest and most convenient way to enjoy your frozen corn, echoing the ease of microwaving fresh corn in its husk.
- To Thaw or Not to Thaw: While optional, some find allowing the frozen corn to sit at room temperature for 15-30 minutes before microwaving results in slightly more even heating. However, it’s perfectly acceptable to cook directly from frozen.
- Prep for Microwave: Place the corn (still in its husk and any plastic wrap removed) on a microwave-safe plate. You can cook several ears at once, adjusting time accordingly.
- Microwave on High: Use the following guidelines, which are typically sufficient for both fresh and frozen corn. Microwave wattages vary, so adjust times slightly for desired tenderness:
- 1 ear: 2 minutes
- 2 ears: 4 minutes
- 3 ears: 5 minutes
- 4 ears: 6 minutes
- Crucial Resting Period: After microwaving, let the corn rest on the plate for 1-2 minutes. This allows residual steam to finish cooking the corn and makes the husk and silk much easier to remove cleanly.
- Effortless Husk & Silk Removal: Carefully grasp the stem end of the corn (the end without exposed silk). Using a sharp knife, cut about an inch off this end. Then, grab the husk from the silk end and pull it downwards towards the cut end. The husk and silk should slide off together, leaving you with a perfectly clean, steamed cob.
- Serve Immediately: Your corn is now ready to be buttered, seasoned, and enjoyed right off the cob, or the kernels can be cut off for various recipes.
Boiling Method (Traditional & Reliable)
For those who prefer a more traditional cooking approach, boiling your frozen corn in the husk yields beautifully tender results.
- Prepare Boiling Water: Fill a large pot with water and bring it to a rolling boil. Ensure there’s enough water to fully submerge the corn cobs.
- Add Frozen Corn: Carefully place the frozen corn (still in its husk, remove any plastic wrap) into the boiling water. The water temperature will drop momentarily, so wait for it to return to a boil.
- Cook to Perfection: Once the water is boiling again, cook the corn for approximately 8-10 minutes. The husks will often turn a darker, more vibrant green.
- Remove and Peel: Using tongs, carefully remove the hot cobs from the water. Let them cool for a minute or two, then use the same cut-and-pull technique described in the microwave method to remove the husks and silk.
Grilling or Roasting Method (For Enhanced Flavor)
If you’re craving a smoky char or a richer, caramelized flavor, grilling or roasting your frozen corn in the husk is an excellent choice.
- Preheat Oven or Grill: Preheat your outdoor grill to medium-high heat (around 400-450°F or 200-230°C) or your oven to 400°F (200°C).
- Place Corn: Remove any plastic wrap from the frozen, un-shucked corn. Place the cobs directly on the grill grates or on a baking sheet if roasting in the oven.
- Cook until Tender:
- Grill: Grill for 20-30 minutes, turning the cobs every 5-7 minutes to ensure even cooking and charring of the husks.
- Roast: Roast in the oven for 30-40 minutes, turning halfway through, until the husks are slightly browned and the corn inside is tender.
- Cool and Serve: Allow the corn to cool for a few minutes before removing the husks and silk using the technique detailed above. The husks will be charred and easy to peel away, revealing perfectly cooked corn. Serve with your favorite seasonings!
Creative Ways to Enjoy Your Easy-Frozen Corn
With your perfectly preserved and cooked corn ready, the culinary possibilities are endless. Beyond simply enjoying it off the cob with butter and salt, here are some inspiring ideas:
- Classic Side Dish: The timeless appeal of corn on the cob never fades, making it a perfect accompaniment to any meal, regardless of the season.
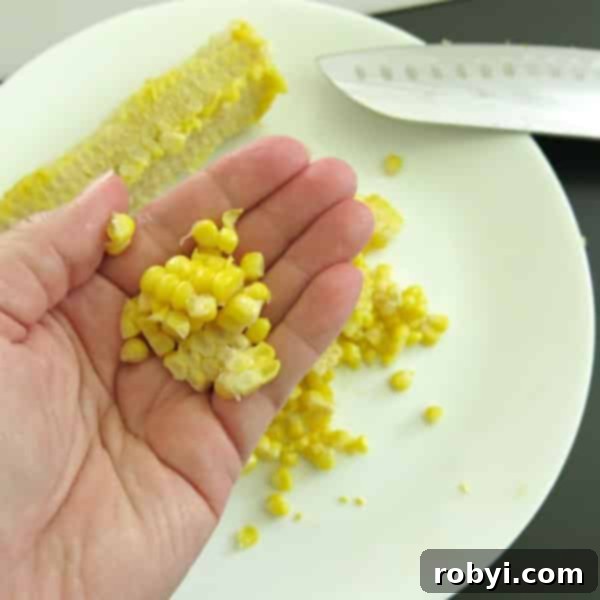
- Vibrant Salsas & Salads: Cut the kernels off the cob and toss them into a refreshing Fresh Corn and Black Bean Salsa, or add to green salads, pasta salads, or grain bowls for a burst of sweetness and color.
- Hearty Soups & Stews: Elevate the flavor profile of your favorite comfort foods like chili, chowders, or a comforting Shrimp Tortilla Soup by adding freshly cut corn kernels.
- Gourmet Grains & Risottos: Stir kernels into rice pilafs, quinoa dishes, or creamy risottos for added texture and a delicate sweetness.
- Mexican Street Corn (Elote/Esquites): Transform your cooked corn into a sensational Mexican Street Corn in a Cup or prepare traditional elote for a true flavor fiesta.
- Breakfast Boost: Mix kernels into scrambled eggs, omelets, or breakfast burritos for a surprisingly delightful start to your day.
For more inspiration on pairing corn with your main courses, be sure to check out these fantastic dinner ideas with corn on the cob!
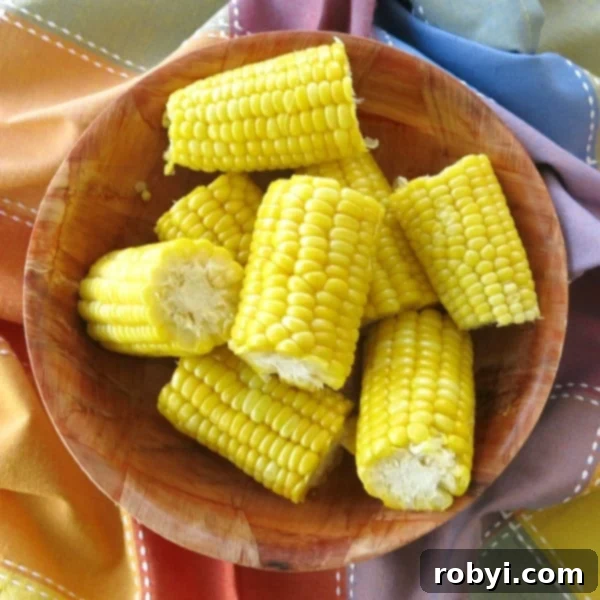
Frequently Asked Questions (FAQs) About Freezing Corn in the Husk
- Q: Is it really safe to freeze corn without blanching?
- A: Yes, it is safe! While blanching is traditionally recommended for enzyme inactivation to preserve quality for longer periods (up to a year), freezing corn on the cob in the husk without blanching is a perfectly safe method for shorter storage, typically 3-4 months. The husk provides natural protection, and rapid freezing slows enzyme activity sufficiently for this duration.
- Q: How long can I store corn frozen in the husk?
- A: For the best flavor, texture, and overall quality using the no-blanch method, we recommend storing your corn for up to 3-4 months. Beyond this timeframe, while still safe to eat, you may notice a more significant change in texture, often becoming softer.
- Q: Does frozen corn on the cob taste as good as fresh?
- A: When frozen quickly and cooked properly, corn preserved with this method tastes remarkably close to fresh, especially within the recommended 3-4 month storage period. The husk helps maintain its natural sweetness and moisture, delivering a very satisfying “summer in winter” experience.
- Q: Can I freeze corn that has already been shucked without blanching?
- A: While technically possible, it’s generally not recommended for optimal quality. If you must freeze shucked corn without blanching, wrap each cob very tightly in multiple layers of plastic wrap and then aluminum foil, or use a vacuum sealer, to prevent freezer burn. However, for shucked corn, blanching prior to freezing will yield much better long-term results.
- Q: Do I need to thaw the corn before cooking it?
- A: No, you absolutely do not! One of the best aspects of this method is that you can cook the corn directly from its frozen state. In fact, cooking it frozen, especially via microwaving or boiling, allows the husk to act as a steaming pouch, resulting in incredibly tender and flavorful corn.
- Q: Can I cut the kernels off the cob before freezing without blanching?
- A: If you plan to cut the kernels off the cob, blanching them first is highly recommended. Without the husk’s protection, individual kernels are more susceptible to freezer burn and quality degradation without the enzyme-deactivating step of blanching. This “no blanch” method is specifically for corn remaining in its husk.
If you’ve embraced this incredibly simple and rewarding technique for freezing corn on the cob, we’re eager to hear about your experience! Please share your insights and results by dropping a comment below, or showcase your delicious creations on social media by tagging @DinnerMom and using the hashtag #DinnerMom. Your culinary adventures inspire our community!
📋 Recipe: How to Freeze Corn on the Cob in the Husk
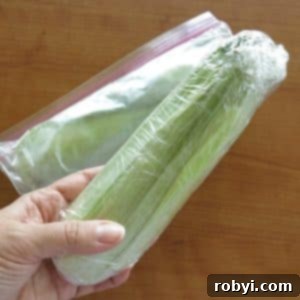
How to Freeze Corn on the Cob in the Husk
Freeze fresh corn on the cob directly in its husk without any blanching, offering the simplest way to enjoy sweet summer corn even when it’s out of season.
Print Recipe |
Pin Recipe |
Rate This Recipe
Course: Side Dish
Cuisine: American
Prep Time: 5 minutes
Cook Time: 5 minutes
Total Time: 5 minutes
Servings: 4 cobs of corn
Author: Marjory Pilley
Equipment
- Plastic Freezer Bag
- Permanent Marker
- Freezer
- Optional: Plastic Wrap, Vacuum Sealer
Ingredients
- 4 each Corn on the Cob (Do NOT remove the husk)
Instructions
Prepare Corn: Start with the freshest corn on the cob possible. Ensure the husk is intact; do not peel or shuck the corn.

Wrap and Seal: Individually wrap each ear of corn snugly in plastic wrap, then place them into a plastic freezer bag. Remove as much air as possible from the bag before sealing it. Using a vacuum sealer is highly recommended for best results.

Label and Store: Use a permanent marker to label the bag with the contents and the date frozen. Store the corn in the freezer for up to 4 months for optimal quality.

Cook When Ready: When you’re ready to enjoy, remove the corn from the freezer and cook using your preferred method for frozen corn on the cob in the husk (e.g., microwave, boil, grill).

Notes
Defrosting: While not strictly required, some people find that allowing the corn to defrost for 15-30 minutes before cooking can lead to slightly more even heating, especially with boiling or grilling. For microwaving, you can often cook directly from frozen.
Cooking Time Variability: Cooking times can vary based on your appliance and the size of the corn. Always cook until the corn is tender and heated through.
✅ Grab 5 Low-Carb Sauces & Get More Tips for a Healthy Kitchen JOIN HERE
Nutritional and Food Safety Disclaimer
