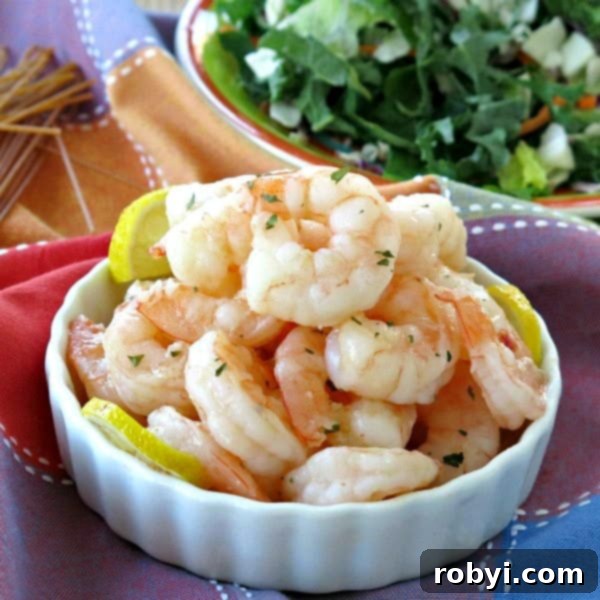
Craving a delicious, healthy dinner that’s ready in mere minutes? Look no further than perfectly cooked skillet shrimp! This incredible method allows you to whip up tender, flavorful shrimp in just 10 minutes, making it the ultimate weeknight savior for busy individuals and families alike. Whether you’re adhering to a specific diet or simply short on time, this foolproof technique guarantees succulent results every single time without compromising on taste or nutrition.
Cooking shrimp on the stovetop is undoubtedly my preferred method because it offers unparalleled control over the cooking process. Unlike baking or grilling, a skillet allows you to constantly monitor the shrimp, ensuring each piece is removed at its peak of perfection. The result? Shrimp that is consistently tender, juicy, and never, ever rubbery.
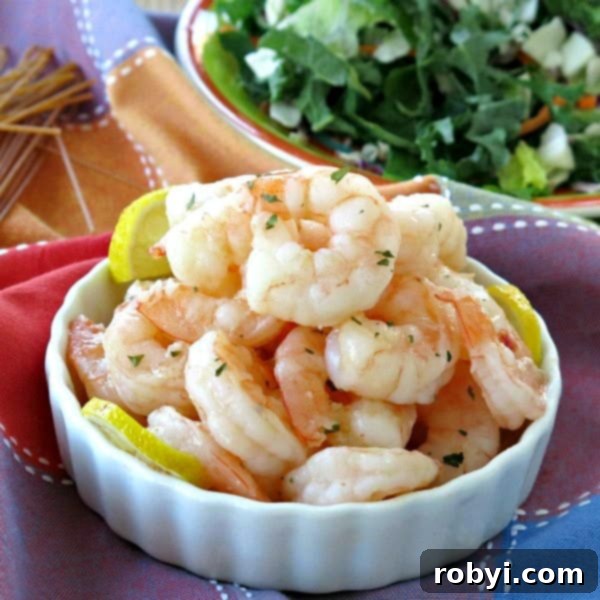
This versatile technique forms the foundation for countless incredible dishes. We use a similar approach for delectable meals such as Greek Shrimp with Tomatoes, hearty Cauliflower Grits and Shrimp, light and fresh Shrimp Zoodles, and even elegant Pan-Seared Scallops. It’s a foundational skill every home cook should master for swift and satisfying meals.
While this base recipe features a classic butter and/or olive oil flavoring, its beauty lies in its adaptability. It’s not inherently spicy or intensely lemony – unless you want it to be! We’ll explore numerous variations to customize the flavor profile to perfectly suit your preferences and the dish you’re preparing. I find myself reaching for this stove-top shrimp method constantly for adding protein to salads, enriching soups, or creating quick pasta dishes. It’s naturally high in protein, low in calories, and undeniably delicious. What’s not to love about such a simple, healthy, and fast dinner option?
Mastering Shrimp Preparation: Tips for Perfect Results
Before you even fire up the skillet, proper shrimp preparation is key to achieving that desirable tender texture and appealing presentation. This recipe assumes your shrimp is ready to cook, but let’s walk through the essential steps to get it there, ensuring every bite is a delight.
Defrosting Shrimp the Right Way
- Overnight Thaw: The best method is to transfer frozen shrimp from the freezer to the refrigerator the night before you plan to cook them. This slow thaw helps maintain the shrimp’s texture.
- Quick Thaw: If you’re in a hurry, place the frozen shrimp in a colander and run cold water over them for about 5-7 minutes, gently separating them as they thaw. Avoid hot water, as it can start cooking the shrimp and make them tough.
- Crucial Step: Pat Dry! Regardless of the defrosting method, thoroughly pat the shrimp dry with paper towels before cooking. Excess moisture will steam the shrimp instead of searing them, preventing that beautiful golden crust and potentially leading to a rubbery texture. Don’t skip this step!
Peeling and Deveining Shrimp
- Peeling: Most recipes, including this skillet shrimp, call for peeled shrimp. This is generally an easy task; simply grasp the legs and peel back the shell. If you prefer to cook shrimp with the shell on (perhaps for a different cooking method like boiling or grilling where the shell adds flavor and protection), that’s an option, but for skillet cooking, peeled is usually best for eating convenience.
- Deveining: While not harmful to eat, the “vein” (which is actually the shrimp’s digestive tract) can be unappetizing in appearance and sometimes contribute a slightly gritty taste. To devein, make a small, shallow cut along the back of each shrimp with a sharp paring knife. You’ll see a thin, dark, stringy line. Gently lift it out with the tip of your knife or a toothpick. Repeat for all shrimp. For many, this is a non-negotiable step for optimal enjoyment.
- Tail On or Off: This is entirely a matter of preference. Keeping the tail on can make for a more elegant presentation, especially if serving as an appetizer, and provides a convenient “handle” for eating. However, removing the tail makes the shrimp easier to eat, particularly when incorporating them into dishes like pasta or salads.
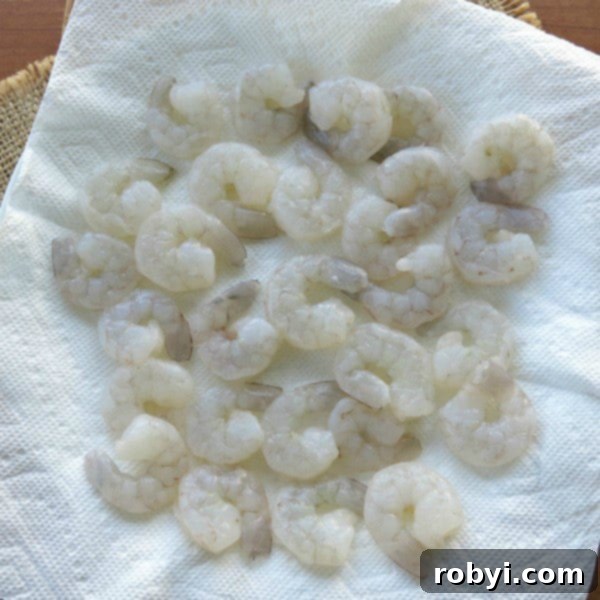
I often purchase raw, unprepared shrimp and handle these steps myself, which is a great way to save money, especially when I find a good sale. I always stock my freezer with several bags, ensuring a quick and healthy meal is always within reach!
Any type of shrimp can be used for this recipe, from rock shrimp to white shrimp and even prawns. Larger shrimp (like jumbo or colossal) are typically easier to work with and tend to stay juicier, but they are also more expensive. Smaller shrimp cook faster but require more attention. For comprehensive information on choosing and buying shrimp, check out resources like Everything You Need to Know to Buy Better Shrimp by Serious Eats.
How to Make the Perfect 10-Minute Skillet Shrimp
Once your shrimp are prepped and patted dry, the cooking process itself is incredibly straightforward. With a few key techniques, you’ll achieve perfectly cooked shrimp every single time, turning this into a second-nature skill in your kitchen.
- Prepare Your Pan and Fats: Begin by melting 1 tablespoon of butter and 1 tablespoon of olive oil in a large frying pan or skillet over medium-high heat. The combination of butter provides rich flavor, while olive oil raises the smoke point, preventing the butter from burning too quickly.
- Note on Proportions: This ratio offers a balanced flavor. For a dairy-free or paleo-compliant version, simply use 2 tablespoons of olive oil. Generally, 2 tablespoons of total fat (butter and/or oil) is the minimum amount needed to adequately coat 1 pound of shrimp and leave a minimal amount of delicious fond in the pan. If you’d like to create a richer sauce at the end, feel free to slightly increase the total amount of butter and oil.
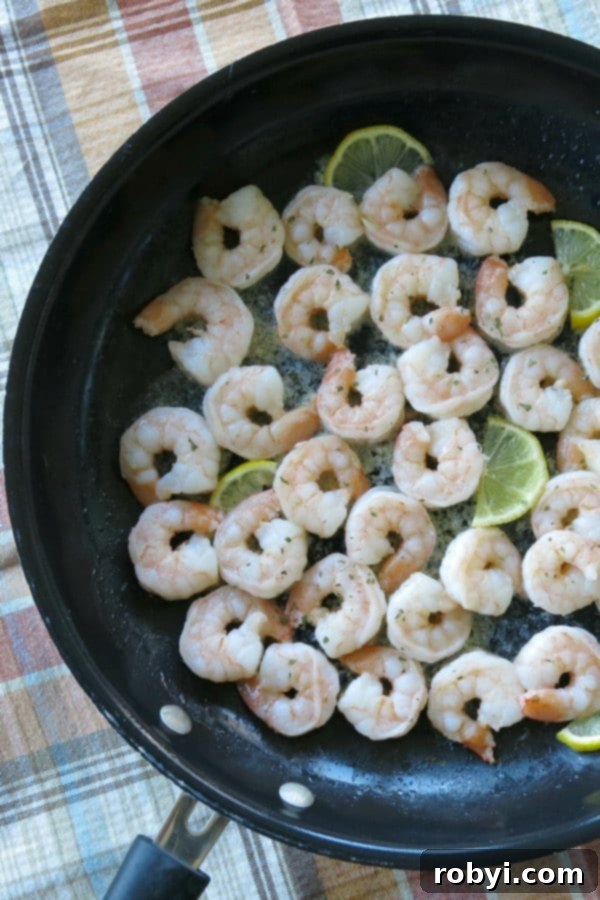
- Arrange the Shrimp: Once the butter is melted and the oil is shimmering, carefully arrange the prepared shrimp in a single layer across the bottom of the hot pan. It’s crucial not to overcrowd the pan; this ensures that the shrimp sear properly rather than steam. If you’re doubling the recipe or cooking a larger quantity, work in batches to maintain consistent heat and achieve the best results.
- Initial Searing (Side One): Allow the shrimp to cook undisturbed for approximately 3 minutes. Resist the urge to move them around during this initial phase; this allows a beautiful, flavorful crust to develop. The exact cooking time may vary slightly depending on the size of your shrimp. For instance, smaller shrimp will cook faster than jumbo varieties. We typically use large-sized shrimp for this recipe.
- Flipping and Even Cooking: At the 3-minute mark, use tongs or two forks to individually flip each shrimp to its other side. Tending to each shrimp ensures they all cook evenly. While you could use a spatula to turn them all at once, individual flipping gives you better control over doneness.
- Final Cook and Removal: Continue cooking for another 2-3 minutes on the second side, watching them closely. Shrimp cook very quickly! The moment they turn opaque pink and curl into a “C” shape, they’re done. Promptly remove them from the pan to prevent overcooking.
How Do You Know When Your Skillet Shrimp is Done?
Determining the perfect doneness for shrimp is a key skill to master, as the difference between perfectly tender and rubbery can be a matter of seconds. Here’s what to look for:
- Color Change: Raw shrimp are typically grayish and translucent. As they cook, they will turn opaque pink or pale white. When done, they should be fully opaque, with no gray or translucent spots remaining.
- Shape: Perfectly cooked shrimp will curl into a loose “C” shape. If they form a tight “O” shape, they are likely overcooked and will be tough and chewy.
- Texture: Gently press a piece of shrimp with a fork or your finger. It should feel firm but still have a slight spring to it. Overcooked shrimp will feel hard and rubbery. Avoid the bright white color, as that’s often a sign they’ve gone a bit too long.
Flavorful Variations for Your Stove-Top Shrimp
One of the best aspects of this basic skillet shrimp recipe is how easily you can adapt its flavor profile to create entirely new dishes. Here are some fantastic ideas to get you started:
- Zesty Lemon-Garlic Shrimp: For a bright and aromatic twist, add 2-3 cloves of fresh minced garlic (or ½ teaspoon garlic powder) to the pan when melting the butter. At the very end of cooking, or just after removing the shrimp from the pan, squeeze fresh lemon juice over them. A sprinkle of fresh parsley or cilantro adds a beautiful finish.
- Spicy Cajun Shrimp: Give your shrimp a kick by sprinkling them generously with Cajun seasoning (or a blend of paprika, cayenne pepper, onion powder, and dried thyme) during the last minute of cooking. This creates a vibrant, flavorful dish perfect for pairing with rice or grits.
- Italian Herb Shrimp: Incorporate Italian seasoning (a mix of oregano, basil, thyme, and rosemary) into the butter and oil as it heats. A pinch of red pepper flakes can also add a subtle warmth. This variation is fantastic with pasta or served over zucchini noodles.
- Asian-Inspired Shrimp: For an umami-rich flavor, add a splash of soy sauce or tamari, a dash of sesame oil, and a sprinkle of ginger powder (or fresh grated ginger) during the final minute of cooking. A garnish of sesame seeds and sliced green onions completes the dish.
- One-Pan Meal Enhancement: After you remove the cooked shrimp from the skillet, utilize the flavorful leftover fat in the pan! Quickly stir-fry some chopped vegetables like broccoli florets, asparagus spears, bell peppers, or sliced carrots. Cook until tender-crisp, then toss the shrimp back in with the vegetables for a complete, nutritious one-pot meal.
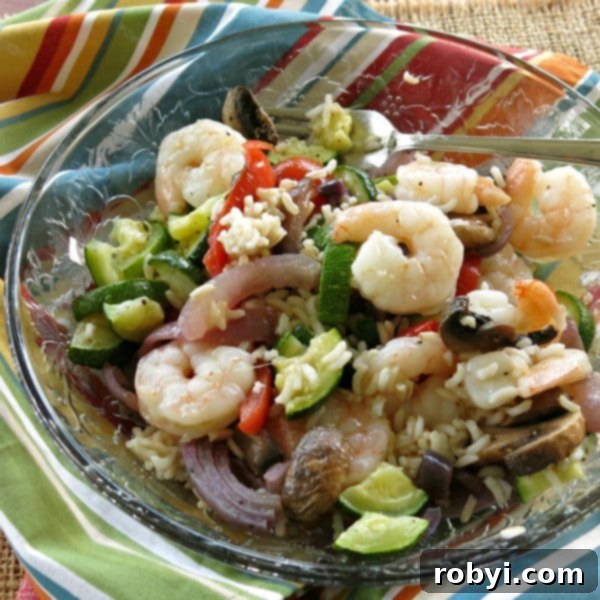
Creative Ways to Use Your Skillet Shrimp: Endless Possibilities
Having a bag of shrimp in the freezer and this quick cooking method in your repertoire means a delicious and easy dinner is never far away. The versatility of skillet shrimp is truly remarkable, allowing it to seamlessly integrate into a wide array of dishes. Here are some exciting ideas to inspire your next meal:
- Elevate Pasta Dishes: Stir your perfectly cooked shrimp into creamy fettuccine alfredo, a zesty lemon-garlic scampi, or a simple marinara pasta. For lighter, low-carb alternatives, pair it with our delicious Zucchini Noodle Alfredo or a satisfying Spaghetti Squash Alfredo.
- Serve with Healthy Sides: Create a balanced meal by serving your shrimp with Lemon Garlic Zucchini Noodles or your favorite roasted, steamed, or sautéed vegetables. As mentioned before, you can even sauté the vegetables in the same pan after removing the shrimp for a one-pan wonder.
- Top Fresh Salads: Transform a simple salad into a hearty and satisfying meal by adding skillet shrimp. It pairs wonderfully with a refreshing Caribbean Salad with Honey Lime Dressing or any mixed greens with your preferred vinaigrette.
- Build Flavorful Bowls: Create vibrant grain bowls or Buddha bowls. Serve the shrimp with fluffy rice, quinoa, or couscous, alongside roasted vegetables (like sweet potatoes, broccoli, or bell peppers), a squeeze of fresh lemon, and a sprinkle of feta cheese or a drizzle of tahini sauce.
- Enhance Soups and Stews: For a protein boost, toss cooked shrimp into your favorite soups or stews during the final minutes of heating. It’s particularly delicious in a comforting Shrimp Tortilla Soup or a creamy chowder.
- Gourmet Pizza Topping: Get creative with pizza night! Toss cooked shrimp with a little pesto, then arrange it on your pizza crust with fresh tomatoes and mozzarella cheese before baking.
- Deconstructed Sushi Bowls: Enjoy the flavors of sushi without the fuss of rolling. Combine seasoned rice, sliced cucumber, avocado, seaweed strips, and skillet shrimp, then drizzle with a creamy sriracha mayo for a quick and satisfying Shrimp Sushi Bowl.
- Tacos, Wraps, and Sandwiches: Shredded lettuce, a vibrant salsa, and a squeeze of lime juice turn skillet shrimp into fantastic tacos or fresh wraps. For a classic, piled-high sandwich, consider making a shrimp po’boy.
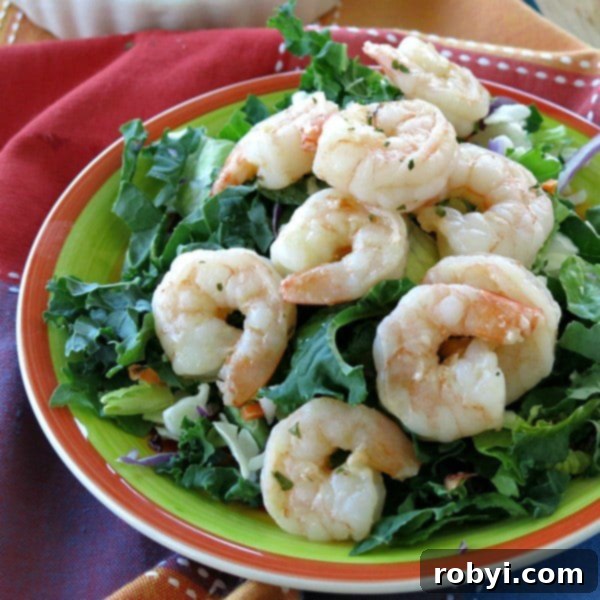
This simple skillet shrimp technique is truly one of the top tricks for getting a delicious, healthy, and satisfying dinner on the table in record time. It empowers you to create endless meal variations, making it a valuable addition to your culinary skills.
Skillet Shrimp FAQs: Your Questions Answered
Here are some frequently asked questions to help you master your skillet shrimp cooking:
- How long does it really take to cook shrimp in a skillet?
Typically, peeled and deveined shrimp cook very quickly, usually within 2-3 minutes per side over medium-high heat. Total cooking time for a pound of large shrimp should be around 5-7 minutes. Smaller shrimp will cook even faster, so keep a close eye on them!
- Can I cook frozen shrimp directly in the skillet without thawing?
While technically possible, it’s generally not recommended for the best results. Cooking frozen shrimp directly can lead to a less desirable texture, as the shrimp will release a lot of water and steam rather than sear. It also makes it harder to achieve even cooking. For optimal tenderness and flavor, always thaw and pat dry your shrimp before cooking.
- How do I prevent my shrimp from becoming rubbery?
The most common cause of rubbery shrimp is overcooking. Shrimp cooks very fast, so watch them closely and remove them from the heat as soon as they turn opaque pink and curl into a loose “C” shape. High heat and a quick cook time are your allies here.
- What kind of skillet is best for cooking shrimp?
A large, heavy-bottomed skillet or frying pan is ideal. Cast iron skillets or stainless steel pans work wonderfully because they retain heat well, which is crucial for achieving a good sear. A non-stick pan can also work but may not provide the same level of browning.
- How should I store and reheat cooked shrimp?
Store leftover cooked shrimp in an airtight container in the refrigerator for up to 2-3 days. To reheat, gently warm them in a skillet over low heat for a few minutes, just until warmed through, or microwave briefly. Be very careful not to overcook them during reheating, as they can quickly become tough.
We hope this comprehensive guide inspires you to make skillet shrimp a staple in your kitchen. This technique is definitely one of the top tricks for getting a tasty, healthy, and fast dinner on the table!
Skillet Shrimp in 10 Minutes or Less Recipe
Make tender, perfectly cooked shrimp every single time using this easy skillet shrimp recipe that’s ready in 10 minutes or less!
Prep Time: 4 minutes | Cook Time: 6 minutes | Total Time: 10 minutes
Servings: 4 servings | Author: Marjory Pilley
Ingredients
- 1 Tablespoon butter
- 1 Tablespoon olive oil
- 1 pound shrimp, peeled and deveined, tail on or off
Instructions
- Melt butter in a large skillet or frying pan over medium-high heat.
- Add olive oil to pan and swirl to combine with butter and coat the bottom of the pan.
- Arrange shrimp in the pan in a single layer.
- Cook shrimp over medium-high heat for about 3 minutes and then flip shrimp to the other side.
- Cook for about 3 minutes more or until shrimp are cooked through and pink.
- Quickly toss to coat with sauce and remove from pan to enjoy.
Notes
The nutritional estimate assumes that ALL oil and butter is consumed. No adjustments have been made for amounts that are left in the pan.
Nutrition
Calories: 169kcal | Protein: 23g | Fat: 7g | Saturated Fat: 2g | Cholesterol: 293mg | Sodium: 906mg | Potassium: 90mg | Vitamin A: 90IU | Vitamin C: 4.6mg | Calcium: 164mg | Iron: 2.4mg
Nutritional and Food Safety Disclaimer
Please take a moment to rate this recipe and share your creations on social media using @DinnerMom or #DinnerMom! We absolutely love seeing what delicious meals you’re cooking up with our recipes. Your feedback helps us continue to provide more free and easy meal ideas!
