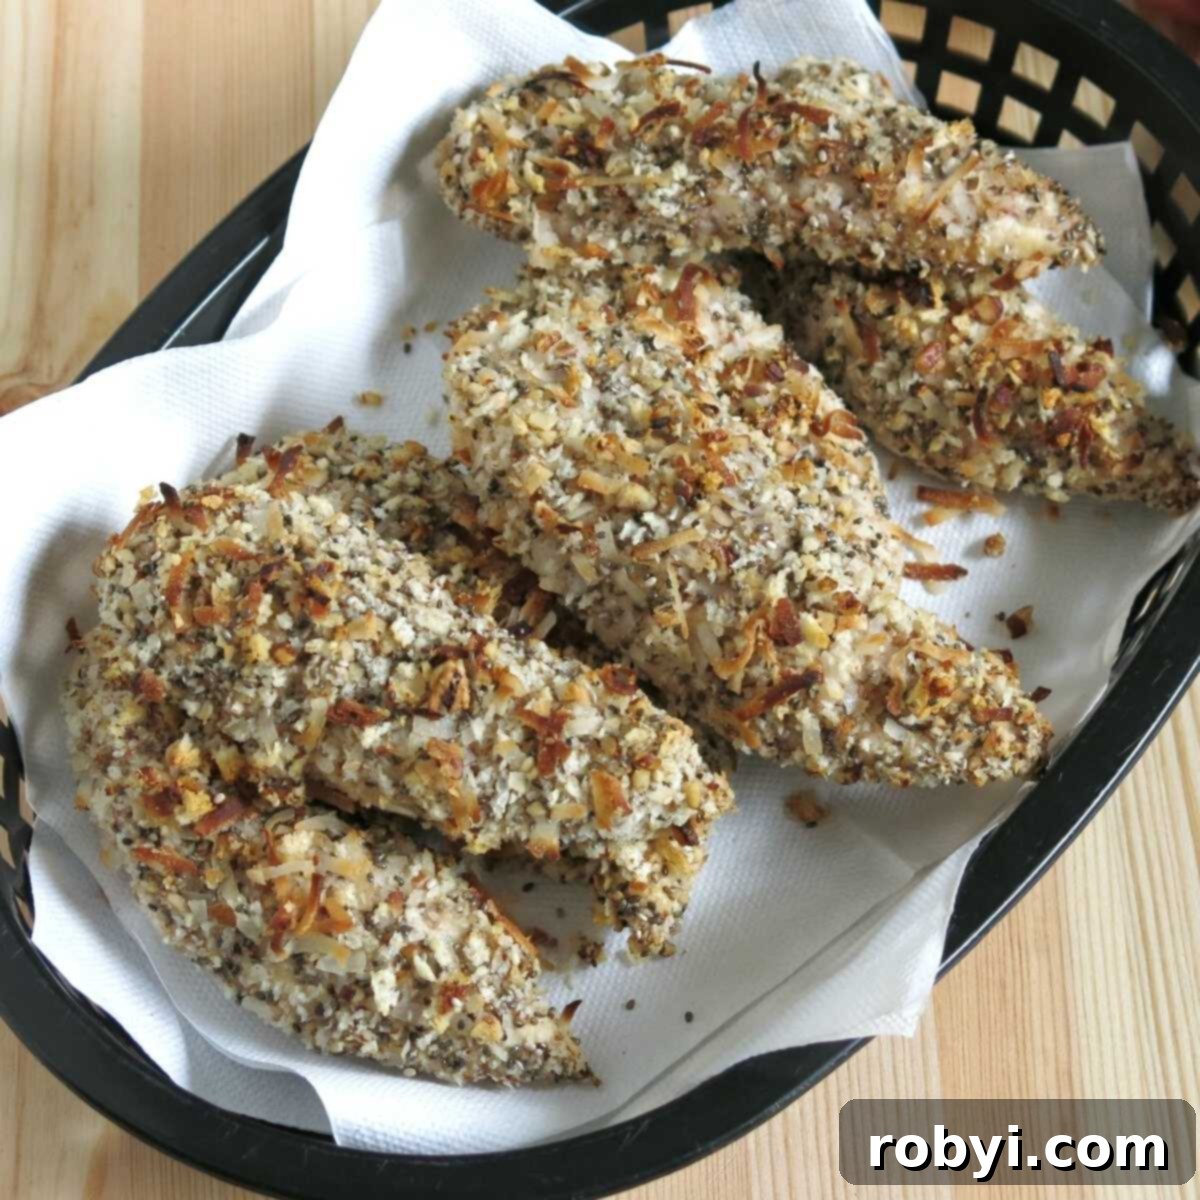
Crispy & Healthy Baked Chicken Tenders: Your Family’s New Favorite Dinner!
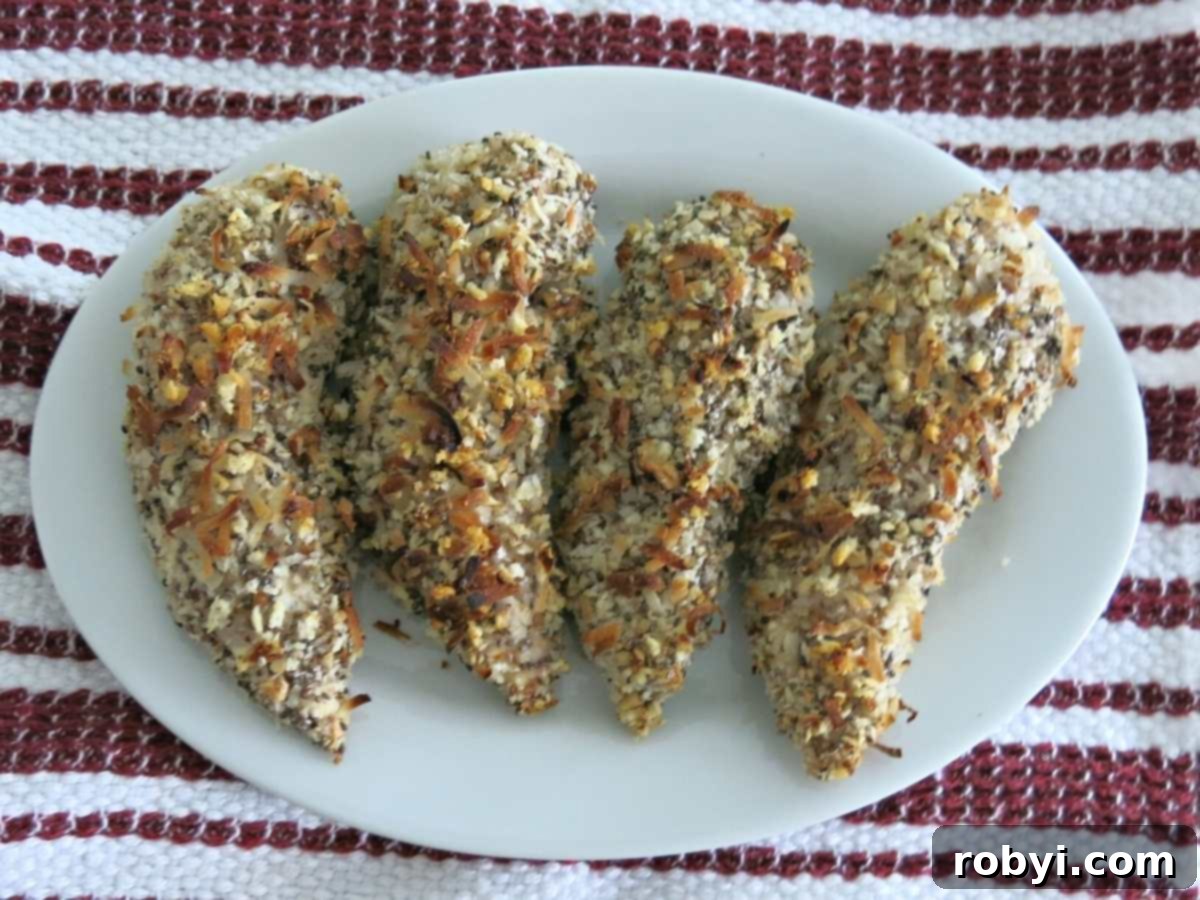
Transform your dinner routine with our Easy Baked Chicken Tenders – a truly delightful and guilt-free meal that promises an extra crispy panko breading infused with nourishing superfoods like heart-healthy nuts and tiny powerhouse chia seeds. While undoubtedly healthy, these tenders are universally adored by both kids and adults for their irresistible, satisfying crunch. Say goodbye to soggy, bland chicken fingers and embrace a homemade version that’s bursting with flavor and texture.
What’s even better? You’ll absolutely love how simple and quick they are to prepare using our clever, fast breading technique. This method ensures that a delicious, wholesome dinner can be on your table in no time, making weeknight meals stress-free and enjoyable for everyone.
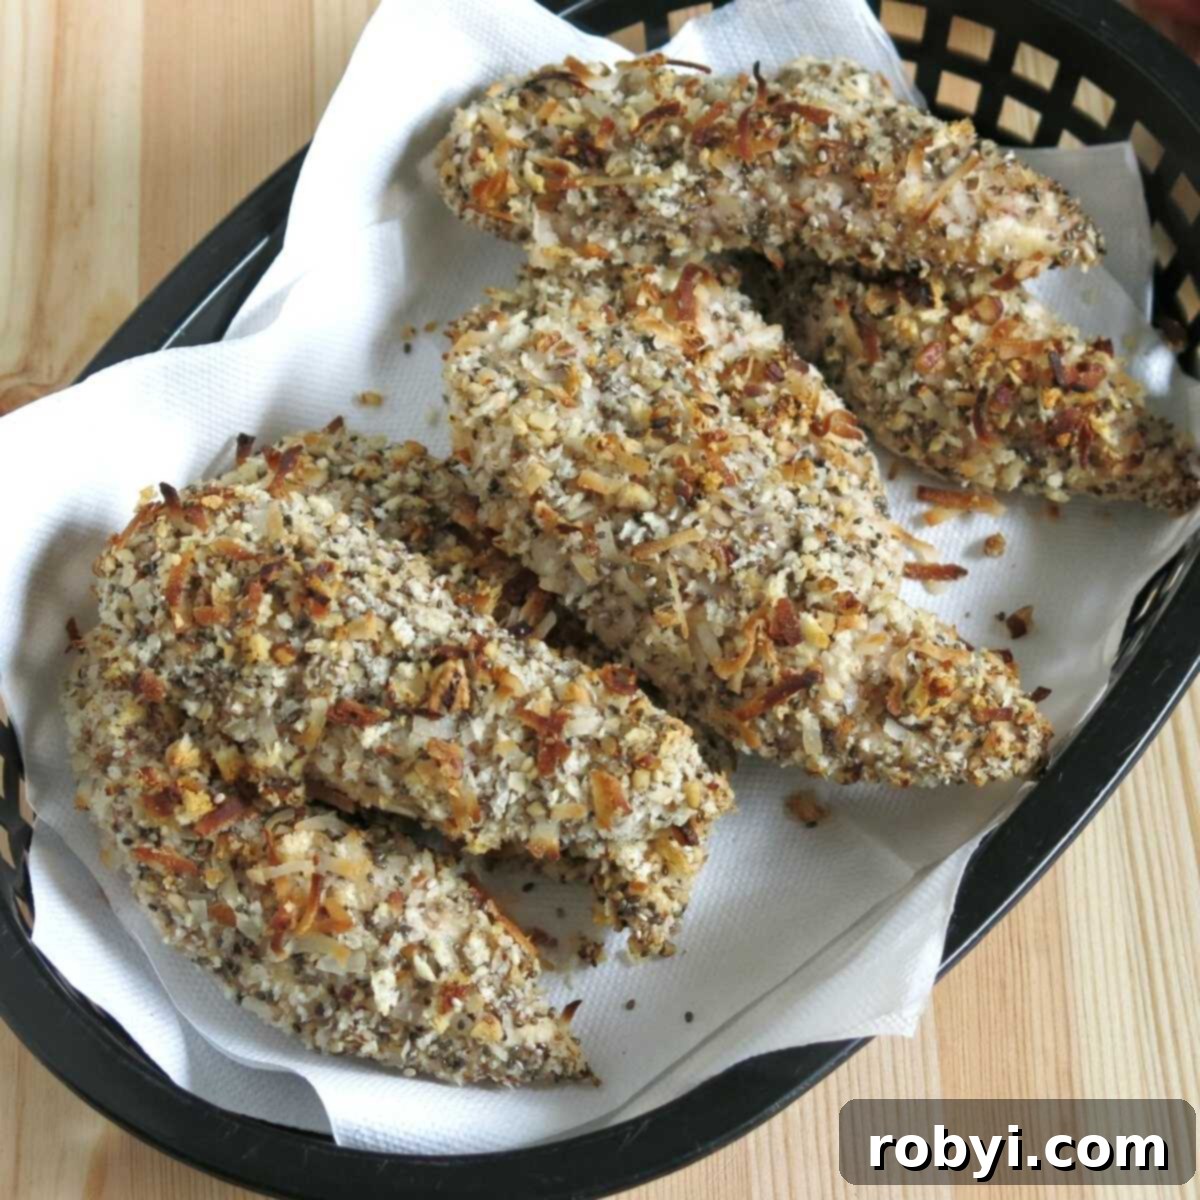
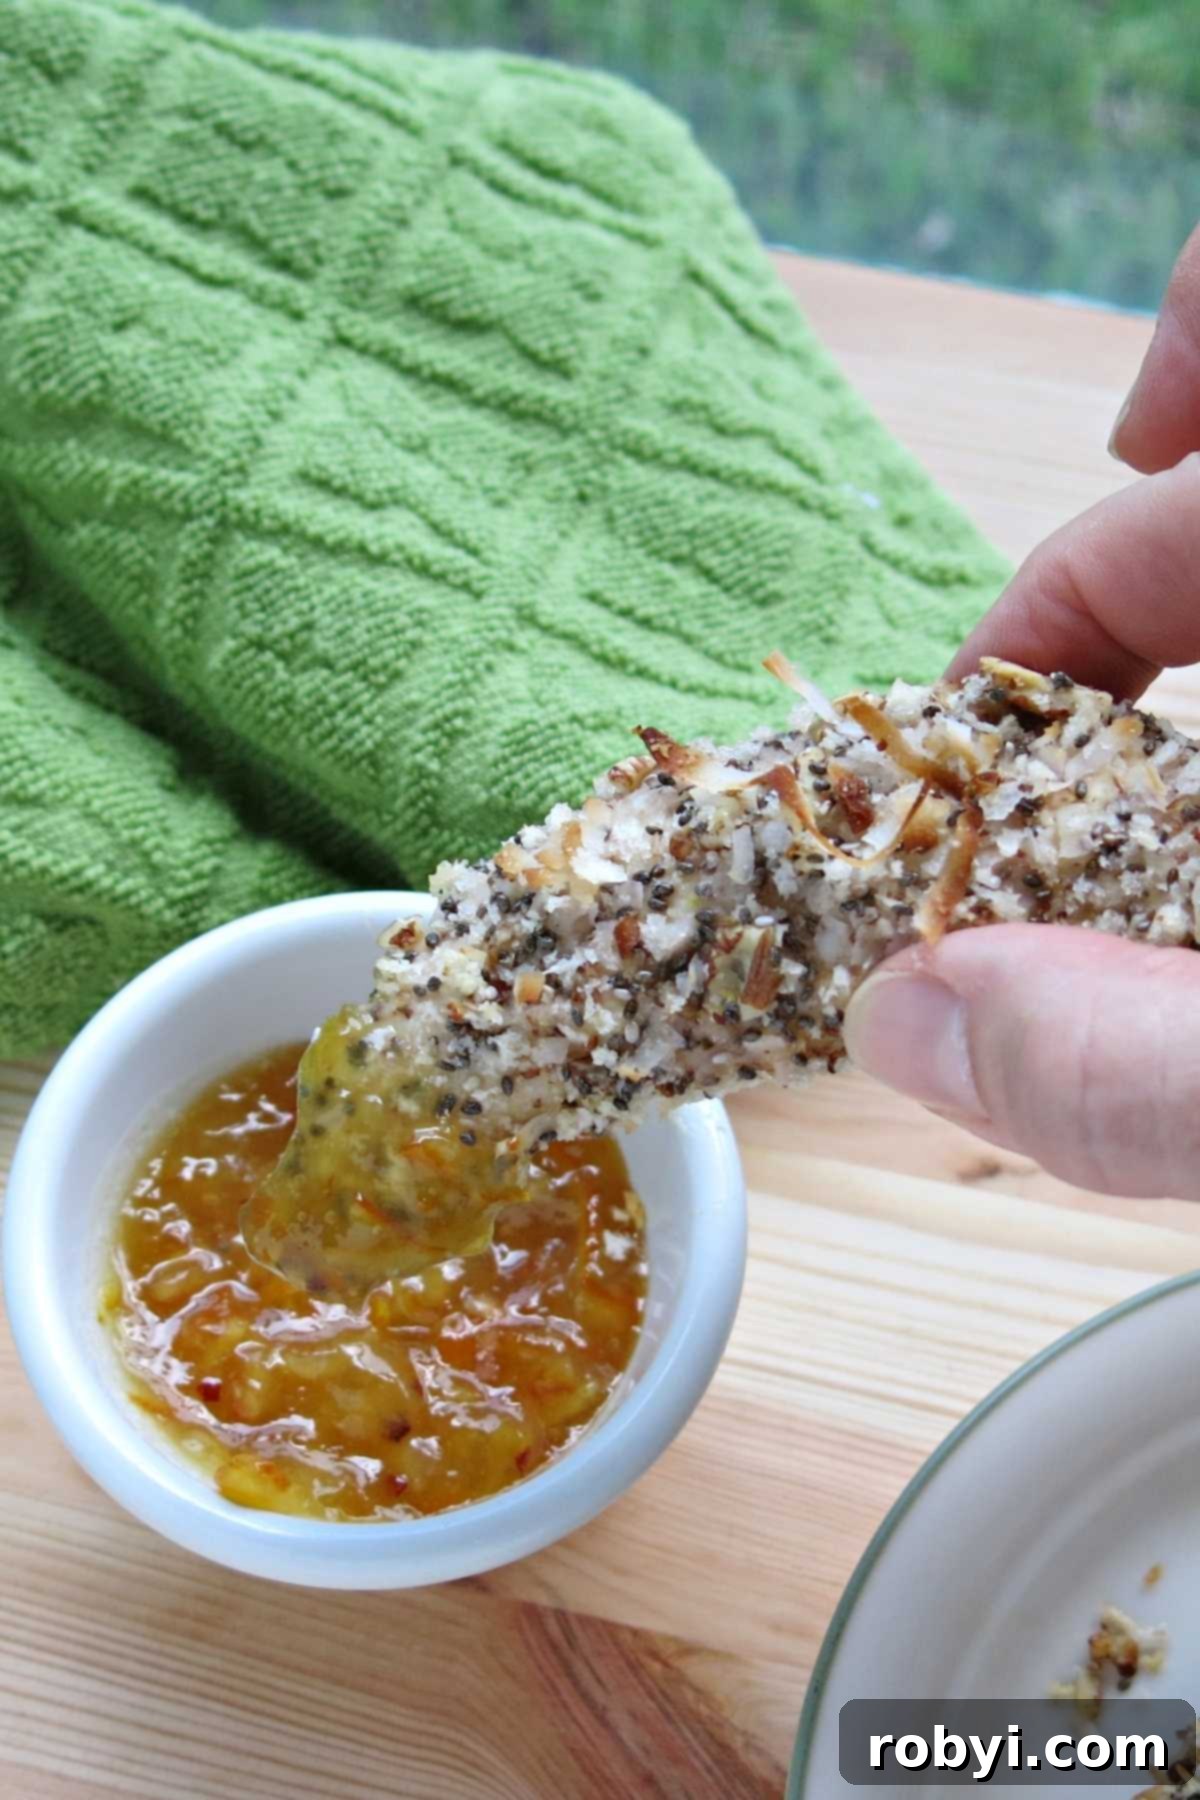
Chicken fingers have always been a staple in our make-ahead meal kitchens, consistently ranking as a top choice for a family-friendly dinner. They offer incredible versatility; parents frequently paired these crispy delights with a fresh, vibrant salad for a satisfying low-carb meal, while children couldn’t get enough of dunking them into a zesty orange dipping sauce. Our Paprika Parmesan Chicken Tenders were another incredibly popular recipe, showcasing the enduring appeal of well-prepared chicken.
Why This Baked Chicken Tenders Recipe Will Become Your Go-To:
- It’s Incredibly Healthy! Not only are these chicken tenders oven-fried – significantly reducing the fat content compared to deep-frying – but their unique coating is packed with good-for-you ingredients. We’re talking about a delicious blend that adds nutritional value without sacrificing taste or texture.
- Easily Customized to Your Liking. We firmly believe this recipe offers the ultimate crispy and flavorful breading. However, we understand that every palate is unique. Feel free to omit any ingredient you’re not fond of, whether it’s a specific nut or the coconut, and simply replace it with an equal amount of additional panko breadcrumbs. This flexibility ensures your family will love every bite.
- Remarkably Easy to Make. Our innovative breading technique is designed for maximum efficiency and minimal mess. You can bread all the chicken tenders at once, significantly reducing handling raw chicken and keeping your kitchen tidier. This streamlined process means less time spent on prep and more time enjoying your meal.
- Versatile Cooking Methods. Whether you prefer the classic bake of an oven or the quick crisp of an air fryer, this recipe adapts beautifully to both. We provide detailed instructions for achieving perfect results with either appliance, giving you flexibility based on your kitchen equipment and preferences.
- Perfect for Low-Carb and Keto Lifestyles! With its wholesome ingredients and oven-baked preparation, this recipe naturally aligns with low-carb and ketogenic dietary needs, making it an excellent choice for those mindful of their carbohydrate intake. Enjoy a satisfying meal without compromising your health goals.
- Assemble and Freeze for Future Meals. This recipe is a superstar for meal prepping! You can easily assemble and freeze the chicken tenders *before* cooking them. This makes it an ideal addition to your repertoire of Healthy Make-Ahead Freezer Meals, ensuring you always have a quick, healthy option ready to go on busy days.
Essential Ingredients for Crispy Baked Chicken Tenders
Crafting these perfectly crispy and healthy chicken tenders starts with a selection of fresh, high-quality ingredients. Here’s a detailed look at what you’ll need and why each component is vital for the best results:
- Chicken Tenders: These are the star of our dish! Chicken tenderloins are naturally lean, tender, and quick-cooking, making them ideal for this recipe. If tenderloins aren’t available, you can easily use boneless, skinless chicken breasts. Simply cut the breasts lengthwise into uniform 1-inch thick strips to mimic the size and cooking time of tenders. Ensuring uniform thickness is key for even cooking.
- Egg: A lightly beaten egg (or two, depending on the quantity of chicken) forms the essential “egg wash” that coats the chicken. This sticky layer is crucial for the breading to adhere properly, creating that delicious, even crust. For a healthy and vegan-friendly alternative, consider a flax egg:
- How to Make a Flax Egg: Combine 1 Tablespoon of ground flaxseed meal with 2-3 Tablespoons of water. Stir well and let the mixture sit for about 5 minutes. It will thicken into a gel-like consistency, perfectly mimicking the binding properties of a traditional egg. This adds fiber and omega-3s!
- Panko Breadcrumbs: This is our secret weapon for an unparalleled crunch! Panko breadcrumbs are Japanese-style breadcrumbs known for their larger, flakier texture compared to standard breadcrumbs. This unique structure allows them to absorb less oil and become exceptionally crispy when baked. We highly recommend using whole wheat panko if you can find it for an added boost of fiber and nutrients. Standard breadcrumbs can be used in a pinch, but be aware that the resulting texture will be much finer and less airy.
- Pecans: Finely chopped pecans contribute a wonderfully buttery flavor and a delicate nutty crunch to the breading. You can chop them with a sharp knife for a rustic texture or pulse them briefly in a food processor for a finer consistency. Other nuts like walnuts or almonds can be excellent substitutes, offering different flavor nuances while maintaining the health benefits and satisfying texture.
- Coconut Shreds: We use unsweetened coconut flakes to add a subtle tropical sweetness and unique texture without unwanted sugars. Unsweetened flakes help keep the recipe healthier and prevent burning during baking. However, if you prefer a touch more sweetness, sweetened flakes can be used – just keep a closer eye on them in the oven as they may brown faster.
- Chia Seeds: These tiny seeds are nutritional powerhouses! Chia seeds add a speckled visual appeal to the breading, along with a significant boost of fiber, protein, and omega-3 fatty acids. They don’t dramatically alter the flavor but contribute to the overall health profile. If you don’t have chia seeds on hand, you can easily omit them without compromising the core recipe.
PRO TIP: The beauty of this recipe lies in its adaptability! You can replace any of the specialty ingredients (pecans, coconut, chia seeds) with an equal amount of additional panko breadcrumbs. This allows you to tailor the breading to your family’s specific tastes or dietary needs, ensuring everyone loves these homemade chicken tenders! For exact quantities and precise measurements, please refer to the detailed recipe card below.
Understanding Chicken Tenders: Cut, Cooking & Care
Before diving into the recipe, let’s clarify what chicken tenders are, both anatomically and culinarily. Chicken tenderloins, often simply called “tenders,” are small, strip-like muscles found on the underside of the chicken breast. They are distinct from the main breast muscle, typically softer and more tender due to their less-used position. In the grocery store, they are often packaged separately, sometimes featuring a tough, white stringy tendon.
From a taste perspective, chicken tenderloins are very similar to boneless chicken breasts, offering a lean, mild-flavored white meat. Their small, consistent size makes them incredibly versatile for various cooking methods, excelling in recipes like fajitas, quick sauté dishes, and, of course, baking or air frying, where their smaller stature allows for rapid and even cooking.
Beyond the anatomical cut, “chicken tenders” also commonly refer to a popular recipe style involving breading and then baking or frying chicken pieces. This preparation is also widely known as chicken strips or chicken fingers. This type of recipe can be made using true chicken tenderloins or by cutting larger chicken breasts into long, narrow pieces, ensuring a consistent size for optimal breading and cooking.
Should You Remove the Tendon from Chicken Tenders?
While there’s no harm in eating the white ligament (tendon) found in chicken tenderloins – it’s completely safe – many find it to be quite chewy and unpleasant in texture. For the best culinary experience and a truly tender bite, we highly recommend removing it. Luckily, it’s a quick and easy process:
To remove the tendon, hold the white tendon firmly with one hand (a paper towel can help with grip). Use a fork to press down on the chicken near the tendon, or gently scrape with a knife. Pull the tendon through, separating it from the meat. It should slide out cleanly with minimal effort, leaving you with perfectly tender chicken.
Our Signature Easy Breading Process: The “Shake & Coat” Method
Get ready to discover a game-changing technique for making perfectly coated baked chicken tenders! This isn’t just any breading method; it’s the efficient, time-saving process we honed and perfected at our make-ahead meal assembly stores, where speed and consistency were paramount. Today, we’ve adapted it for the home kitchen, favoring bowls with tight-fitting lids over plastic bags for an even more eco-friendly and convenient approach.
The biggest benefits of this method? Significantly less time spent in the kitchen, minimal handling of raw chicken, and a lot less mess!
Here’s your step-by-step guide to achieving beautifully coated chicken tenders every time:
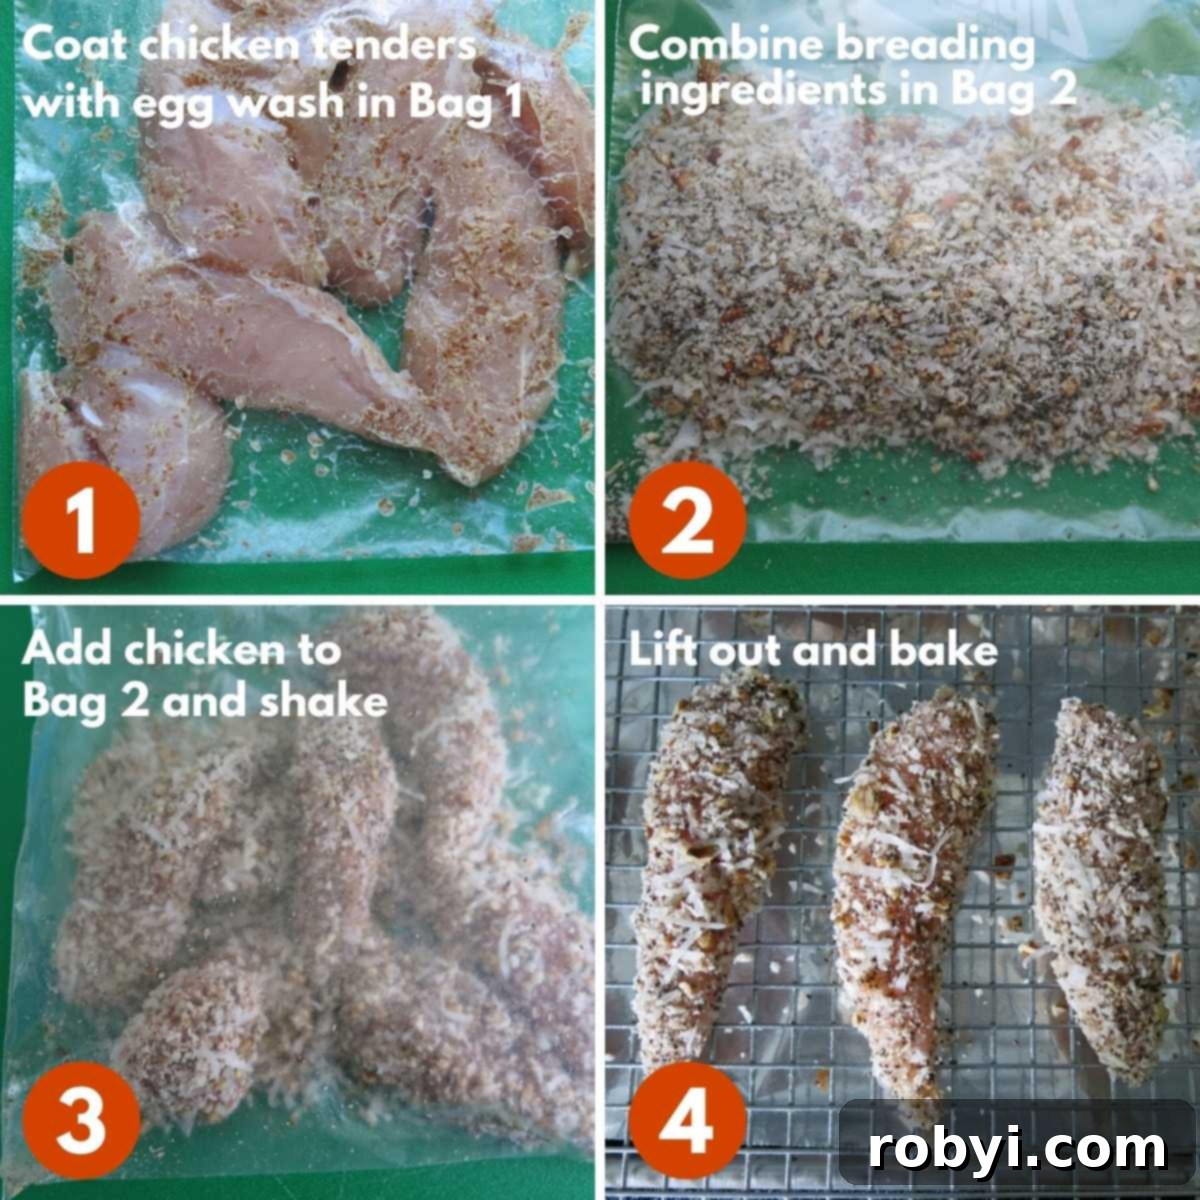
- Prepare the Chicken: Begin by thoroughly patting your chicken tenders dry with paper towels. This crucial step helps the egg wash adhere better. If necessary, take a moment to remove any visible tendons using the method described above. In a medium-sized bowl with a tight-fitting lid (or a large plastic bag), add a slightly beaten egg. Add the dried chicken tenders to the egg, seal the bowl or bag tightly, and gently turn or shake to ensure every piece of chicken is evenly coated with the egg wash.
- Combine Breading Ingredients: In a second separate bowl with a tight-fitting lid (or another large plastic bag), combine all your breading ingredients: panko breadcrumbs, unsweetened coconut shreds, finely chopped pecans, and chia seeds. Secure the lid and give it a good shake to thoroughly mix all the components until they are uniformly distributed. This creates our unique, superfood-infused crispy coating.
- Coat the Chicken: Working in batches if preferred (though you can often do all the chicken at once with this method), lift the chicken tenders from the egg wash, allowing any excess egg to drip off. Transfer these egg-coated tenders directly into the bowl or bag containing the breading mixture. Seal tightly and gently shake the bowl or bag. The goal is to evenly coat each piece of chicken with the crispy breading. You’ll be amazed at how quickly and cleanly this happens!
- Final Placement: Once thoroughly coated, carefully lift the breaded chicken tenders and arrange them in a single layer on your prepared baking sheet (details on sheet pan prep below).
This “shake and coat” process is incredibly effective at covering most of the tenders with a generous layer of breading. However, if you notice any small bare spots, simply press the excess breading from the bottom of the bowl or bag onto those areas with your fingers. It’s that easy!
You know you want to say it: Shake and Bake! This method truly lives up to the name.
Baking Chicken Tenders to Crispy Perfection in the Oven
Achieving perfectly crispy, golden-brown chicken tenders in your oven is simple with these instructions. The key is proper preparation and careful monitoring to ensure they are cooked through and wonderfully crunchy on the outside.
- Preheat Your Oven: Start by preheating your oven to 375°F (190°C). Allowing the oven to reach the correct temperature ensures that the chicken begins cooking immediately upon entering, contributing to a crispier exterior.
- Prepare the Baking Sheet: Line a large baking sheet with aluminum foil for easier cleanup. Then, generously coat the foil with cooking spray or a light brushing of olive oil. For the absolute crispiest results, especially on the bottom, we highly recommend placing a cooling rack (like those used for cookies) on top of the prepared baking sheet and coating the rack with cooking spray as well. This elevates the chicken, allowing air to circulate around all sides, preventing sogginess.
- Arrange the Chicken: Place the breaded chicken tenders in a single layer on the prepared baking sheet (or cooling rack). Ensure there is adequate space between each tender; overcrowding can lead to steaming instead of baking, which will result in less crispy chicken. For an extra golden crust, lightly spritz the tops of the chicken tenders with a little olive oil or cooking spray before baking.
- Bake to Perfection: Bake the chicken tenders in the preheated oven for approximately 20 minutes. Halfway through the cooking time (around the 10-minute mark), use tongs to carefully flip each tender to ensure even browning and crispiness on both sides.
- Check for Doneness: The exact cooking time may vary slightly depending on the thickness of your chicken tenders. Always use a meat thermometer to confirm doneness. Chicken is safely cooked when it reaches an internal temperature of 165°F (74°C). Insert the thermometer into the thickest part of a tender, ensuring it doesn’t touch bone. The breading should be beautifully golden brown and crunchy.
- Serve Immediately: Once cooked, remove the chicken tenders from the oven and serve hot with your favorite dipping sauces.
Top Tips for Unbeatable Crispy Baked Chicken Strips
Achieving that coveted crunch is easier than you think! Follow these expert tips to ensure your homemade chicken tenders come out perfectly crispy every single time, rivaling any restaurant-style chicken finger.
- Employ a Cooling Rack on Your Baking Sheet: This is arguably the most crucial tip for crispy bottoms! If you own a wire cooling rack (the kind used for cookies or cakes), place it directly on top of your lined baking sheet. Coat the cooling rack generously with non-stick spray. By placing the chicken tenders on this elevated rack, air can circulate completely around them, preventing the bottoms from steaming and becoming soggy against the hot pan. It’s a simple trick that makes a world of difference.
- A Light Spritz of Oil is Key: Before placing your breaded chicken into the oven or air fryer, give them a light misting with olive oil or cooking spray. This thin layer of oil is vital for browning and crisping the breading. It helps to activate the “fry” in oven-frying, ensuring a golden, crunchy exterior without excessive fat. Don’t drench them; a light, even coat is all you need.
- Panko Breadcrumbs are Non-Negotiable: While standard breadcrumbs work, panko breadcrumbs are superior for achieving that light, airy, and extra-crispy texture. Their unique flaky structure absorbs less moisture and crisps up more effectively. You can even lightly toast the panko breadcrumbs in a dry pan for a few minutes before mixing them with other breading ingredients to enhance their crunch and deepen their flavor, though we find it’s not strictly necessary for fantastic results with this recipe.
- Don’t Overcrowd the Pan: Whether baking in the oven or air frying, ensure your chicken tenders are arranged in a single layer with ample space between each piece. Overcrowding the pan traps moisture, leading to steamed rather than crispy chicken. If necessary, cook in batches to maintain proper air circulation.
- Cook Immediately After Breading: For the crispiest coating, try to cook the chicken tenders soon after breading them. The longer they sit, the more moisture from the chicken can seep into the breading, potentially making it less crisp. If you are prepping ahead, freeze them raw as described in the make-ahead section, rather than refrigerating them fully breaded for extended periods.
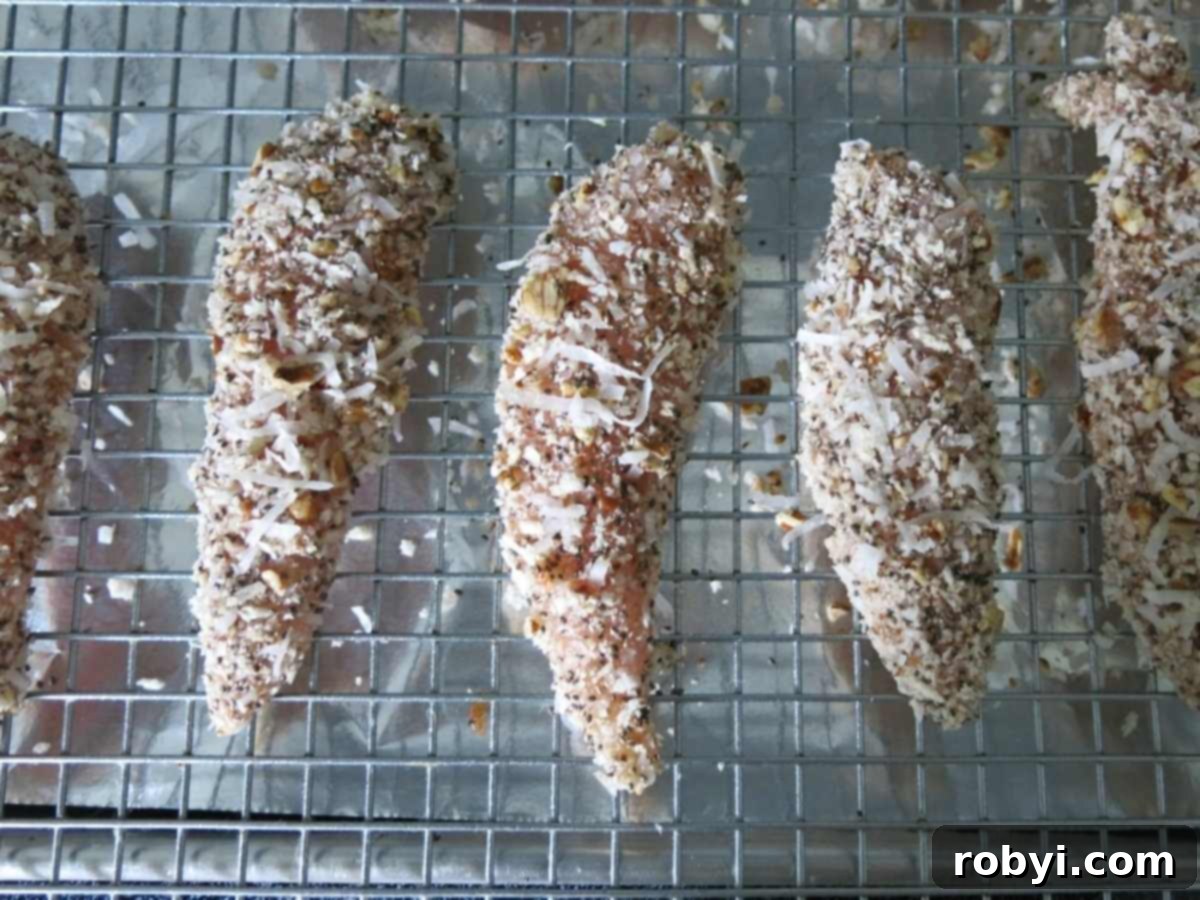
This cooling rack technique truly does keep the bottoms from getting soggy, guaranteeing a crisp bite every time!
Air Frying for Extra-Crispy Chicken Tenders
If you own an air fryer, you’re in for a treat! This appliance is perfect for making these healthy chicken tenders incredibly crispy with minimal oil. We tested this recipe with a Ninja 4 Quart Air Fryer, which comfortably handles about 1 pound of chicken tenderloins per batch. Remember, always refer to your air fryer’s manufacturer’s instructions, especially regarding capacity and specific temperature guidelines, if they differ from our general advice.
- Prepare the Air Fryer Basket: Lightly mist the crisper plate or basket of your air fryer with olive oil or another cooking oil suitable for high heat. It’s important to use a pump spray bottle or a paper towel to apply oil; avoid aerosol cooking sprays as they can contain propellants that may damage the non-stick coating of your air fryer over time.
- Arrange the Chicken: Place the breaded chicken fingers in a single layer within the air fryer basket. Ensure there is enough room for air to circulate freely around all sides of each piece. This circulation is critical for even cooking and achieving maximum crispiness. If you have a smaller air fryer, you will likely need to work in batches to avoid overcrowding, which can lead to soggy results.
- Lightly Oil the Tops: Once the chicken tenders are arranged, give the tops a quick, light mist with olive oil. This helps the breading adhere during cooking and ensures it gets beautifully golden and crispy.
- Air Fry to Golden Perfection: Cook the chicken tenders at 375°F (190°C) for approximately 15-20 minutes. About halfway through the cooking time (around 7-10 minutes), use silicone-tipped tongs to carefully flip the chicken tenders.
- Preheating: Generally, you do not need to preheat an air fryer as it heats up very quickly. However, if you prefer, you can preheat it for 3 minutes with the crisper basket in place before adding the chicken.
- Adjust Cook Time: The exact cooking time will vary based on the thickness of your chicken tenders and the specific model of your air fryer. Thicker tenders will require a few extra minutes.
- Monitor Frequently: Air fryers cook quickly! It’s a good idea to check your chicken frequently, especially towards the end of the cooking time, to prevent overcooking. Simply pause the air fryer and peek inside.
- Ensure Safe Doneness: Chicken is done when it reaches an internal temperature of 165°F (74°C). To check, carefully lift the thickest tender out of the basket and insert a temperature probe into its center. Alternatively, you can cut the thickest piece in half to ensure there is no pink remaining inside. The breading should be golden brown and crisp.
- Serve Hot: Once perfectly cooked and crispy, carefully lift the chicken tenders out of the air fryer and serve them immediately. Enjoy the satisfying crunch!
Storing and Reheating Your Delicious Chicken Tenders
Proper storage and reheating are key to enjoying your homemade chicken tenders even after they’ve cooled. While they are best enjoyed fresh, these guidelines will help maintain their flavor and texture for later.
- Refrigerator Storage: Allow any leftover chicken tenders to cool completely to room temperature (within 2 hours of cooking) before storing. Place them in an airtight storage container and refrigerate for 3-4 days. This prevents bacterial growth and keeps them fresh.
- Reheating for Crispiness: To bring back that glorious crunch, reheating methods matter!
- Oven: Preheat your oven to 375°F (190°C). Place the chicken tenders on a baking sheet (preferably with a wire rack underneath for optimal crispiness). Warm them until heated through, which usually takes about 10-15 minutes, depending on size.
- Air Fryer: This is an excellent option for reheating! Place the tenders in a single layer in the air fryer basket (no oil spray needed this time, unless they seem very dry). Air fry at 350°F (175°C) for 5-8 minutes, flipping halfway, until hot and crispy.
- Microwave: We generally do NOT recommend reheating chicken tenders in the microwave. While it will warm them quickly, the microwave’s moist heat will inevitably make the breading soggy, losing all the delightful crispness you worked so hard to achieve.
- Freezer Storage: Cooked chicken tenders freeze beautifully for longer storage. Once cooled, place leftovers in an airtight freezer-safe storage container or a heavy-duty freezer bag. They can be stored for up to 3 months. For the best quality and texture upon reheating, we recommend defrosting them overnight in the refrigerator before warming them using the oven or air fryer methods.
Effortless Meal Prep: Make-Ahead and Freeze Raw Chicken Tenders
One of the best features of this recipe is its incredible suitability for meal prep. You can prepare a large batch of these chicken tenders in advance and freeze them, making weeknight dinners incredibly convenient. Imagine having a wholesome, homemade meal ready to cook from the freezer whenever you need it!
Here’s how to prepare and freeze your chicken tenders before they’re cooked:
- Prepare as Directed: Follow all the recipe instructions up to the point where you would normally place the breaded chicken tenders on the baking sheet for cooking. Do NOT cook them at this stage.
- Freeze in a Single Layer: Arrange the raw, breaded chicken tenders in a single layer on a parchment-lined baking sheet or a freezer-safe tray. Place the tray in the freezer for 1-2 hours, or until the tenders are solid. This step prevents them from sticking together.
- Transfer to Storage: Once frozen solid, transfer the individual chicken tenders to an airtight freezer-safe storage container or a heavy-duty freezer bag. Remove as much air as possible from the bag to prevent freezer burn. Label the container with the date.
- Storage Duration: For the best quality, store the frozen, uncooked chicken tenders for up to 2 months. They will remain safe to eat beyond this, but quality may decline.
- Cooking from Frozen:
- Defrosting Method (Recommended): The night before you plan to enjoy them, simply move the frozen chicken tenders from the freezer to the refrigerator to defrost overnight. Once thawed, cook them in the oven or air fryer as you normally would. If any breading has fallen off during the freezing or thawing process, gently press it back onto the chicken before cooking.
- Cooking Directly from Frozen: You can also cook these chicken tenders directly from frozen! When cooking from frozen, add approximately 10-15 minutes to the usual cooking time. Always check the internal temperature to ensure they reach a safe 165°F (74°C) and are no longer pink inside before serving.
Having a stash of these ready-to-cook chicken tenders in your freezer is a true game-changer for quick, healthy meals!
Zesty Orange Dipping Sauce for Baked Chicken Tenders
While these crispy chicken tenders are delicious on their own, pairing them with the right dipping sauce can elevate the entire meal. If you’re looking for an extra special, vibrant, and incredibly flavorful dipping sauce to complement the subtle sweetness of the coconut and the richness of the pecans in this recipe, look no further than this bright and zesty orange sauce:
- Orange Marmalade: ½ cup (use a low-sugar variety if you prefer) – Provides the core citrusy, sweet, and slightly bitter notes.
- Seasoned Rice Vinegar: 2 Tablespoons – Adds a tangy depth and balances the sweetness of the marmalade.
- Dijon Mustard: 1 teaspoon – Contributes a sharp, piquant kick and helps to emulsify the sauce.
- Red Pepper Flakes: A pinch (or more, to taste) – Offers a gentle warmth and subtle heat that brightens the entire flavor profile.
Simply whisk all these ingredients together in a small bowl until well combined. The sauce can be made ahead of time and stored in the refrigerator. This sweet and tangy sauce is a fantastic counterpoint to the savory chicken.
Another popular and widely loved option is this fantastic Chick-Fil-A copycat sauce by Chelsea’s Messy Apron, known for its creamy, tangy, and slightly smoky flavor that pairs wonderfully with chicken.
For those who enjoy variety, other excellent dipping sauce choices include classic honey mustard, creamy ranch, bold barbecue sauce, or even a simple squeeze of fresh lemon juice for a bright, clean finish.
Explore More Delicious Chicken Tender Recipes
Chicken tenderloins are incredibly versatile, offering a quick and easy base for a variety of flavorful meals. If you’re wondering what else you can create with these lean and tender cuts, check out some of our other favorite recipes. These dishes highlight the adaptability of chicken tenders, from spicy and sweet to savory and comforting, ensuring there’s something to please every palate:
- Paprika Parmesan Chicken {Baked or Air Fryer}
- Healthy Bang Bang Chicken
Would you like more easy, healthy, carb-conscious recipes delivered straight to your inbox?
📋 Recipe: Crispy & Healthy Baked Chicken Tenders
Easy Baked Chicken Tenders – Crispy & Healthy
Easy Baked Chicken Tenders feature a crispy and healthy panko breading that incorporates nutritious superfoods like nuts and chia seeds. Follow our fast breading technique to prepare them effortlessly for a delicious family meal.
Prep Time: 10 minutes
Cook Time: 20 minutes
Total Time: 30 minutes
Servings: 8 servings
Author: Marjory Pilley
Equipment
- Air Fryer (May be used instead of the oven)
Ingredients
Chicken Tenders
- 2 pounds chicken tenders
- 1 egg lightly beaten or egg-replacer (1 Tablespoon flax seed mixed with 3 Tablespoons water; allow to sit for 5 minutes)
- ⅔ cup coconut flakes unsweetened
- ⅔ cups panko breadcrumbs whole wheat
- ½ cup pecans finely chopped
- 1 Tablespoon chia seeds
Instructions
Preparation for either cooking method
- Pat chicken tenders dry with a paper towel. Place chicken tenders and egg (or egg replacer) in a large plastic bag or bowl, seal and turn to coat.
- Place coconut flakes, finely chopped pecans, panko breadcrumbs, and chia seeds into a second bag or bowl with a lid. Seal and shake to combine ingredients.
- Lift the chicken tenders into the container with the breading ingredients. Seal tightly and shake to coat the tenders with the breading mixture. You can do this in batches or all at once. If there are bare spots, press the excess breading into those areas.
Oven Instructions
- Preheat oven to 375 °F if baking in the oven.
- Place breaded chicken tenders on a cookie cooling rack coated with non-stick cooking spray. Place the cooling rack on top of a baking sheet. The bottoms will not get soggy using this technique. However, they may be cooked on a regular baking sheet instead. Gently turn over halfway through the cooking time.
- Bake for about 20 minutes or until chicken tenders are no longer pink and reach an internal temperature of 165 °F.
Air Fryer Instructions
- Mist the crisper plate or basket with olive oil. Do not use an aerosol spray which may harm the equipment in the long-run.
- Place chicken fingers in a single layer with room for air to circulate on all sides. Work in batches if you have a small-sized air fryer. Mist the top of the chicken fingers with a little olive oil to keep the breading in place.
- Cook chicken tenders for about 15-20 minutes at 375 °F, flipping chicken tenders halfway through with silicone tipped tongs. Cook time will vary based upon the thickness of the chicken. Check chicken frequently to see how it is doing. Just pause and check. Chicken is done when it reaches an internal temperature of 165 °F.
Last Step
Please leave a rating and comment! letting us know how you liked this recipe. It helps our business to thrive so we can continue to provide more free recipes!
Notes
Scroll up for more details and process shots!
Storage, Reheating, and Make Ahead Process
- Refrigerator – Place leftovers in an airtight storage container in the refrigerator for 3-4 days.
- Reheat – Warm chicken fingers in the oven at 375 °F until heated through, about 15 minutes. Alternatively, reheat in an air fryer. We don’t recommend the microwave because the breading will not be soggy.
- Freeze – Leftovers may be frozen in an airtight storage container, such as a freezer bag, for up to 3 months. For best results, defrost overnight in the refrigerator before warming.
- To make ahead and freeze: Prepare chicken tenders, but don’t cook them. Freeze in a single layer in a baking tin. Cover and store for up to 2 months for best results. Move the chicken fingers to the refrigerator the night before you are ready to enjoy them, and then cook them as you usually would. These can be cooked from frozen; add about 10 minutes and check to be sure the chicken is no longer pink before enjoying.
Grab 5 Low-Carb Sauces
and get more easy, healthy recipes! JOIN HERE
Nutrition
Serving: 4g | Calories: 254kcal | Carbohydrates: 7g | Protein: 27g | Fat: 13g | Saturated Fat: 5g | Cholesterol: 93mg | Sodium: 179mg | Potassium: 507mg | Fiber: 2g | Sugar: 1g | Vitamin A: 64IU | Vitamin C: 1mg | Calcium: 34mg | Iron: 1mg
Nutritional and Food Safety Disclaimer
This recipe was originally published on July 2, 2013, and has been comprehensively updated and republished to enhance the reader experience, improve clarity, and incorporate new cooking insights.
